Graco is a renowned brand known for its high-quality airless paint sprayers and top-of-the-line equipment. While they rigorously test their paint sprayers, issues arise. Imagine you’re working on an important painting project and your paint sprayer suddenly stops working. It can be quite frustrating and may delay your project completion.
Now, let’s consider another scenario where your Graco paint sprayer encounters a problem and refuses to spray. Perhaps there are no local shops nearby, and you can’t send it to a paint store immediately. Are you familiar with Graco Airless paint sprayer troubleshooting at that point? If No, don’t worry!
I have developed this detailed guide specifically for Graco paint sprayer users. By providing practical solutions to these common issues, I hope to alleviate frustrations and help users resolve problems. This guide encompasses a wide range of Graco paint sprayer models and is designed to provide valuable assistance to users in need. So, let’s delve into the details.
Table of Contents
- Common Graco Airless Paint Sprayer Problems and Their Troubleshooting
- 1. The Sprayer Doesn’t Prime and Pressurized
- 2. Why is My Graco Spray Gun Spitting?
- 3. Tip Housing Paint Leakage
- Graco Spray Tip Problem (Practical example)
- 4. Paint Sprayer Motor is Stuck
- 5. Airless spray pattern problem
- 6. When Paint is Saggy
- 7. Insufficient Coverage
- 8. The Trigger is Stuck
- 9. Why is my paint sprayer not spraying?
- 10. Leakage From Trigger
- What To Do If These Methods Don’t Work?
- Final Verdict on Graco Airless Paint Sprayer Troubleshooting
- FAQs On Graco Airless Paint Sprayer Troubleshooting
- Why does my airless paint sprayer leaving streaks?
- How do I get a smooth finish with an airless sprayer?
- Why am I getting tails when spraying?
Common Graco Airless Paint Sprayer Problems and Their Troubleshooting
In this section, I will discuss the Graco airless paint sprayer problems and their authentic graco airless paint sprayer troubleshooting. It does not matter either you have Graco Magnum Project Painter Plus, Graco Truecoat 360, Graco Magnum X5, Magnum X7 , Graco ultra models or any other type and model; our troubleshooting paint sprayers methods are universal and applicable to all models. Check out the details below:
1. The Sprayer Doesn’t Prime and Pressurized
This is a common query: Why is my airless sprayer not building pressure? Or How do you fix an airless sprayer that is not priming?
If the sprayer doesn’t prime, the paint sprayer won’t build pressure. It usually happens due to the piston, which doesn’t move up and down regardless of the applied pressure.
Reason and Solution
There are usually three reasons such as obstructed ball check, blocked siphon hose, and a bad graco paint sprayer transducer. The solutions are:
Check out the Ball Check
Your Graco sprayer consists of one or two ball checks depending on the model you have. Make sure that the ball seats or ball check are tightened to help the pump build accurate pressure. Just remove the obstruction, and it will start working.
Inspect The Siphon Hose
It’s basically an intake valve where the paint comes up from the storage. If it is pressurized, it will not function. The clogging inside it is the main problem of the malfunctioning. If it is clogged, unscrew the rock catcher, and clean the hose well with the help of a metal strainer. There should not be any obstruction inside.
Change The Pressure Transducer
If the pump is not pressurized, the simple transducer is not working properly. The transducer tries to run finely but is unable to pump the primer. So, you should replace this item, and it costs a little bit.
2. Why is My Graco Spray Gun Spitting?
Spitting can be a common issue when using sprayers, but there are several measures you can take to minimize it.
When you release the trigger on your airless spray gun (SG2 or SG3), spitting occurs. It is because paint particles are expelled from the gun even after spraying stops. To overcome this issue, it is recommended to develop a habit of releasing the trigger beyond the painting area. This is an alternative to stopping abruptly. These solutions are effective in normal spitting situations. However, if it’s spitting really badly, here are more solutions.
Other Reasons and Solutions:
Insufficient air supply, a malfunctioning pressure regulator, or improper pressure settings can also lead to uneven pressure and spitting. To resolve this problem, it is important to inspect the air compressor for proper pressure output and ensure there are no leaks in the air hoses.
Check the pressure regulator for any defects or malfunctions, and adjust the pressure to the manufacturer’s recommended setting. By addressing these pressure-related issues, you can eliminate spitting problems and achieve a smoother spray pattern.
Over time, paint residue or debris can build up in the nozzle, causing disruptions in the spray pattern and resulting in spitting. To address this issue, it is important to thoroughly clean the nozzle. Remove it from the spray gun, soak it in an appropriate cleaning solution, and use a brush or needle to remove any stubborn residue. Once cleaned, reattach the nozzle and test the spray gun to see if the spitting has stopped.
If the above suggestions didn’t work then try this one. I have been dealing with sprayer issues for a long time so I am sharing what I have learned. I remember couple of months before, I used a green Graco FF LP (Fine Finish Low Pressure) tip with a small hole. The tip seal comes with green FF LP tips that reduce spitting and are ideal for surfaces like furniture, cabinets, doors, etc. It has a smaller hole than other tip seals, preventing paint splattering.
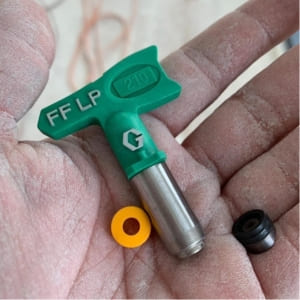
The black tip seal gasket is used with the tip seal, and it should be positioned on the right side of the tip seal. Furthermore, a yellow tip seal gasket is provided for spraying hot solvents. When working with hot solvents, it’s important to use the yellow tip seal gasket in combination with the tip seal.
This will ensure proper functioning and prevent any issues from the heat. By using the green FF LP tips, the tip seal, and the appropriate gaskets as instructed, you can effectively minimize spitting and achieve a smooth, fine finish when using a sprayer.
UPDATE:
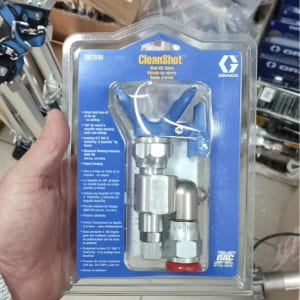
There’s a straightforward solution I tried 2 days ago to reduce spray guns spitting at the tip. I found out that by adding a CleanShot valve to your extension piece, you can easily correct the issue. The valve is equipped with a needle that shuts off fluid flow at the tip. This results in a clean spray pattern without spitting. It’s a simple and effective fix to ensure a smooth and consistent spraying experience.
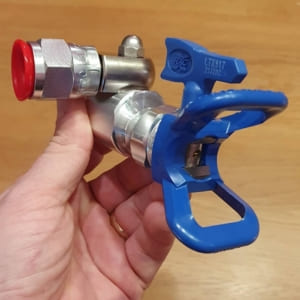
3. Tip Housing Paint Leakage
It’s a common problem reported by many users that the paint leaks from the spray gun tip housing. You should always check the slight paint leakage before starting the painting project. Don’t wait for the paint to drip from the leakage point.
Reason and Solution
Here the problem is with the outer tip that is not isolated or screwed properly. To eliminate this problem, disassemble it and clean the threading part properly. Check the gasket and replace it if it is still not working accurately.
Graco Spray Tip Problem (Practical example)
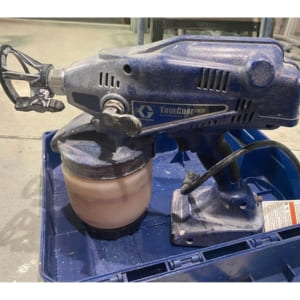
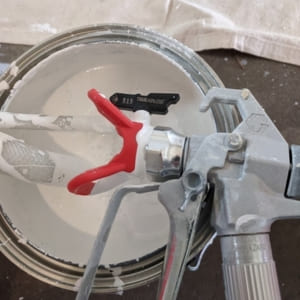
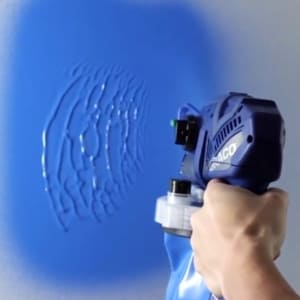
Recently, your friend purchased a Graco 390 sprayer, even though she had never used a sprayer before. As a way to familiarize herself with the equipment, she decided to conduct a test using smooth masonry paint as shown in the picture.
However, she encountered an issue with the sprayer, and she turned to me for help, wondering why the Graco sprayer was behaving in an unexpected manner and what she might be doing wrong.
In this particular case, the Graco Classic 390 sprayer comes with a 517 LP tip, which is specifically designed for spraying masonry paint. However, it’s important to pay attention to the pressure setting when using this tip.
The LP tips are intended to operate at 50% less pressure compared to other tips. To address the issue, it is suggested to start with a pressure of around 75 bar and gradually increase it until you achieve a uniform spray pattern.
The problem my friend experienced, where paint accumulated on the nozzle holder, is likely due to using excessively high pressure.
4. Paint Sprayer Motor is Stuck
When you start the work, plugin your Graco paint sprayer, trigger the button and find the motor stopped. You can also say that the graco paint sprayer not turning ON. Check out the following causes and solutions in this regard:
Reason and Solution
Faulty Electric Board
You should test the outlet from a tester whether it’s supplying electrical power or not. There might be an issue with the circuit breaker or the fuse. Replace them if needed, or you can use another power outlet.
Too Low Pressure
Always read the Graco airless paint sprayer instructions given by the manufacturer and set a suitable pressure according to the instructions. Don’t set it too low. Turn the knob to adjust the pressure.
Seized Pump
Sometimes, the pump or motor is seized due to dirt, residual derived paint, and many such reasons. Unplug the sprayer, clean such components, and enjoy painting again.
Damaged Pump
A pump or motor that is damaged even a little will not work. You can disassemble it and find the problem. If needed, try to replace it with a new motor.
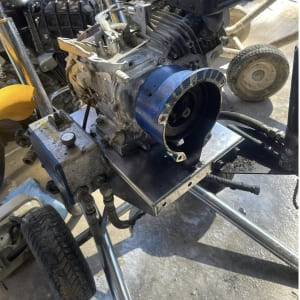
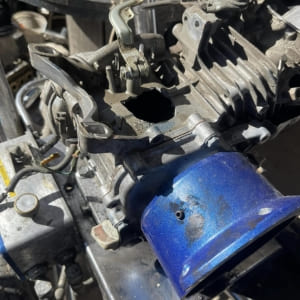
UPDATE: Last month, I experienced a situation where the Graco GM3500 motor exploded due to the clutch and field becoming stuck together. The solution was to replace the motor and install a different clutch.
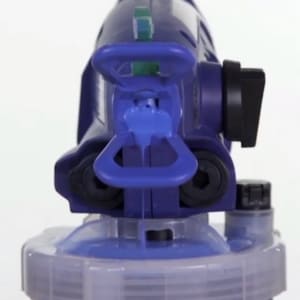
5. Airless spray pattern problem
Whether you buy airless spray guns online or from the physical market, each sprayer offers different patterns. When the sprayer is loaded with primer, it gives you the selected pattern while painting. If the pattern is disturbed, keep in mind that it’s an issue with the pattern, and you can’t get a flawless finish.
Reason and Solution
Slightly Blocked Spray Tip
Dirt particles and debris prevent the sprayer from working smoothly. Some latest models come with unclog function on a reversible airless paint sprayer. Use this feature or unblock it manually using thin wire or more.
Thick Particles in Paint
When you mix something in paint, sometimes thin balls or particles are made that stick to the tip. Such particles clogged up the sprayer tip due to foreign particles. Therefore, check your paint while putting them into the storage tank.
Clogged Filter
The filter is an important component of an airless paint sprayer; and check the filter always and clean it well before starting your painting project.
Worn Spray Tip
Check the spray tip and replace it with the same if worn up.
Missing Gasket Seal
Check the seal whether it’s missing or not. Replace it if it’s missing.
Power Extension
Sometimes, the power outlet is not nearer to the painting wall or ceiling, and you have to use power cords or extensions. The length of the wire is indirect to the power supplied due to different losses. Your used extension should be high-quality, and always try to use short cords. Otherwise, the sprayer will receive low power, and the issue will arise.
6. When Paint is Saggy
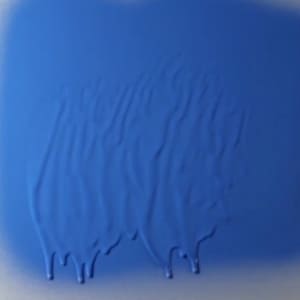
When you are done with the painting job and notice that the paint is sagging, running slowly, or airless spray patter problems, it’s an alarming situation. This means that you will not get a clear paint finish.
Reason and Solution
It usually happens when the applied medium is too thick. I always recommend the manufacturer’s instructions and set the spray speed according to that. Your applied coating should be thinner to get a clear finish.
Adjust Speed
Paint spraying pressure or speed adjustment is the best solution for it. Make sure the speed is enough to get a thin paint coating. Instead of this, you can also use a smaller spray paint tip with an adjustable fan pattern. Keep the fan pattern wide to get a smooth finish. If you are not experienced enough, read the instructions and keep the gun at a suitable distance while painting.
7. Insufficient Coverage

When you select your required pattern and don’t get what you want, there is an issue with the coverage. Your paint sprayer is not hitting the desired coverage or offering inadequate coverage. You will feel thin gaps and unclear finish or paint patterns.
Reason and Solution
There are common reasons that are related to the painter’s experience. In short, the settings are wrong.
Paint Slowly
It usually happens when you are going too fast. You should notice the pattern and quantity to adjust your painting speed.
Small paint Tip
When the hole is smaller, the paint finish gets disturbed. Therefore, always choose a wider spray tip.
Too Wide Fan Pattern
Check the instructions and narrow the fan pattern to get an accurate paint finish.
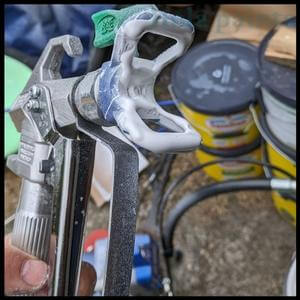
8. The Trigger is Stuck
When everything is fine, but the trigger is not working, here the problem is with the locking operation. Disengage the lock, rotate the locking knob, and all is done.
9. Why is my paint sprayer not spraying?
There might be numerous reasons when you pull the trigger, the machine makes a sound, but nothing comes out. It’s normal, and there is an issue with the atomizer of the sprayer. First, try to use the Graco sprayer reset button.
Reason and Solution
The primary reasons are: the paint cup is not properly attached, or the knob position is wrong. The wrong tip position also creates this problem. You can resolve them as follows:
Re-attach the Paint Cup
Check out that the cup is properly attached. Detach it and clean the attachment properly. Again, attach it properly, check the threading, and tighten it well. Reading instructions is a better way to place it in the right position.
Spray Knob or Tip
Inspect both the spray knob and tip of the airless paint sprayer. Clean the debris stuck here and replace them if necessary.
10. Leakage From Trigger
When graco paint sprayer leaking from bottom, it’s not a good sign. Whether the leakage is minute or high, the spray pump is not working well. Here the best remedy is to replace the pump.
What To Do If These Methods Don’t Work?
Hopefully, our described methods will help you resume your painting project. However, there might be a time when none of the methods work. What to do in such a situation? The best and most effective way in that condition is to contact Support or read Graco airless paint sprayer manual to find the solution accordingly.
Graco sprayer company provides technical and non-technical support whether you use a magnum sprayer or a true coat sprayer.
Final Verdict on Graco Airless Paint Sprayer Troubleshooting
In conclusion, there are several unexpected paint sprayer problems that can occur in Graco airless paint sprayer. I have described and given the solution of those that are most common in Graco sprayers. I believe you will find this guide about Graco airless paint sprayer troubleshooting helpful in all types of painting projects.
FAQs On Graco Airless Paint Sprayer Troubleshooting
Why does my airless paint sprayer leaving streaks?
Some paint sprayers leave streaks while painting and disturb the overall paint finish. It usually happens for two reasons, i.e., when pressure is too low, or the nozzle is worn. Set the pressure, and changing the nozzle can resolve this issue.
How do I get a smooth finish with an airless sprayer?
Nowadays, airless paint sprayers are mostly used due to several advantages. If you do the proper settings of pressure, orifice size, and fan width, you can get a smooth paint finish. It’s also important to spray from a sufficient distance.
Why am I getting tails when spraying?
When the pressure is not set properly, the paint creates bad tails. Set the atomizer pressure and clean the tip properly to remove any stuck material and get rid of this problem as the atomizer is responsible for the overall paint pattern.

Jennifer Marie
Jennifer Marie is a general contractor with over the years of experience in home remodeling, DIY projects, and commercial painting projects. Her experience includes working with paint sprayers, painting tools, and other painting supplies. You can follow her on Facebook.