Milk paint is a popular choice of painters due to its environment-friendly components and vintage look and is traditionally applied with a brush. However, many beginner DIYers wonder can you spray milk paint.
Spraying milk paint has become a modern twist to achieve a smoother, streak-free finish. However, it does need some prep work to get a good result. A good quality sprayer that can handle the thickness of milk paint is very important, while a properly-mixed milk paint will flow smoothly through the sprayer, providing a nice and even coat.
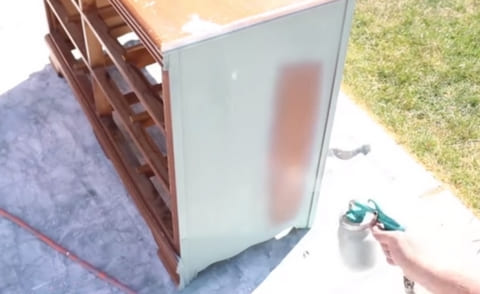
Table of Contents
- How to Paint with Milk Paint?
- Step 1: Picking the Right Sprayer
- Step 2: Mixing the Best Spray Milk Paint
- Step 3: Sanding Down the Surface
- Step 4: Spraying the Milk Paint
- Step 5: Making a Faux Stain
- Step 6: Distressing and Sealing
- Final Look After Spraying Milk Paint
- Milk Paint Vs Chalk Paint Vs Latex
- Wrapping Up
- FAQs On Can You Spray Milk Paint
- Q. Should milk paint be thinned?
- Q. Does milk paint crack?
- Q. Does milk paint require primer?
- Q. How long do milk paint last?
- Q. What’s the recommended number of milk paint coats?
- Q. Is milk paint washable?
- Q. Is milk paint prone to scratching?
- Rosalie Sanchez
How to Paint with Milk Paint?
I’ve always liked milk paint for its earth-friendly ingredients and the antique feel it gives. If you’re also a fan of spraying finishes, the good news is you can indeed spray milk paint to get a smooth finish provided that it is done correctly.
Usually, I’d just use a brush to paint, but then I learned about spraying milk paint. It sounded like a great approach to achieve a smoother finish without any streaks. So, I ended up giving it a chance. Here’s how I did it in my lawn, step by step:
Step 1: Picking the Right Sprayer

The first thing I learned was that a regular paint sprayer won’t work with milk paint, it gets clogged up. So, I went online and bought a Critter sprayer from Amazon, which turned out to be a great choice. It’s easy to clean, that is definitely a plus point while working with milk paint.
The idea of hooking up Mason jars filled with paint directly to the sprayer was a winner for me; it was practical and hassle-free. Setting it up was a no-brainer with the clear instructions provided. And when it came to using it, the sprayer did the job smoothly, spreading the paint evenly.
Step 2: Mixing the Best Spray Milk Paint
I mixed the General Finishes water based milk paint in a 50-50 ratio with water. If it’s hot where you are, you might want to add a bit more water so the paint doesn’t dry too quickly. The Critter sprayer worked well with this mixture, and it was easy to spray the paint evenly.
Step 3: Sanding Down the Surface
Before painting, I had to sand down the surface. I grabbed my orbital sander and started with 80 grit sandpaper to peel off the old paint finish. There were quite a few gouges and dings but once I got most of the finish off, I switched to 220 grit to smooth everything out.
Step 4: Spraying the Milk Paint
As I chose the General Finishes Water Based Milk Paint in snow white, it came with the perk of being self-sealing, eliminating the need for a topcoat (wax or polyurethane). This feature was a time-saver, though I had plans to use oil wax later on to deepen the color.
The high adhesion rating of this paint made it a reliable choice for my outdoor furniture project. Mixing it up was a breeze, and despite the hot weather, a little extra water kept it at the right consistency.
With the Critter sprayer loaded up, I sprayed the milk paint onto the surface. I didn’t worry too much about getting it perfect because milk paint dries flat and matte, so you won’t see any odd streaks. It covered really well and gave a great look.
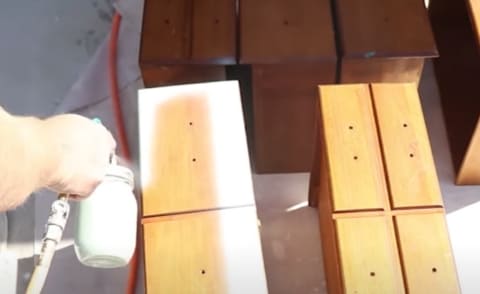
Step 5: Making a Faux Stain
For a fun twist, I made a faux stain by mixing Old Fashioned milk paint in chocolate brown with water in a ten-to-one ratio.
The color was rich and the consistency was just right for brushing on and wiping back. As I applied it, the charm of colonial or shaker furniture that it hinted at really came through.
It brought an aged, rustic feel to the wood, exactly the barn wood look I needed, and the best part? Knowing the color wouldn’t fade over time made me love it even more.
Step 6: Distressing and Sealing
After the paint dried, I distressed the surface a bit to remove any loose paint. Then, I used Rust-Oleum based ultimate polyurethane over milk paint to deepen the color and seal the paint.
The oil wax darkened the color a bit more, and after wiping it back with lint-free rags, it sealed the paint nicely. Once it cured, it hardened like a resin and looked awesome.
Final Look After Spraying Milk Paint
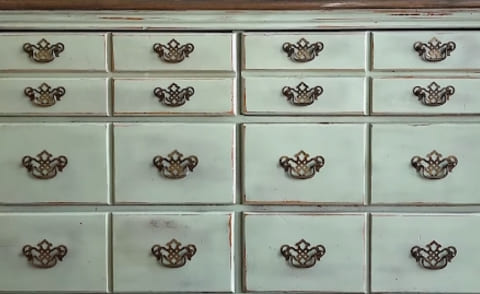
The final look of the dresser after spraying the milk paint was nothing short of stunning. The smooth finish and the adorable, classic charm it revealed was a delightful makeover, making every stroke of effort in the project entirely satisfying.
Milk Paint Vs Chalk Paint Vs Latex
| Feature | Milk Paint | Chalk Paint | Latex Paint |
| Base | Powder blended with individual dry pigments | Complete and fixed mixed | Liquid |
| Preparation | Must be mixed with water | Water not needed, but can be added to thin | Ready to use |
| Smell | Slight, like cut grass | No smell | Mild to none |
| Key Ingredient | Milk proteins | All inorganic materials; milk-free protein | Various, often acrylic or vinyl |
| Storage | Cannot be stored (materials degrade) | Can be stored securely for a long time | Can be securely stored for an extended period of time |
| Finish Look | Chippy distressed look | Smoother appearance | Varies (smooth to satin or gloss) |
| Weight | Lightweight | Heavier | Varies |
| Absorption | Soaks into wood like a stain | Sits more on top of the wood | Sits more on top of the wood |
| Coverage of Textured Surfaces | Less coverage on textured surfaces | Better coverage on textured surfaces | Good coverage |
| Ideal For | Rustic or aged look | Covering textured surfaces | General-purpose painting |
TIP: When done right, milk paint gives a factory-like finish. But it may raise wood grain, so a light sanding after drying is needed. Applying hemp oil before sanding prevents dust.

Wrapping Up
Spraying milk paint was a fun and worthwhile experience for me. With the right sprayer and a bit of prep, it was easy to get a nice, smooth finish. And playing around with faux stains and finishes let me create a look I really love. So, if you’re planning about trying it, I’d say go for it!
Can you spray milk paint is definitely not a big concern if you learn the right spray painting techniques.
FAQs On Can You Spray Milk Paint
Q. Should milk paint be thinned?
Milk paint can be thinned if needed. It’s recommended to use water, adding about 10% by volume to achieve the desired consistency. For a quart of milk paint, this would be about 3 fluid ounces of water.
Q. Does milk paint crack?
Milk paint can crack if not handled correctly during application. It’s better to apply the second coat of milk paint when the first coat is dry but not completely dried out. If the first coat is left to dry for too long before the second coat is applied, it will start to crackle, making it difficult to apply the second coat smoothly. As the paint continues to dry, these cracks will become more visible.
Q. Does milk paint require primer?
No, a primer isn’t necessary when using General Finishes Milk Paints as they are self-sealing, eliminating the need for a primer.
Q. How long do milk paint last?
When applied fresh, milk paint forms the strongest bond. However, if stored in a sealed container, it remains usable for two weeks to a month. In its dry powder state, milk paint boasts a long shelf life of over 3 years.
Q. What’s the recommended number of milk paint coats?
The number of coats required can vary based on the color choice. Lighter colors like white typically need 2 to 3 coats for solid coverage. On the other hand, darker shades may sometimes only require a single coat for a satisfactory finish.
Q. Is milk paint washable?
While milk paint is more water-resistant compared to some other paints, for surfaces that will see a lot of wear and tear, applying a clear sealer over the paint is advisable. Once cured, milk paint can be washed without issue.
Q. Is milk paint prone to scratching?
Milk paint tends to be more resistant to chipping and scratches when compared to chalk paint, which makes it a solid choice for painting areas with high traffic or furniture.

Rosalie Sanchez
DIY enthusiast with years of experience in home decor and home improvement. With a passion for educating consumers about DIY projects. Every time, I work with our painting professionals to provide you with the best painting product reviews and how-to advice. You can follow me on Facebook.