As a longtime user of Fuji spray products, I can say without hesitation that their customer service team receives a significant number of calls every day from customers seeking help maintaining their HVLP spray guns.
Fortunately, step-by-step instructions for cleaning Fuji spray guns can resolve most of these issues.
As far as I am aware, about 89 to 92% of problems customers face are the result of missed steps in maintenance procedures, which are often overlooked and not known. Our article will provide valuable insight into the best ways to maintain HVLP spray guns.
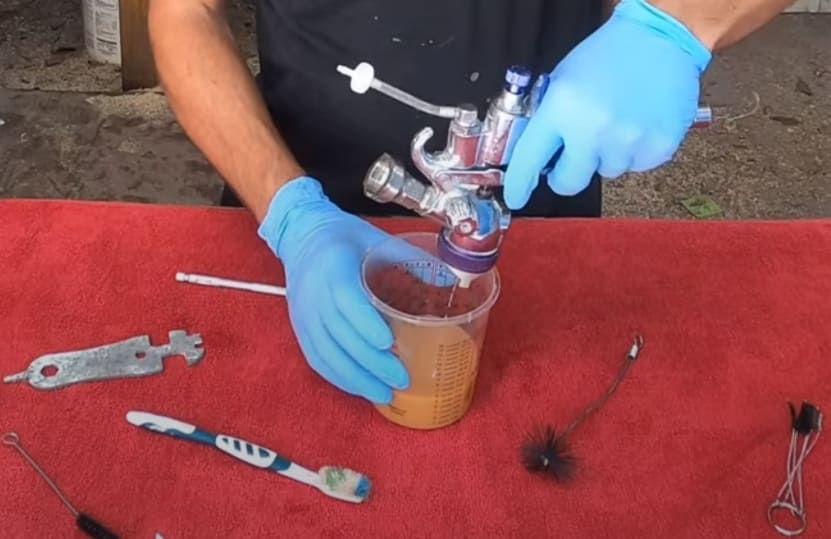
Table of Contents
- How do you clean a Fuji spray gun?
- Tools required:
- Step 1: Preparation
- Step 2: Disassemble Your Spray Gun
- Step 3: Cleaning the Fluid Cup
- Step 4: Clean the Fluid Tip
- Step 5: Clean the Air Cap
- Step 6: Clean the Needle
- Step 7: Clean the Spray Gun Body
- Step 8: Reassemble Your Spray Gun
- How to Clean Fuji 3M PPS system
- Tips for proper cleaning:
- Conclusion:
- FAQS On cleaning fuji spray gun
- Q: Can I use a cleaning solution other than the manufacturer’s?
- Q: How often should I clean my spray gun?
- Q: Can I reuse cleaning solutions?
- Q: Can I soak my spray gun in a cleaning solution?
- Q: How do you clean a Fuji spray tan machine?
- Q: How to use Fuji spray gun?
How do you clean a Fuji spray gun?
Here are the steps to clean your Fuji Spray Gun:
Tools required:
The tools required for cleaning a Fuji HVLP sprayer are:
- Cleaning solution
- Cleaning brush
- Small wrench or pliers
- Soft cloth
- Protective gloves
- Eye protection
- Respirator or mask for breathing protection
Step 1: Preparation
It’s important to set up your workspace before cleaning. A clean workspace with adequate lighting is essential. You will need to use a cleaning brush, cleaning solution, and a clean rag. It’s an excellent idea to wear protective gear to protect yourself against potential harm caused by cleaning solution and debris.
Step 2: Disassemble Your Spray Gun
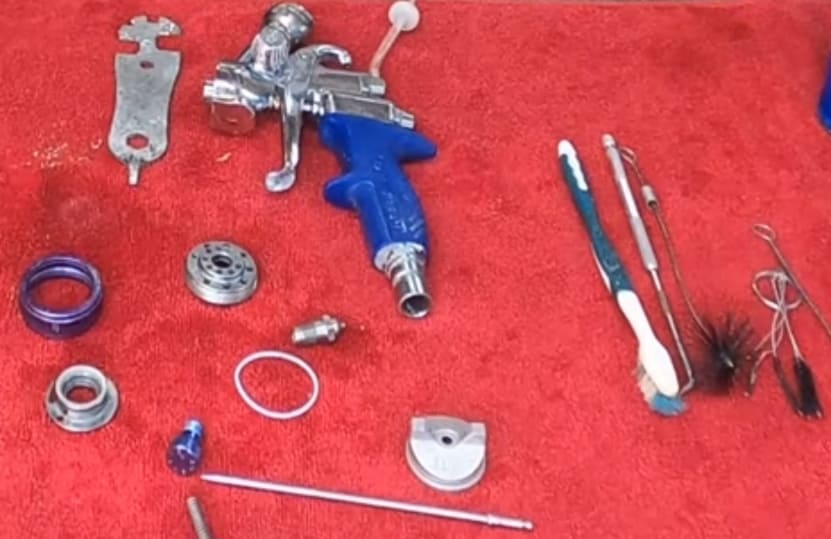
Cleaning your Fuji Spray Gun starts with disassembling it and remove all the parts. (Here, I used the Fuji 3M PPS system, but you can use any other model like the Fuji Q4 gold sprayer, Fuji Q5 platinum or Fuji Semi Pro 2 system.) By doing this, you can ensure thorough cleaning of every component. Take the fluid cup out of the spray gun body. Next, remove the other parts, including the fluid tip, air cap, and needle. You can remove the fluid needle by loosening the packing nut and gently pulling it out. By twisting them counterclockwise, you can remove the air cap and fluid tip.
Step 3: Cleaning the Fluid Cup
Fluid cups are used to store paint or other fluids. To clean a fluid cup, it’s important to first clear away any remaining paint or fluid and then rinse it out using a cleaning solution. For thorough cleaning, take a cleaning brush and vigorously scrub the inside of the cup.
After washing the cup with clean water, dry it with a clean rag.
Step 4: Clean the Fluid Tip
During spray painting, it is the fluid tip that delivers paint to the spray gun’s nozzle. If any residue or debris remains, use a small brush and cleaning solution to remove them. Keep the tip in good condition by avoiding sharp tools or wire brushes that might damage it.
Step 5: Clean the Air Cap
Another important component of your spray gun is the air cap, which directs and shapes the spray pattern. You can clean it by soaking it in a cleaning solution for 30 minutes, then brushing it gently with a soft brush. Rinse it thoroughly with water and let it dry before reassembling it.
Step 6: Clean the Needle
The needle controls the flow of paint inside the fluid tip. If there are any residues or debris on it, clean it with a soft brush and a cleaning solution. Keep the needle as gentle as possible and do not bend or damage it.
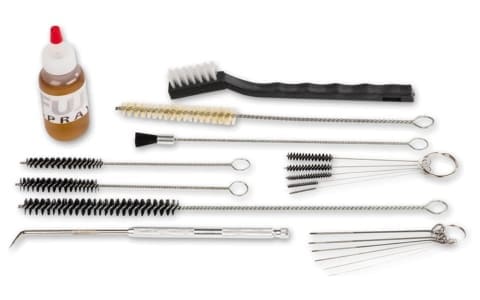
Fuji offers a fantastic cleaning kit for keeping your paint spray guns in top shape, especially if you use them a lot. It’s a 19-piece set that has everything you need, like a long brush for hard-to-reach places, various types of brushes, and lubricant to keep things running smoothly.
This kit works well for different spray guns, not just Fuji. It’s like a complete spa day for your spray gun, ensuring it stays clean and functions perfectly. So, if you’re into daily finishing work, this kit is a must-have to make your life easier.
Step 7: Clean the Spray Gun Body
Cleaning the spray gun body with a cleaning solution and a soft towel is recommended. If there is dirt or debris, wipe it off and let it dry.
Step 8: Reassemble Your Spray Gun
After cleaning and drying each component, reassemble the spray gun. Attach the fluid tip, air cap, and fluid needle again. Be careful not to overtighten the components as this could damage them. Lastly, secure the spray gun handle to the main body. Finally, reattach the paint cup to the spray gun bottom and tighten it securely. After everything is securely attached, test the spray gun to ensure it works. or You can test the spray gun after everything has been securely attached.
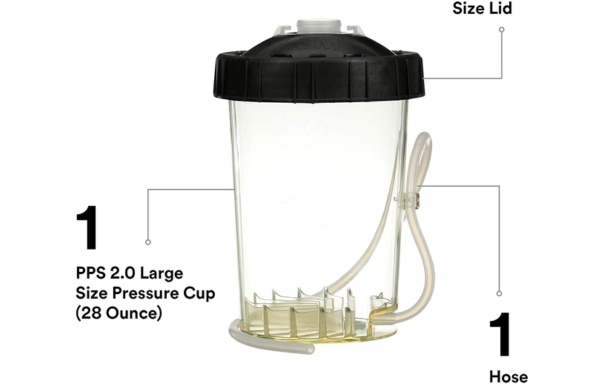
How to Clean Fuji 3M PPS system
A few months ago, I used the Fuji 3m PPS 2.0 system for my woodworking project. After completing it, I realized the importance of sharing the cleaning steps involved in maintaining the system. Therefore, I would like to demonstrate the simple process of cleaning these tools.
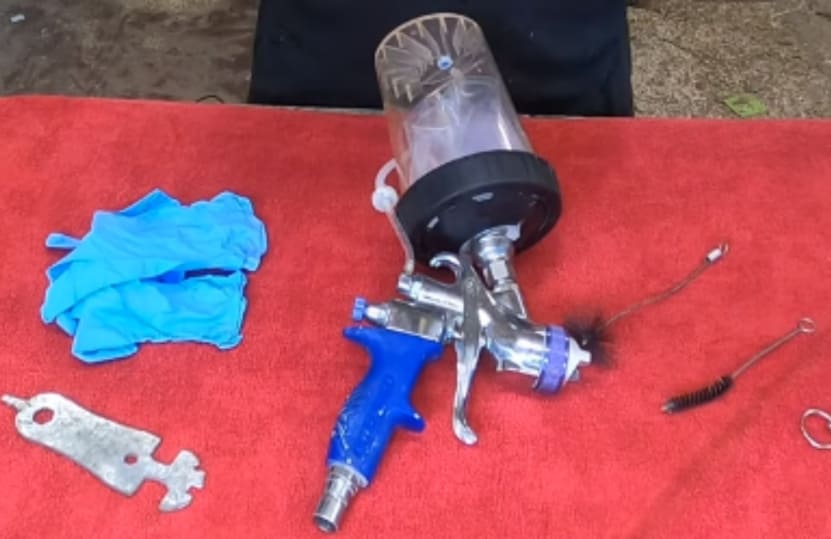
To do this, I have gloves, the tool that comes with the Fuji sprayer, and the sprayer with the 2.0 system on top. I also have a couple of brushes, including some tiny ones, and cleaning solution.
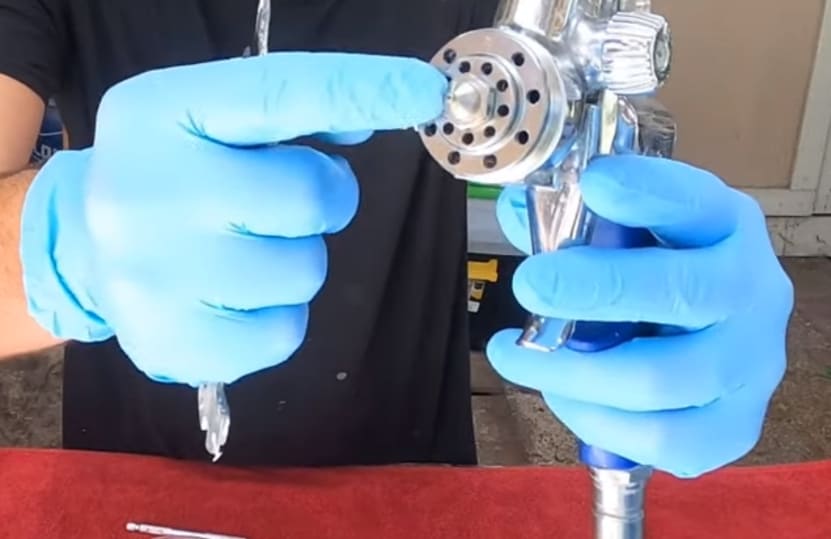
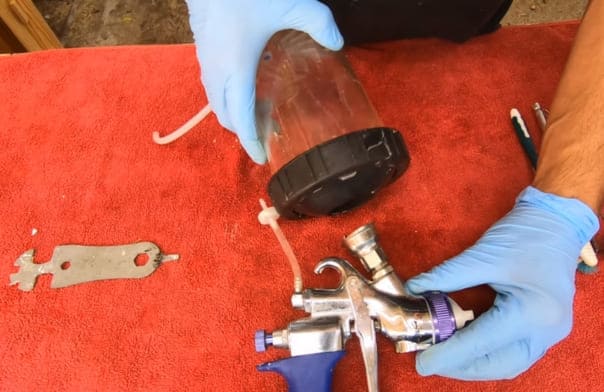
The 3M system is an excellent disposable system. To begin, you need to disconnect the air hose from the gun and turn it upside down to allow any solution inside to drain out.
I also open the needle at this point to avoid trapping any solution inside the gun. Then, with a couple of taps, everything comes off with a quarter turn, and your gun is separated from the PPS system, which is designed to be thrown away.
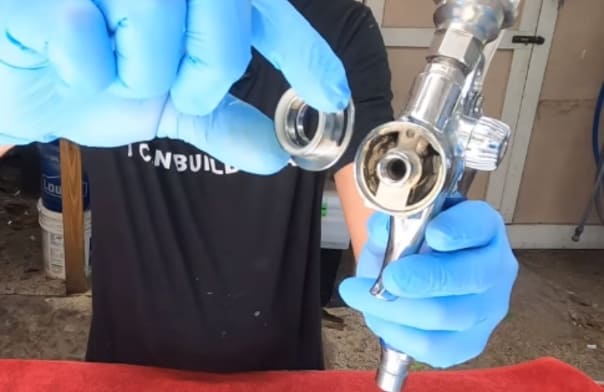
You remove the dome and bag and throw them away, leaving only dust in the actual cup. To clean the gun, you will need to use a cleaning solution. Depending on the type of solution you have in the gun, whether water-based or oil-based, you will need to use either brush cleaner or paint thinner.
You pour a third of a cup of the solution into a disposable cup, put on gloves, and start cleaning the gun. I usually pour the solution into the gun and let it sit for a moment, so it gets into the air chamber and loosens everything up. Then, I use a brush to give it a nice scrub. If the solution is dry, I pull the trigger and brush the tip to clear any clogs.
Once the clog is cleared, I clean the walls of the sprayer, and when the spray comes out smoothly, I know it’s clean as shown in the picture below.
Tips for proper cleaning:
If you want better results, use high-quality cleaning solutions and soft brushes.
After each use, clean your spray gun immediately to prevent paint from drying.
Do not use harsh chemicals or abrasive tools on your spray gun.
Conclusion:
Maintaining and optimizing your Fuji Spray Gun requires regular cleaning. Maintaining your spray gun will enable you to obtain professional results while saving you time and money. Follow the steps discussed above for proper HVLP spray gun cleaning and maintenance and use the tips provided.
FAQS On cleaning fuji spray gun
Q: Can I use a cleaning solution other than the manufacturer’s?
Q: How often should I clean my spray gun?
Q: Can I reuse cleaning solutions?
Q: Can I soak my spray gun in a cleaning solution?
Q: How do you clean a Fuji spray tan machine?
The easiest way to maintain a Fuji spray tan machine is by removing any excess solution from the cup and wiping down the exterior. To clean the gun, disassemble it and use a cleaning solution to soak its parts. Clean the fluid cup and other parts with a cleaning brush. After that rinse and dry it thoroughly before reassembling. You should avoid water entering the spray gun motor.
Q: How to use Fuji spray gun?
Using a Fuji spray gun is easy and efficient. Here are the steps below:
- Attach the compressed air source to the gun.
- Now, fill the cup with paint or coating material.
- Use the controls to adjust the spray pattern and airflow.
- Hold the spray gun perpendicular to the area to be painted and start spraying.
- Apply the paint evenly by moving the gun back and forth.
- If necessary, adjust the settings and clean the gun after use thoroughly.

Jennifer Marie
Jennifer Marie is a general contractor with over the years of experience in home remodeling, DIY projects, and commercial painting projects. Her experience includes working with paint sprayers, painting tools, and other painting supplies. You can follow her on Facebook.