We’re often asked about the best painting supplies and tools we use to achieve remarkable furniture paint transformations. Well, let me spill the beans! I am not a fan of expensive painting tools and equipment. However, I do have a handful of trusty painting tools and products that make our lives as furniture painters a breeze. Today, I share my all-time favorite items every aspiring furniture painter should have in their arsenal.
If you’re planning to dive headfirst into furniture painting and take on multiple projects, these furniture painting tools are absolute game-changers. Before we proceed, let’s clear one thing up: there’s a vast array of products available for furniture painting, but these are the nine tools that I have tried and used while painting furniture. So I will walk you through each one, explaining why I love them and sharing my specific recommendations. Come on, let’s get creative!
Table of Contents
- Best Painting Tools For Furniture Painting
- 1: Preparation Tools needed for painting :
- 2: Must have painting tools:
- 3: Additional supplies for painting:
- 4. Paint and Finish Supplies:
- Conclusion On best tools for painting:
- FAQS On Furniture Painting Tools
- Q1: What is the best tool to paint furniture?
- Q2: Is it better to paint furniture with a brush or a roller?
- Q3: What brushes are best for painting furniture?
- Q4: What is the best way to paint furniture?
- Q5: How many paint coats on furniture?
Best Painting Tools For Furniture Painting
- Screwdriver / Dewalt Electric screwdriver
- Cleaner
- Wood Filler
- Sandpaper
- Tack Cloth
- Primer
- Paint
- Paint Sprayer
- Topcoat
1: Preparation Tools needed for painting :
The easiest way to achieve a flawless finish is to prepare furniture properly before painting. You’ll need the following wood painting equipment:
Screwdriver:
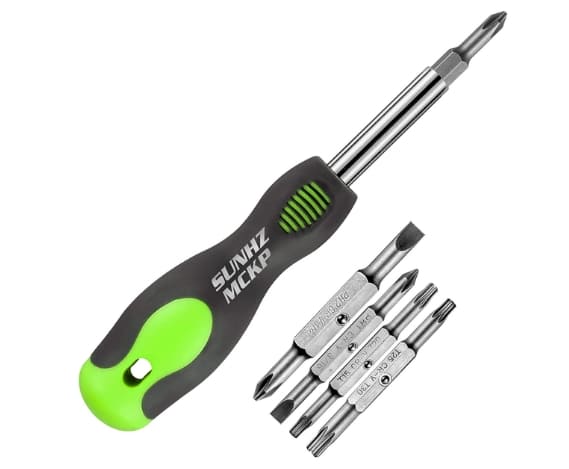
In the process of furniture painting, you’ll need a screwdriver. This will make it easier for you to paint evenly and thoroughly by removing any hardware such as knobs, handles, or hinges. I have been using the SUNHZMCKP Screwdriver, and it has become my go-to tool for all my repair needs. Its portability and versatility make it a suitable tool for outdoor and daily repairs.
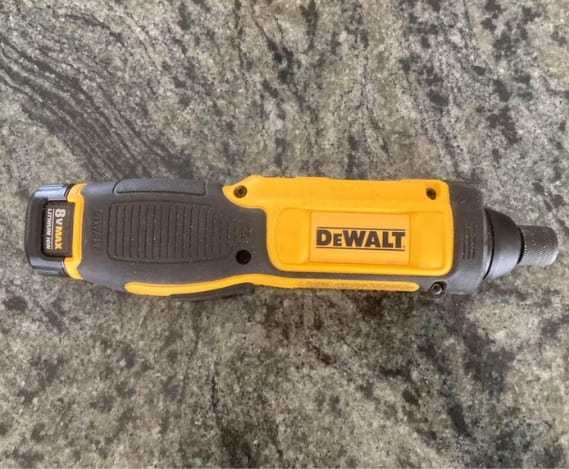
Over time, I upgraded my tool collection and transitioned from the SUNHZMCKP Screwdriver to the DEWALT electric cordless screwdriver. This switch has proven to be a significant improvement for my daily repair needs. Its precise control and effortless handling make my tasks easier for me. Having two batteries included means I’m never without power.
Cleaner:
A perfect finish requires proper cleaning to ensure paint adhesion. You should clean the surface with mild detergent or a furniture cleaner to remove dirt, grime, and grease. A smooth, clean surface allows paint to bond effectively, resulting in a durable finish.
I use Krud Kutter Cleaner, which contains a powerful formula that tackles tough dirt and grease quickly. Using a little of this cleaner goes a long way, making it a cost-effective and reliable cleaner.
Wood filler:
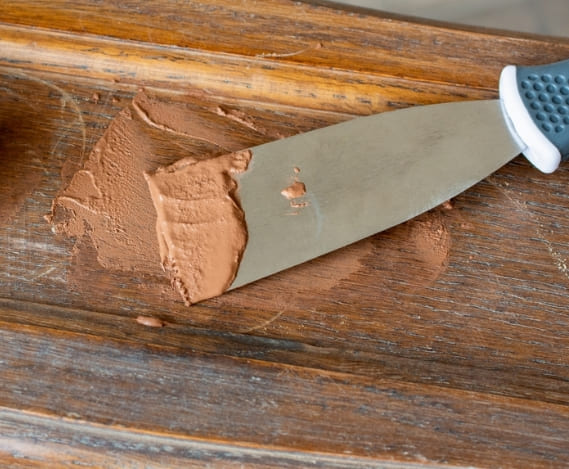
A wood filler is an essential product when your furniture has dents, scratches, or holes. You can use a putty knife to level damaged areas with wood filler. Once it has dried, sand it down for a smooth surface. Wood Filler helps ensure seamless paint application and restores furniture originality.
Having experimented with various wood fillers for different projects, I am sharing different wood fillers to suits your needs.
Aqua Coat Water-Based Clear Wood Filler
Aqua Coat Water Based Wood Filler gel provides a clear finish and enhances natural wood grain beautifully. With a drying time of 45-60 minutes, it allows efficient progress.
Bondo Home Solutions Wood Filler
Bondo is another highly effective solution for repairing broken corners and tackling other repair tasks. Also, it helps fill old hardware holes. Bondo Wood Filler impressed me with its quick drying time of 30 minutes to 1 hour. With Bondo, you can confidently address a wide range of repairs, ensuring long-lasting results and a professional finish. You can also purchase it from Homedepot.
Elmer’s E868 Wood Filler

Elmer’s E868 Wood Filler has become my preferred choice for repairs. I particularly like Elmer’s Wood Filler because it is versatile in various repair scenarios. It not only repaired chipped wood furniture, but also patched small nail holes flawlessly. Its ease of use was a bonus for me, and no touch-up painting was needed in either case. The color match was flawless, and it dried quickly without additional paint. I found the applicator tube to be easy to use when applying the product. Additionally, unlike Bondo, it doesn’t have a strong odor.
Sandpaper:
Sandpaper grit is an important consideration when preparing furniture for painting. It is typically recommended to use 120- to 180-grit sandpaper when painting furniture. Grit ranges like this one strike a good balance between removing imperfections such as old paint and rough patches, while creating a smooth surface for paint to adhere to.
Start with a coarser grit, such as 120, to remove existing finishes, rough areas, or stubborn paint. Afterwards, use a finer grit, such as 180, to smooth out the surface. This process ensures proper paint adhesion and professional results. Furthermore, I find 150 grit sandpaper useful for projects that require sanding furniture down to bare wood. It is easier to remove old finishes, stubborn paint, or deeper imperfections with these coarse grits.
Remember to always sand in the direction of the wood grain and use light, even pressure to avoid damaging the surface.
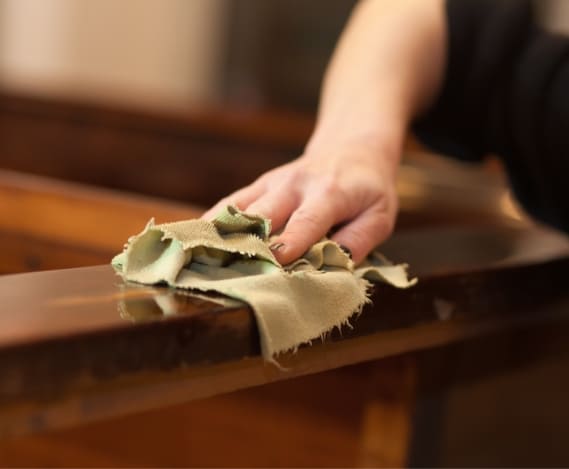
Tack cloth:
I prefer using a tack cloth for painting furniture due to its exceptional ability to remove dust, lint, and other particles from the surface. Unlike a lint-free rag, the tack cloth is specifically designed to attract and hold onto these particles, ensuring a clean and smooth painting surface. Its tackiness allows for efficient cleaning without leaving residue, making it a reliable choice for flawless finish on furniture projects.
Here’s a handy tip: When using a tack cloth, I find it beneficial to wear disposable gloves to avoid the sticky and uncomfortable feeling that comes from direct contact with the tack cloth. By wearing gloves, I can easily glide the tack cloth over the surface without residue transferring to my hands. It keeps the process clean and ensures that the tack cloth effectively removes dust and debris without leaving unwanted marks or textures on the furniture.
2: Must have painting tools:
Now that your furniture is prepped, it’s time to paint it. Here are the further tools needed to paint furniture which are as follows:
Paint Rollers
Rollers work well on large surfaces and require less preparation than sprayers. You should choose the right roller for the type of paint you are using, whether it is oil or water-based. Consider the roller nap texture, as it affects the finish—shorter nap for smooth surfaces, longer nap for textured surfaces.
Paint Brush
Choose a brush size that suits the furniture’s size and intricacy, ensuring optimal coverage. I’ve had experience with various quality paint brushes brands, but I recently gave Zibra brushes a try for my painting projects and I must say, I’m also impressed with their performance.
These brushes ensures a smooth and even finish. Also, the brushes are easy to clean and maintain their shape.
TIP: When painting with latex paint, synthetic bristle brushes are helpful, while natural bristle brushes are suitable for oil-based or alkyd paints.
Paint sprayers
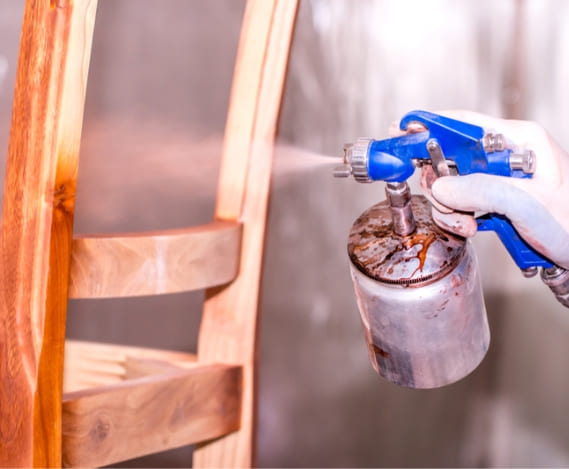
When you use paint sprayers, you will achieve quick and flawless finish on your furniture painting projects. It is common to use brushes and rollers to paint, but paint sprayers offer more convenience, efficiency, and flexibility.
Brushing or rolling large surfaces or intricate details can be time-consuming and labor-intensive. However, paint sprayers allow for quick and even coverage, drastically reducing painting time.
Find out the best paint sprayers reviews and why they are essential tools to your painting tool collection.
3: Additional supplies for painting:
Along with the preparation and paint, the following tools can help you paint furniture more effectively:
Paint Trays
These shallow containers hold paint and make it easy to dip brushes and rollers evenly into the paint. You can remove excess paint from your tools by using trays with ridges.
Painter’s Tape
I use painter’s tape to create clean, crisp lines and prevent paint splatters in certain areas. It is particularly useful when painting adjoining surfaces in different colors or when designing intricate patterns.
Drop Cloths
Drop cloths or plastic sheets are great for catching any paint drips or spills on your floor or work area. It saves you from unnecessary cleanup because they are reusable, and easy to clean.
Helpful Resource: Whether you’re a seasoned DIYer or looking for expert craftsmanship, check out the price of painting furniture that will help you more.
4. Paint and Finish Supplies:
Selecting the right paint and finish supplies will ensure your painted furniture looks great and durable. Consider the following:
Primer
If you’re painting bare wood, stained surfaces, or dark-colored furniture, a primer is recommended. It provides an even base for paint, improves adhesion and prevents stains or bleeding through. The primer you choose should be specifically designed for the material of your furniture, such as wood or laminate.
I found Zinsser BIN a shellac-based primer, especially for oak and laminate furniture. I applied two coats of it to prevent the tannins from bleeding through, and this primer handled the job beautifully. It may take some adjustment due to its runny consistency, but it dries fast.
The other one Zinsser Bulls Eye is my go-to primer for its water-based formula that effortlessly adheres to surfaces without sanding. With a 35 minute drying time, I can topcoat within an hour. It provides a uniform seal and ensures a smooth base for my painting projects, saving me time and effort.
Paint
Furniture paint jobs are incomplete without choosing the right paint color. No matter what color you choose, make sure the paint you choose is designed for furniture and matches your desired finish (matte, satin, or glossy). The ease of cleanup and low odor of water-based latex paint make these paints popular choices. In addition, it dries quickly. However, oil-based paints provide a durable finish, but they require longer drying times and ventilation.
Note: Take a look at this informative article on the optimal paint options for furniture, highlighting the various types of paint we highly recommend and their suitability for achieving your desired finish.
Finishing Products:
Clear coats, varnishes, or waxes can provide durability, smoothness, and protection for the painted surface. You can protect your painted furniture from scratches, stains, and general wear and tear by applying a topcoat. I like a clear polyurethane topcoat for long-lasting durability. Also, it protects and adds a professional finish to your furniture.
Conclusion On best tools for painting:
When you have the right things for painting and supplies, painting furniture can be a rewarding and creative experience. Don’t forget to invest in quality sprayers or brushes, choose the appropriate furniture painting tools, finish products, and prioritize proper preparation before painting.
FAQS On Furniture Painting Tools
Q1: What is the best tool to paint furniture?
A1: Paint sprayers and brushes with high quality are often considered the best tools for painting furniture, as they offer good control and even coverage.
Q2: Is it better to paint furniture with a brush or a roller?
A2: This depends on the furniture and the finish you wish to achieve. Brushes are good for intricate details and corners, while rollers are better for large, flat surfaces.
Q3: What brushes are best for painting furniture?
A3: In general, synthetic bristle brushes are recommended for painting furniture since they provide a smooth finish. If you want better control, look for brushes that have angled or tapered tips.
Q4: What is the best way to paint furniture?
A4: You can paint furniture with oil-based paint to make it durable. The best way to prepare the furniture surface for painting is by cleaning, sanding, and priming it. Finish it with a clear protective coat or sealant for durability.
Q5: How many paint coats on furniture?
A5: It is recommended to apply two to three thin coats of paint to furniture to achieve a quality finish. Make sure each coat is completely dry before moving onto the next. This process helps create a smooth and even finish on the painted furniture.

Rosalie Sanchez
DIY enthusiast with years of experience in home decor and home improvement. With a passion for educating consumers about DIY projects. Every time, I work with our painting professionals to provide you with the best painting product reviews and how-to advice. You can follow me on Facebook.