Chipped wood furniture can be a troublesome issue for many homeowners. Over time, accidental bumps, everyday wear and tear, or even mishaps during moving can lead to unsightly chips and damage on wooden furniture surfaces. These chips not only affect the appearance of your furniture but can also leave the underlying wood vulnerable to further damage like moisture absorption and decay. So, how to fix chipped wood furniture?
Quick Summary:
To fix chipped wood furniture, clean the area, fill the chip with wood filler, sand it smooth, match the color with stain or paint, and seal it.
It’s a detailed process, but with the right tools and techniques, you can repair your chipped wood furniture to its former appearance. So, stay tuned to learn more!
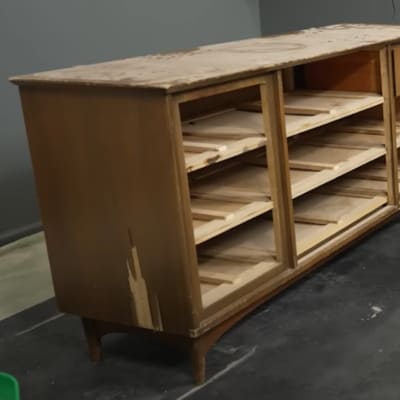
Table of Contents
- How To Fix Chipped Wood Furniture?
- Materials you’ll need to fix chipped furniture:
- Step 1: Setting Up the Workspace
- Step 2: Cleaning the Mess
- Step 3: Preparing Bondo Mixture And Filling The Gaps
- Step 4: Sanding Away Imperfections
- Step 5: Priming for a Fresh Start
- Step 6: Painting the Dresser
- Step 7: Adding a Protective Seal
- Step 8: Buffing and Polishing (Optional)
- Here is another project: how to fix chipped wood table tops
- How do you fill a chip in wood furniture?
- Wrapping Up
- Rosalie Sanchez
How To Fix Chipped Wood Furniture?
There was a dresser that once I moved to my store room and I totally forgot about it. Last Monday, I looked into it and found it as a chipped wood dresser. It had seen better days, with chips and dings ruining its once-beautiful surface.
The reason behind it is that the dresser is of veneer wood material and veneer wood has a thin layer of real wood glued onto a base, making it vulnerable to water damage because moisture can seep in and weaken the bond. In contrast, laminate has layers of resin-soaked paper or fabric, forming a water-resistant surface that’s less prone to damage from water exposure.
I decided to fix the dresser on my own and fix the scratched wooden dresser. This method is applicable to all wood furniture including tables, dressers, chairs, doors, cabinets, etc. Here’s how I did it:
Materials you’ll need to fix chipped furniture:
- Bondo wood filler
- Bondo hardener (usually comes with the filler)
- Plastic or metal putty knife
- Sandpaper (220-grit)
- Disposable gloves
- Mask (for dust protection)
Step 1: Setting Up the Workspace
I set up shop in my garage, making sure it was well-ventilated, and spread a plastic sheet on the floor to catch any mess. Read more about preparing wood furniture for painting!
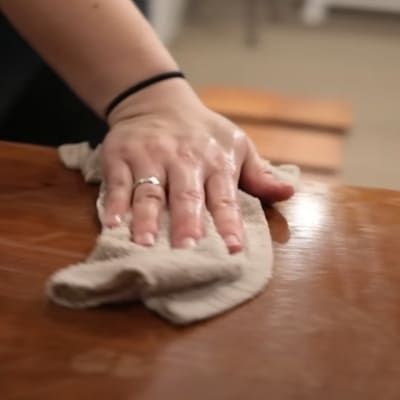
Step 2: Cleaning the Mess
The first task was to remove any loose or splintered wood around the chipped areas.
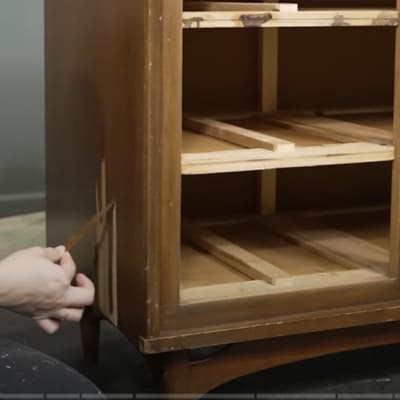
I also gave the entire dresser a good cleaning using a damp cloth and some mild wood cleaner, getting rid of years of grime and old finish.
Step 3: Preparing Bondo Mixture And Filling The Gaps
Next, I chose Bondo wood filler for this project because it’s a durable and versatile filler that can be used on wood surfaces like veneer or laminate.
While Bondo wood filler is undoubtedly a reliable choice for filling gaps in wood surfaces, it’s essential to consider alternative options like the REALINN Wood Furniture Repair Kit. This kit offers a comprehensive solution for various wood surface repairs, including holes, cracks, scratches, or discolorations. With its versatile tools and materials, this kit is a cost-effective choice for anyone looking to restore the beauty and functionality of their wooden furniture and fixtures.
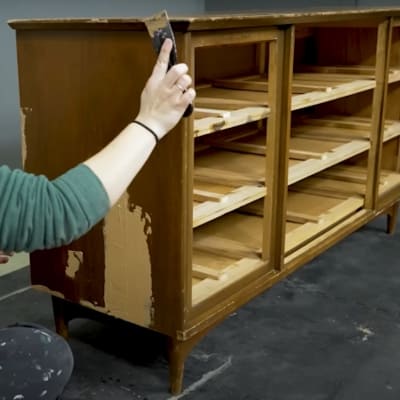
Back to the process, I used a small disposable mixing plate where I squeezed two ounces of Bondo and added a few drops of hardener, roughly the corn kernels size. The precise ratio can vary depending on factors like temperature and humidity, so I made sure to consult the product instructions for specific guidelines.
A suitable ratio is reached when the mixture takes on a pink or light red hue. Mixing the filler with the hardener, I applied it to the chipped area, being careful to overfill it slightly. Using a putty knife, I smoothed it out especially the corners and edges, making sure it matched the dresser’s contours.
Step 4: Sanding Away Imperfections
Once I had allowed the Bondo filler to dry for the specified time, which was about 15 minutes at a temperature of 77 degrees Fahrenheit (25 degrees Celsius), or a bit longer in cooler environments (around 20 to 30 minutes), I started the sanding process.
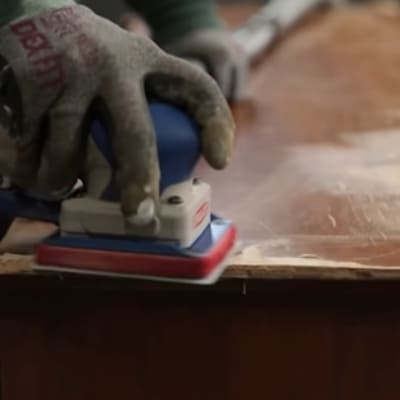
I reached for my surfprep sander, a choice tool for this task, as it helps achieve a smooth and even surface. I initiated the sanding process with coarse grit sandpaper, delicately working on the patched region. The goal here was to remove any excess filler and create a level surface that seamlessly blended with the rest of the dresser.
Blending the edges of the repair into the surrounding wood was a bit tricky but essential for a seamless finish.
Note: Check out our best sander reviews to find other quality orbital or belt sanders.
Step 5: Priming for a Fresh Start
With the repaired area smoothed out, I applied the Rust-Oleum Eye Shellac wood primer to ensure the paint would adhere correctly. This primer is versatile and compatible with various paint types, including chalk paint, enamel paint, acrylic, and more, giving flexibility to choose our preferred paint type. I followed the manufacturer’s drying time instructions.
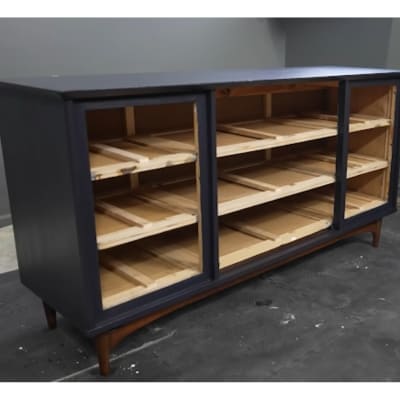
Step 6: Painting the Dresser
I decided to give my dresser a fresh look with a new paint color. Oil-based paints are an excellent choice for refinishing veneer and other types of furniture, as they provide a durable and long-lasting finish, leaving a shiny finish.
For my dresser restoration project, I opted for Rust-Oleum Protective Enamel Paint. With this oil-based enamel paint, wooden surfaces are protected from mold damage, moisture, heat, as well as abrasions, insects and rot. To achieve optimal results, I applied multiple thin coats and ensured each one had ample time to dry before proceeding.
Find out which spray paint is best for wood furniture by reading the reviews!
Step 7: Adding a Protective Seal
After the paint had dried, it was time to safeguard my hard work. I applied a clear Rust-Oleum wood sealer, following the instructions closely. This not only protected the dresser but also gave it a beautiful finish.
Step 8: Buffing and Polishing (Optional)
Once the sealer had fully dried, I couldn’t resist giving the dresser an extra touch of shine. I gently buffed the surface with a soft cloth, marveling at the smooth and glossy finish I achieved. And that’s all! My dresser is not just functional now; it’s a piece of furniture I’m proud to have in my home.
Here is another project: how to fix chipped wood table tops
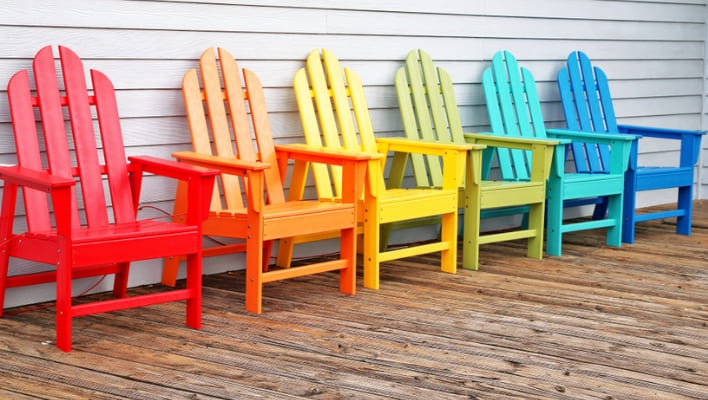
I wanted to share a DIY outdoor furniture makeover with you! If your outdoor furniture is chipped, faded, or rusted as shown in the picture below;
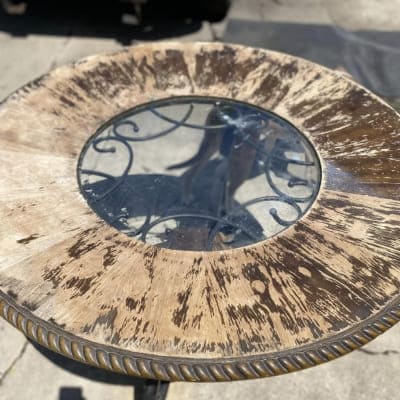
Here’s an easy fix:
I started with Rust-Oleum Stops Rust Primer, then used Rust-Oleum Metallic Paint and Primer in one for a sleek finish. For the table top, I applied a coat of Peel Stop, followed by two coats of gel stain and an exterior top coat.
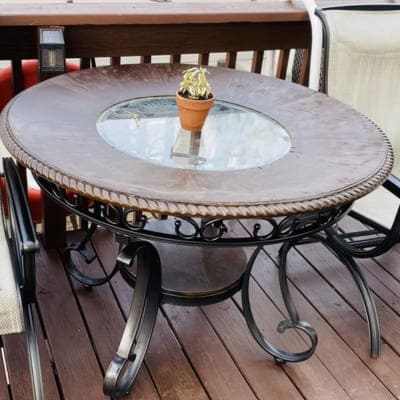
This spray paint surprised me—it went on smoothly without those annoying sags. I usually don’t like spray cans, but this one has a great spray tip to prevent that issue. I still need new cushions, but it’s a big improvement for now.
How do you fill a chip in wood furniture?
You’ve got a little chip in your beloved wood furniture? No worries, I’ve got you covered! Here’s what I did:
1: Clean the Area: First, I gave the chipped spot a good clean. Just wiped away any dust, dirt, or those annoying little wood bits.
2: Choose Your Filler: I picked up a trusty wood filler, one that matched the furniture’s color. You want it to blend in seamlessly. I’d recommend something like “Minwax Wood Putty” or “DAP Plastic Wood Filler.”
3: Apply the Filler: Now, the fun part! With a putty knife, I applied the wood filler into the chip. I made sure to put a tad extra because it shrinks as it dries.
4: Smooth and Level: To make it all nice and smooth, I gently pressed the filler down, making it level with the rest of the wood.
5: Let It Dry: Patience is key here. I let that filler dry out completely, following the instructions on the label. It might take a few hours or even overnight.
6: Sand the Surface: Once it was dry, I grabbed some fine-grit sandpaper. With gentle strokes, I sanded the filled area, going with the grain of the wood.
7: Stain or Paint (if needed): If your furniture needs it, you can stain or paint the repaired area to match the rest of it.
By the end of it, you won’t even notice that chip anymore. Trust me, it’s a game-changer for keeping your furniture looking fantastic! And for sandpaper, I used “3M SandBlaster Sandpaper” or “Norton 9″ x 11″ Sanding Sheets” to get the job done right. Here is more information about fixing broken corners.
Wrapping Up
Learning how to fix chipped wood furniture can eliminate the cost of replacement and repair wooden furniture in good condition. By following the above step-by-step guide process, from cleaning and filling the chips with wood filler to painting, and sealing, you can refinish your damaged furniture and enjoy its renewed elegance for years to come.

Rosalie Sanchez
DIY enthusiast with years of experience in home decor and home improvement. With a passion for educating consumers about DIY projects. Every time, I work with our painting professionals to provide you with the best painting product reviews and how-to advice. You can follow me on Facebook.