Painting a car is a common automotive practice for owners to maintain their car’s damaged paint, or add new color. Can you paint over clear coat, or is it necessary to remove the existing topcoat to achieve a fresh appearance?
Following the right approach when painting over clear coat is crucial to achieving a smooth and durable finish.
Painting over a car’s clear coat is generally discouraged because regular paint doesn’t adhere well to this protective layer. To repaint a specific area, it’s better to scuff the clear coat in that spot to ensure the new paint sticks effectively. If you’re considering a full surface repaint, it’s advisable to remove the clear coat first, followed by applying paint and a fresh clear coat layer for a robust and appealing finish.
However, keep in mind that if you choose to paint over a clear coat, getting the surface ready is super important. Sanding the clear coat creates a rough surface texture, enhancing adhesion for the new paint and reducing the risk of issues like peeling or bubbling.
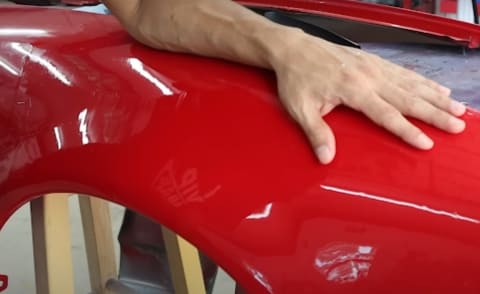
Table of Contents
- What Is Clear Coat?
- how to remove clear coat before painting?
- Can You Paint Over Clear Coat? Step By Step Guide
- 1. Clean the Surface
- 2. Should I Sand the Clear Coat?
- 3. Do I need To apply Primer?
- 4. Masking and Protection
- 5. Apply the New Paint
- Is Buffing and Polishing Necessary?
- Can you paint over clear coat furniture?
- Step 1: Gather Your Materials
- Step 2: Prepare Your Furniture
- Step 3: Sand the Clear Coat
- Step 4: Clean Again
- Step 5: Apply Primer
- Step 6: Paint
- Step 7: Optional Sanding Between Coats
- Step 8: Allow to Dry
- Step 9: Finish and Protect
- Can you paint over clear coat wood?
- Can you paint over an acrylic clear coat?
- Is it good to clear the coat over enamel paint?
- How long to let the clear coat dry before sanding?
- Is it possible to apply new auto paint over existing paint without using a primer?
- Could we paint over clear varnish?
- Wrapping Up
- Martina Hitchcock
What Is Clear Coat?
Clear coat is a transparent finishing paint used as a topcoat over already painted surfaces, typically in automotive applications. It enhances the texture of the vehicle’s surface while offering exceptional durability and protection against various physical and chemical factors.
Clear coat shields your car’s paint, but harsh weather and UV rays can weaken it. Regular waxing is important to protect the clear coat.
In a humorous take, Christopher Smith discusses the evolution of car painting, from the simple two-step process to the modern clear coat exteriors. He highlights the protective and enhancing qualities of clear coat in a 35-layer Lada demonstration.
how to remove clear coat before painting?
| Surface | Method | Steps |
| Clear Coat from Paint | Using a Chemical Paint Stripper | 1. Apply the stripper following the manufacturer’s instructions. 2. Let it sit for the recommended time. 3. Gently scrape off the clear coat with a plastic scraper. 4. Rinse and clean the area. |
| Clear Coat from Aluminum Wheels | Using Acetone or Lacquer Thinner | 1. Apply a small amount of acetone or lacquer thinner to a cloth. 2. Rub the cloth over the clear coat in a circular motion. 3. Wipe off the residue and clean the wheels. |
| Clear Coat Scratches | Wet Sanding and Polishing | 1. Wet sand the scratched area with fine-grit sandpaper (1000-2000 grit). 2. Polish the area with a rubbing compound. 3. Finish with a wax or sealant for protection. |
| Clear Coat from Headlights | Toothpaste or Baking Soda | 1. Apply toothpaste or make a paste with baking soda and water. 2. Rub the mixture onto the headlights using a cloth. 3. Rinse and repeat if necessary. |
| Clear Coat from Wood | Sanding with Care | 1. Use a fine-grit sandpaper (320-400 grit) to sand the clear coat gently. 2. Sand with the grain of the wood to avoid damage. 3. Wipe clean and refinish if needed. |
| Clear Coat Runs | Wet Sanding and Buffing | 1. Wet sand the runs with a fine-grit sandpaper (1500-2000 grit). 2. Use a buffing compound to polish the area until smooth. 3. Finish with wax or polish. |
Can You Paint Over Clear Coat? Step By Step Guide
Painting over a clear coat isn’t quite as straightforward as applying paint to bare metal or primer. Here’s a step-by-step guide to help you accomplish a successful and lasting paint result:
1. Clean the Surface
Start by thoroughly cleaning the area you plan to paint. I used custom shop restoration automotive grease cleaner to remove any contaminants, such as dirt, oil, or wax. This step is important for ensuring proper paint adhesion.
2. Should I Sand the Clear Coat?
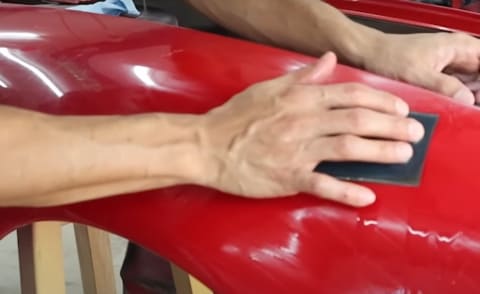
To create a rough surface for the new paint to adhere to, you’ll need to sand the clear coat. Start with 800-grit sandpaper and sand the entire area lightly. Make sure not to sand too aggressively, so that the underlying paint doesn’t get damaged.
After the initial sanding, switch to 1000-grit sandpaper for a finer paint layers. Sand in a circular motion, ensuring even coverage, followed by a1500-grit sandpaper to get a neat surface. Here’s what you need to know about how to sand a car in detail.
3. Do I need To apply Primer?
Depending on the condition of the clear coat and the type of paint you’re using, you may need to apply a primer. Primer helps the new paint adhere better and can also improve the color’s coverage.
I used Rust-Oleum 260510 automotive primer due to its quick drying time, ability to fill imperfections, and rust-resistant formula that helps ensure a seamless and robust coat for my vehicle. The advanced spray system and comfort spray tip made the application process efficient and user-friendly.
4. Masking and Protection
Use masking tape and plastic sheeting to protect any areas you don’t want to paint. This includes windows, trim, and other adjacent surfaces. Make sure that only the area you intend to paint is exposed.
5. Apply the New Paint
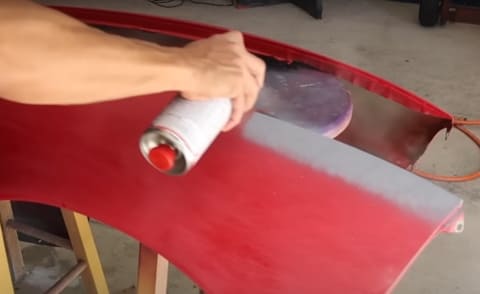
For the application of the new paint, I decided to use Dupli-Color BCL0125 paint. This choice was made because of its reputation for being chip-resistant and its ability to impart a glossy varnish, enhancing the overall look of my car.
Alternatively, the Speedokote SMR-210/211 urethane gallon kit offers durability and a professional-grade finish, making it a solid option for achieving a long-lasting and silky texture.
Considering the instructions by manufacturer for mixing and applying the automotive paint, use overlapping strokes to ensure an even coat.
TIP: Here are some tips that will help you repaint your car at a reasonable cost.
Is Buffing and Polishing Necessary?
Once the paint is completely dry, carefully remove the masking tape and plastic sheeting.
To attain an even and shiny look, you can buff and polish the painted area using automotive Turtle Wax T-241A Polishing Compound. It will help remove any minor imperfections and enhance the shine of the paint.
Can you paint over clear coat furniture?
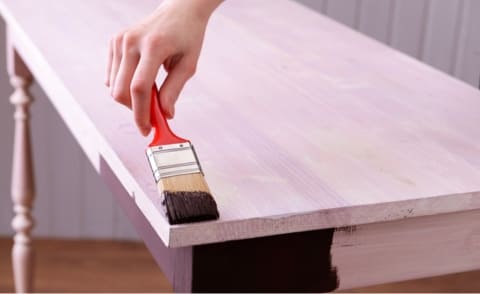
Furniture can transform a space, but if you have a piece with a clear coat that no longer suits your style, painting over it can breathe new life into your home decor. Here’s a step-by-step guide on how to paint over clear coat furniture, along with product recommendations to ensure a successful project.
Step 1: Gather Your Materials
Before you begin, gather the necessary materials for this project:
Materials:
- 3M SandBlaster Sandpaper
- KILZ Premium High-Hide Primer
- Benjamin Moore Advance Interior Paint, Rust-Oleum Chalked Ultra Matte Paint, and Valspar Cabinet Enamel Paint.
- Purdy Nylox Brushes and Wooster Brush Pro/Doo-Z Roller Cover.
- 3M ScotchBlue Painter’s Tape
- Trimaco Supertuff Tack Cloth
- Minwax Polycrylic Protective Finish and General Finishes High-Performance Topcoat.
Step 2: Prepare Your Furniture
Start by getting your furniture ready:
Clean the Surface: Make sure your furniture is clean by getting rid of dust, dirt, and any other stuff on it.
Step 3: Sand the Clear Coat
Next, lightly sand the clear coat to create a rough surface for the paint to stick to. Use a coarse-grit sandpaper (around 120 grit) first, and then make it smoother with a finer grit sandpaper (about 220 grit). Keep sanding until it’s nice and smooth.
Step 4: Clean Again
After sanding, wipe off any sanding dust. A tack cloth is great for this because it picks up tiny particles.
Step 5: Apply Primer
Put on a thin, even layer of primer on your furniture. You should follow the drying instructions on the primer can. Using primer can enhance the adhesion of paint and cover stains.
Step 6: Paint
After the primer has dried, start painting with thin, even coats. It’s a good idea to use a few thin paint coats instead of one thick coat. Between coats, follow the drying times on the paint can.
Step 7: Optional Sanding Between Coats
A fine-grit sandpaper (like 220 grit) can be used to remove any imperfections between coats for an extra smooth finish. Sanding dust should be cleaned away before applying the next coat.
Step 8: Allow to Dry
Make sure the last layer of paint dries completely as per the manufacturer’s instructions.
Step 9: Finish and Protect
A clear topcoat or sealer can protect the paint and increase the durability of your furniture.
Can you paint over clear coat wood?
You can paint over clear coatings like polyurethane wood furniture, but you should prepare the surface properly by using a high-quality primer. Clear coats, such as polyurethane, create a sleek and lustrous outcome that may resist adhesion from most paints.
Can you paint over an acrylic clear coat?
Certainly, you can apply a clear coat over acrylic paint. This is especially advisable when painting objects or surfaces that will be subjected to environmental factors, like direct sunlight, as the clear coat provides protection to the paint and enhances its glossiness.
Is it good to clear the coat over enamel paint?
Applying a clear coat over enamel paint is a viable option. Enamel paints adhere effectively to clear coat finishes.
When considering clear coat products for this purpose, some recommended choices include Rustoleum Crystal Clear and Spray Max 2K.
How long to let the clear coat dry before sanding?
To obtain the best painting results when sanding after applying a clear coat, you should be waiting for a minimum of 24 hours, but do not let it go past 48 hours. This time frame allows the clear coat to thoroughly dry and harden, ensuring optimal conditions for successful sanding. Waiting longer than 48 hours may make the sanding process more challenging.
Is it possible to apply new auto paint over existing paint without using a primer?
You can apply new auto paint over existing paint without applying the primer, however, without a primer coat, the new paint may not adhere uniformly. As a result, achieving an even coat might require additional layers of paint.
Could we paint over clear varnish?
Contrary to common belief, it is indeed possible to paint over clear varnish water-based or oil-based paints. Keep in mind that the process can be time-consuming, and to complete a professional type coating, don’t skip sanding and preparation work before painting.
Wrapping Up
Concluding the above all, painting over clear coat is possible, but it requires careful preparation and attention to detail.
Take this guide on “can you paint over clear coat” as your go-to-guide to getting fresh and flawless paint results for your vehicle, restoring its painting effect and protecting it from the elements.

Martina Hitchcock
Martina Hitchcock is a versatile author with expertise in different fields. As a paint sprayer expert, she has in-depth knowledge of paint spraying techniques, tools, and equipment. Martina is also an experienced home remodeler who has worked on various projects, including kitchen and bathroom renovations, flooring installations, and room additions. Her knowledge of home improvement and remodeling is extensive, and she enjoys sharing her insights and tips with readers. You can follow her on Facebook.
