Has your car’s paint started to peel? A silky-smooth finish begins with sanding step in the automotive refinishing process, whether you’re restoring an old classic or refinishing your daily driver to remove imperfections. Proper sanding ensures that the paint adheres well, creates an even surface, and eliminates any surface defects.
By dedicating just a few hours on a leisurely afternoon, you can transform your car’s appearance and give it a fresh, professional look. This article provides a simple step-by-step guide on how to sand a car for paint to help you achieve impressive results without the need for costly professional services.
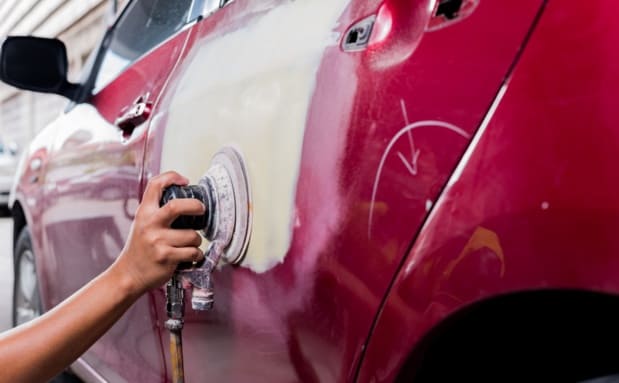
Table of Contents
- Steps For Sanding a car for paint
- 1. Supplies and Tools For sanding car paint
- 2. Prepare the Work Area:
- 3. Wash the Car Thoroughly:
- 4. Start with Coarse Grit Sandpaper:
- 5. Check Your Progress For Automotive sanding :
- 6. Move to Finer Grits:
- 7. Wet Sanding:
- 8. Check for Uniformity:
- 9. Finish the Car Sanding Process:
- Conclusion On Sanding a car for paint :
- FAQS On sanding car
- What is the easiest way to sand a car?
- How many hours does it take to sand a car?
- Can I sand my car by hand?
- Can you sand a car at home?
- Is wet sanding good for cars?
- Can you vacuum the sand out of a car?
- Do you wet or dry sand car paint?
Steps For Sanding a car for paint
1. Supplies and Tools For sanding car paint
Prepare all the tools before starting the automotive sanding. These include:
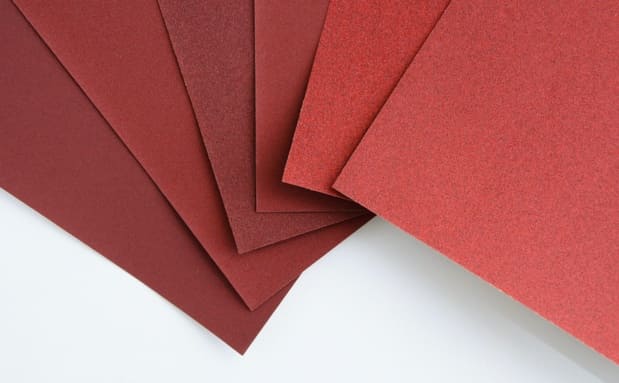
- Sandpaper grits (typically 320, 600, 1000, 1500, and 2000)
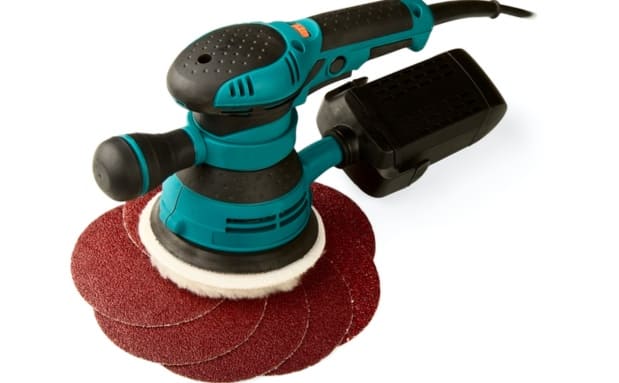
- Sanding block or a power sanding machine (I used the Milwaukee M18 Orbit Sander for sanding a wooden surface; it’s lightweight and powerful but could use better grip options. Also, I have tried Dewalt polisher for buffing out deep scratches on a car.)
- Water source and bucket (for wet sanding)
- Masking tape and plastic sheets (to protect surrounding areas)
- Clean microfiber cloths
- Spray bottle with water (for wet sanding)
- Safety gear: goggles, dust mask, and gloves
Did you know?
If the old paint on your car is solid and uncracked, you can skip sanding before repainting! Just apply a coat of primer before adding the new paint. However, when sanding is necessary, using a power electric sander can help achieve a smooth surface for a professional finish.
2. Prepare the Work Area:
Find a well-ventilated spot for sanding a car. If you’re sanding indoors, ensure proper ventilation and use a dust extraction system if possible. Cover adjacent surfaces, windows, and any other areas you want to protect from sanding dust and debris.
Helpful Resource: If you’re facing paint issues on your car, learn about fixing paint blisters on car with our comprehensive guide.
3. Wash the Car Thoroughly:
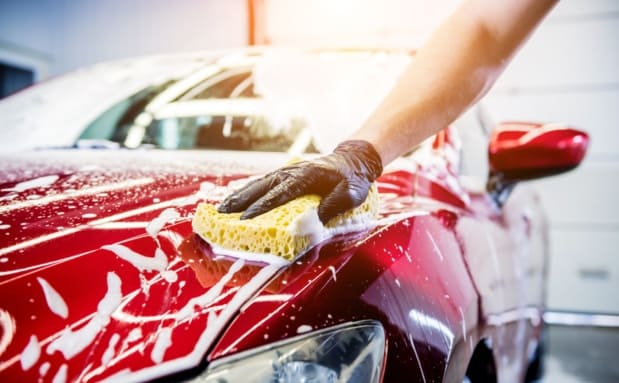
Before you sand down car, make sure it is clean to remove all dirt, grime, and contaminants that may interfere with the sanding process. Before proceeding, ensure the surface is completely clean and dry by using mild car wash soap and rinsing the vehicle well.
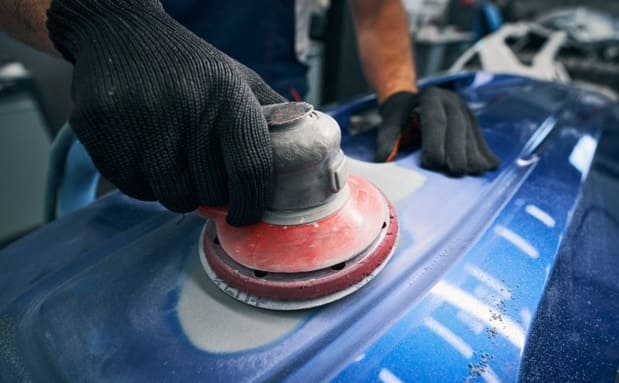
4. Start with Coarse Grit Sandpaper:
To begin sanding, attach coarse grit sandpaper (around 320) to the power sanding machine for removing existing paint, clear coat, or rough surfaces as shown in the picture below.
Start sanding it in circular motions and pay attention to all areas of the vehicle. Press gently to prevent damage the car. Avoid repetitive patterns and keep strokes even.
Furthermore, a smooth paint job is entirely worth the extra time spent dividing a car into panels like the roof, bumper, hood, trunk, and doors, before sanding each one.
5. Check Your Progress For Automotive sanding :
After sanding with coarse grit, wipe the surface with a clean, damp microfiber cloth to inspect your progress. Look for areas with old paint or rough spots, and mark them if necessary. Repeat the sanding process until you have removed all imperfections and achieved an even surface.
6. Move to Finer Grits:
Continue to use finer grits (e.g., 600, 1000) to smoothen the surface further. You should remove scratches left by the previous grit after each grit.
7. Wet Sanding:
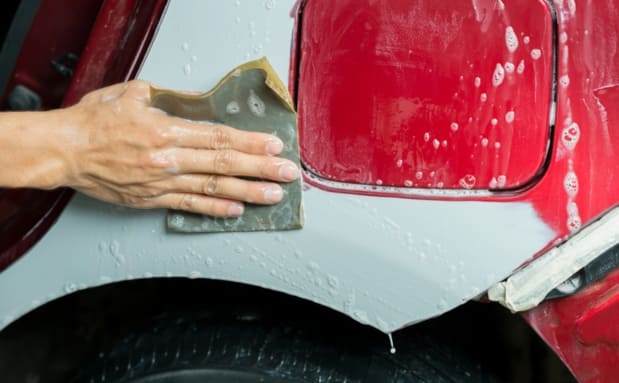
Continue to use the sanding block or machine in smooth, consistent motions, keeping the surface wet for wet sanding. Wet sanding your car requires using (1500 to 2000) grit sandpaper soaked in water before starting the sanding process. Keeping a bucket of water nearby for easy access ensures a smoother sanding experience and better results for your vehicle’s surface.
Note: Wet sanding can produce glass-like finishes. This method involves sanding with water to remove debris and reduce heat buildup.
8. Check for Uniformity:
Inspect the surface regularly to ensure uniform texture. A good lighting setup is essential for spotting flaws.
9. Finish the Car Sanding Process:
After you have sanded the surface smooth, rinse it off. The vehicle must be completely dry before primer and paint can be applied.
Conclusion On Sanding a car for paint :
From removing old paint to creating a smooth surface, the sanding process lays the foundation for a professional and stunning paint job. By investing time and effort into proper automobile sanding, you’ll be rewarded with a beautiful result that enhances the overall appearance and value of the vehicle.
FAQS On sanding car
What is the easiest way to sand a car?
The easiest way to sand a car is using an electric sander or sanding machine. Choose medium grit sandpaper (around 320) for initial paint removal and switch to finer grits (e.g., 600, 1000, 1500, and 2000) for a smooth finish. Wet sanding with electric sanders can further improve results. Remember to clean the car thoroughly, protect the surrounding areas, and wear safety gear for a successful auto sanding process.
How many hours does it take to sand a car?
The time it takes to sand a car depends on various factors, such as the car’s size, the extent of surface imperfections, and the sanding method used. It may take days rather than hours. Generally, sanding a car can require anywhere from 30 to 40 hours or more for a thorough job to achieve a professional finish.
Can I sand my car by hand?
Yes, you can sand your car by hand, but it can be laborious and time-consuming. Using sandpaper by hand allows for better control over specific areas, but it may take longer to achieve a smooth finish than using an electric sander.
Can you sand a car at home?
Yes, you can sand a car at home. Sanding a car is part of the automotive refinishing process and can be done in your garage or driveway. The right tools, safety precautions, and attention to detail are required. Using an electric sander or using sandpaper by hand with various grits can help you achieve a smooth surface for a professional paint job.
Is wet sanding good for cars?
Yes, wet sanding benefits car refinishing. It involves sanding the surface with water, which helps carry away debris, reduces heat buildup, and prevents sandpaper clogging. Wet sanding produces a smoother finish, removes scratches, orange peel, and is commonly used before applying paint or clear coat.
Can you vacuum the sand out of a car?
Vacuuming sand out of a car is possible to some extent, but not entirely effective. Sand particles can get trapped in the car’s interior, making it challenging to remove them completely with a vacuum cleaner. It’s recommended to use compressed air, soft brushes, and microfiber cloths for thorough cleaning. Regular maintenance and cleaning can prevent sand buildup inside the vehicle.
Do you wet or dry sand car paint?
Car paint refinishing uses wet and dry sanding techniques. Each method offers distinct advantages and is chosen based on the specific stage of the refinishing process. Wet sanding involves sanding the surface with water to reduce heat and carry away debris, resulting in a smoother finish. Wet sanding utilizes back-and-forth linear movements and involves water, while dry sanding is performed without water, using small circular motions to even the surface.