Your car’s paint isn’t just for looks; it’s a shield against the elements. But when small rocks or debris chip away at that protective layer, it can lead to bigger problems, like rust creeping in and causing unsightly blisters beneath the surface.
No matter if it’s due to road hazards, weather-related issues, or even a less-than-perfect paint job, those paint blisters can be a real eyesore and a potential threat to your car’s structural integrity. There are certain ways for how to fix paint blisters on car. But first get into what causes bubbling on car paint?
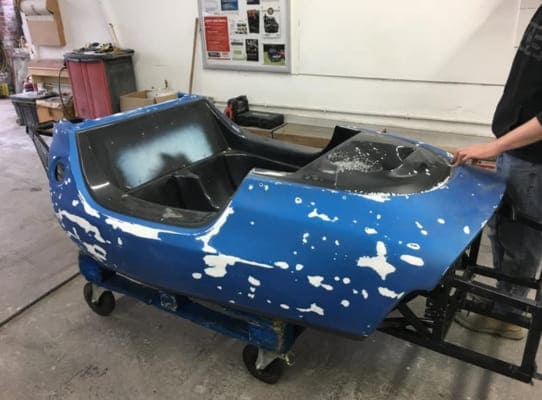
Table of Contents
- Fixed Car Paint Blisters- A Bold Automotive Makeover with BMW San Marino Blue
- What Are The Causes Of Car Paint Bubbling And Peeling?
- How To Fix Paint Blisters On Car?
- Materials And Tools Required To Fix Bubbling on car paint
- Step 1: Clean the Area
- Step 2: Protect Surrounding Areas
- Step 3: Remove Rust
- Step 4: Apply Body Filler
- Step 5: Use Spot Putty
- Step 6: Primer
- Step 7: Painting
- Step 8: Applying Clear Coat
- Step 9: Final Buff
- How to Fix Rust Bubbles on a Car
- Recommended Products:
- How Much Is The Cost Of Fixing Bubbling Paint On A Car?
- Wrapping Up
- FAQs On how to fix paint blisters on car
- Q: How do you flatten paint bubbles?
- Q: How do you fix bubbling paint without repainting?
- Q: How to fix car paint bubbles after rain?
- Q: How to address tiny bubbles in car paint?
- Q: Will paint blisters go away?
- Rosalie Sanchez
Fixed Car Paint Blisters- A Bold Automotive Makeover with BMW San Marino Blue
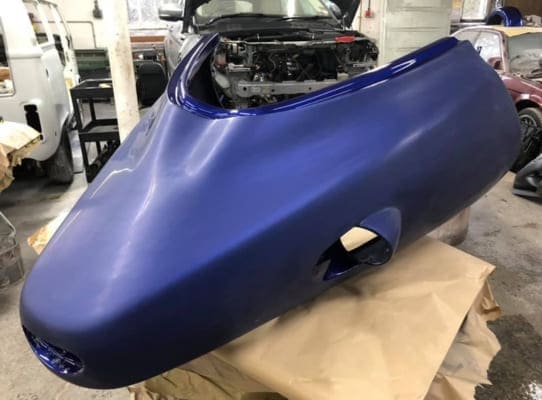
Meet the “Plastic Rat” – a quirky and unconventional 3-wheeled kit car that came to us unloved and incomplete. Our initial plan was simple: repair the unsightly blisters in the gel coat, coat it in sleek black paint, and wrap it in vinyl for a modern twist.
But fate had other plans, and our client chose a completely different path. Instead of what they expected, they opted for a full paint job. Now, here’s where it gets interesting. Painting a unique kit car like the “Plastic Rat” in a brand new color could be a risky move, as it might affect its value and originality. But our client saw it as a blank canvas and went all-in, choosing BMW San Marino Blue.
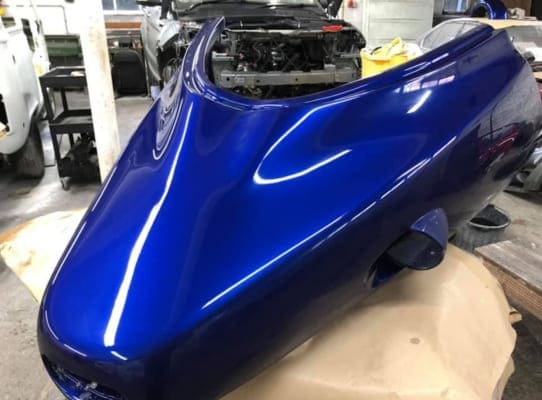
The result? Nothing short of spectacular. The “Plastic Rat” now stands out like never before, and we can’t wait to see it fully reassembled and hitting the streets. Check out the amazing results!
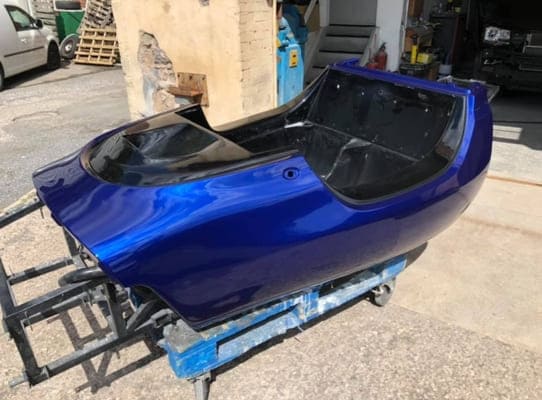
But here’s the twist – if you had the chance to pick a color for this crazy, roofless, doorless wonder on three wheels, what would you choose?
What Are The Causes Of Car Paint Bubbling And Peeling?
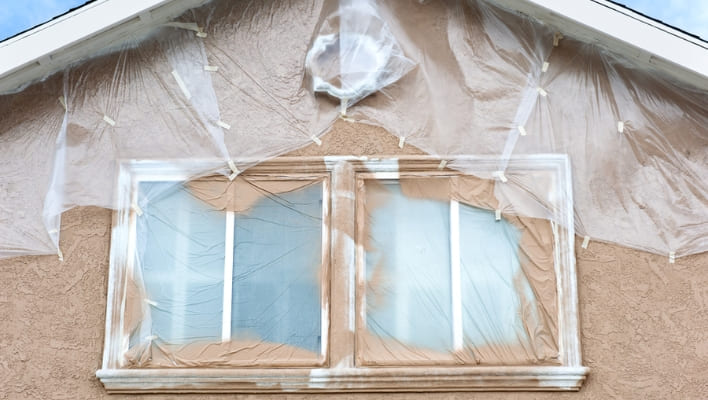
- Water damaged bubbling paint occurs when moisture becomes trapped within or beneath the layers of paint during the application process of my another project as shown in the picture below.
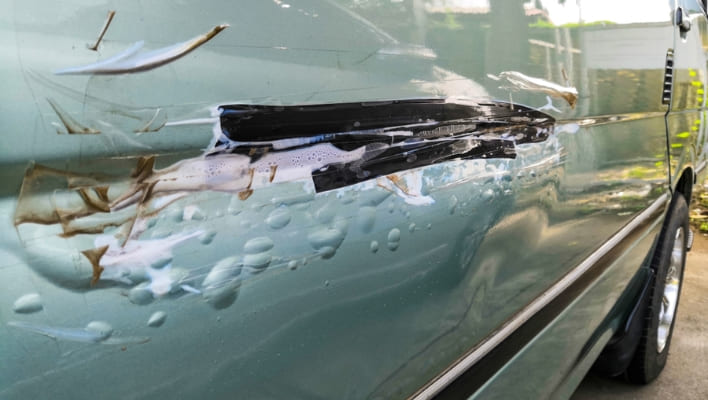
- Trapped moisture slowly moves towards the surface of the paint over time.
- Painting in hot and humid weather can lead to moisture being trapped within the paint layers because the high humidity level can cause condensation or moisture to be present on the surface when the paint is applied.
- Applying several layers of paint in rapid succession may result in the formation of a barrier that hinders moisture from dissipating. This can also trap solvents used in the paint.
- If the paint takes too long to dry, it provides more time for moisture or debris to become trapped within the paint layers.
- When a surface is stripped of paint but left bare for an extended period before repainting, moisture and debris can accumulate on it. Applying paint over this can lead to bubble formation.
- Using low-quality paint thinner in the paint mixture can disrupt the paint’s chemical balance, making it more susceptible to moisture-related issues.
- If the undercoat is not allowed to fully dry before applying the topcoat, it can trap moisture, which may eventually lead to bubbles forming in the paint.
How To Fix Paint Blisters On Car?
To help you restore your car’s pristine finish, here’s a step-by-step guide in easy-to-understand language:
Materials And Tools Required To Fix Bubbling on car paint
- Clean Microfiber Cloths
- Wax & Grease Remover
- Automotive Masking Tape
- Q-tips
- Wire Wheel Brush
- Sandpaper (80 – 600 Grit)
- Body Filler & Hardener
- Spot Putty
- Self-etching Primer
- Filler Primer
- Perfectly Matched Paint
- Clear Coat
- Light Cutting Compound/Polish
- Orbital Buffer
Step 1: Clean the Area
Start by cleaning the entire affected area with wax and grease remover. This will ensure that no contaminants like road grime, tar, or wax interfere with the repair process.
Step 2: Protect Surrounding Areas
If you can’t remove surrounding trim, use Q-tips or masking tape to protect it from accidental damage during the repair.
Step 3: Remove Rust
Use a wire brush on a grinder to eliminate as much surface rust as possible. For remaining rust, employ rough 80-grit sandpaper. Sand in a cross-hatch pattern to reach the metal beneath. Don’t hesitate to sand beyond the chip’s borders if necessary. Learn more about sanding car.
Step 4: Apply Body Filler
Clean off the sandpaper dust with compressed air. Mix Bondo body filler and hardener as it provides excellent adhesion properties, ensuring a seamless and long-lasting repair. Spread a thin layer over the sanded area using a squeegee. Let it cure per the instructions.
Begin sanding with 80-grit sandpaper, maintaining a cross-hatch pattern. Continue switching gradually to finer grits for a smoother finish.
Step 5: Use Spot Putty
For minor imperfections, use Bondo Glazing spot putty. The reason why I preferred this is that it offers easy sanding and smoothing capabilities, allowing for a seamless finish on the repaired area. Let it dry and sand again, this time with 400-grit sandpaper.
Step 6: Primer
Mask off areas where you don’t intend to spray or paint. Start cleaning the whole area with Kleanstrip wax and grease remover. It is highly effective because it not only cleans the surface thoroughly but also leaves no residue behind, providing great stickiness for the primer and paint layers.
Moreover, its fast-drying formula saves valuable time during the repair process while delivering a clean surface ready for priming and painting.
After the grease removes got dried, apply a coat of Rust-Oleum self-etching primer, followed by filler primer. It works amazing for automotive paint blister repair due to its ability to create a strong bond with bare metal surfaces, offering corrosion resistance in the repaired area.
After the paint has dried, lightly sand the surface using 400-grit sandpaper to achieve a smooth finish. Finish with fine 600-grit sandpaper.
Step 7: Painting
Ensure the repaired area is clean and dry. Start applying the first coat of Perfect Match Paint. This paint is highly regarded for its fast-drying formula, allowing for efficient and timely paint repairs.
Its lacquer-based composition ensures a durable finish on various surfaces like metal and plastic, making it versatile for automotive touch-ups.
With a short full cure time of just 1 hour and excellent coverage, it provides convenience and effective results in automotive paint applications.
Step 8: Applying Clear Coat
After two or three coats, it’s time for Urethane automotive clear coat as it offers superior durability and UV protection, ensuring a long-lasting and glossy finish for your car’s paint repair. Apply 2 to 3 thin coats and allow them to dry between applications.
Step 9: Final Buff
When the paint is dry, use an orbital buffer and a light Wizards finish cut compound or polish to buff the repaired area.
I found it exceptional for its fine abrasive properties that eliminate imperfections and enhance the paint’s glossy finish, providing professional-grade results in automotive paint repair.
This will blend the repair seamlessly with the rest of the paint, leaving your car looking like new.
How to Fix Rust Bubbles on a Car
To address rust bubbles on your car, follow these steps:
- Safety First: Wear gloves and goggles to protect yourself.
- Rust Removal: Remove loose rust and paint using a wire brush or sandpaper.
- Rust Converter: Apply a rust converter to halt further corrosion, allowing it to dry thoroughly.
- Surface Smoothing: Sand the area until it’s smooth.
- Primer Application: Use rust-inhibiting primer to prepare the surface for painting.
- Paint Match: Choose a matching automotive paint color.
- Thin Coats: Apply multiple thin coats of paint, allowing each to dry.
- Protective Finish: Finish with a clear coat for added protection.
Recommended Products:
- Rust-Oleum Rust Reformer: Effective rust converter.
- Dupli-Color Automotive Touch-Up Paint: Quality automotive paint.
How Much Is The Cost Of Fixing Bubbling Paint On A Car?
Addressing bubbling paint on a car varies in cost. Minor issues may range from $50 to a few hundred dollars, while extensive problems could cost between $300 and $1,000 for a complete repaint, influenced by make, model, and paint choice.
DIY options are budget-friendly, involving sanding, body filler, and repainting.
Wrapping Up
Fixing paint blisters on a car demands precision and the right materials. DIY options are more budget-friendly. This comprehensive step-by-step tutorial offers an efficient solution for addressing paint blisters on your car, helping to rejuvenate its appearance while also averting potential structural concerns.
No matter if you take professional help or a DIY approach, fixing paint blisters is important for both aesthetics and durability.
FAQs On how to fix paint blisters on car
Q: How do you flatten paint bubbles?
To flatten paint bubbles, start by letting the affected area dry completely. Then, delicately sand the paint bubbles with fine-grit sandpaper until achieving a smooth surface. Finish by applying a thin layer of primer and paint, feathering it into the surrounding area.
Q: How do you fix bubbling paint without repainting?
To fix bubbling paint without repainting, carefully cut around the bubble with a utility knife. Peel away the loose paint, sand the edges, and then use spackling compound to fill the void. Sand it smooth, prime, and touch up with matching paint.
Q: How to fix car paint bubbles after rain?
After rain, dry the car thoroughly. Use a fine-grit sandpaper to gently smooth out the bubbles. Clean the area, apply a rust inhibitor if needed, and touch up with automotive paint.
Q: How to address tiny bubbles in car paint?
Tiny bubbles in car paint can be fixed by lightly sanding the affected area, cleaning it, and applying touch-up paint. Ensure the car’s surface is dry before tackling the bubbles.
Q: Will paint blisters go away?
Paint blisters, often caused by issues like moisture or improper application, won’t typically go away on their own. You’ll need to address the underlying problem and then fix the affected area. This usually involves scraping, sanding, and repainting the surface after addressing the root cause to prevent future blistering. Ignoring paint blisters can lead to more extensive damage over time.

Rosalie Sanchez
DIY enthusiast with years of experience in home decor and home improvement. With a passion for educating consumers about DIY projects. Every time, I work with our painting professionals to provide you with the best painting product reviews and how-to advice. You can follow me on Facebook.