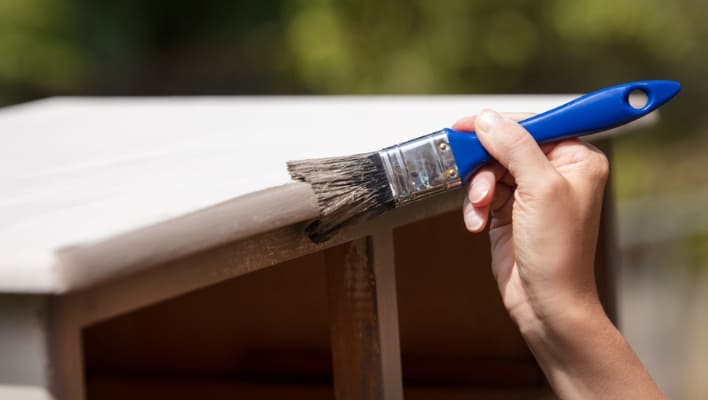
If you’re into sprucing up old furniture with a DIY touch, you’ve likely tried your hand at chalk painting. While many tout its ease, the reality can be different. Despite its supposed ease of use, chalk paint comes with its set of challenges, from adhesion problems to a grainy texture. In this brief exploration, we’ll discuss five common issues encountered with chalk paint and provide tips on how to fix chalk paint problems.
Are you ready to learn from chalk paint mistakes, so next time, it’s perfect. Let’s begin!
Table of Contents
- A Common Cause of Chalk Paint Problems and Quick Fixes
- What not to do with chalk paint?
- What is Chalking?
- What is the problem with chalk paint?
- Why does my chalk paint look patchy?
- Reasons for Chalk Paint Looking Patchy
- Fixes for Patchy Chalk Paint
- Is chalk paint bad for lungs?
- Does chalk paint need primer?
- Can you paint furniture with chalk paint without sanding?
- How many coats of chalk paint is best?
- Does chalk paint require a top coat?
- Is it best to use a brush or roller with chalk paint?
- How long after chalk painting can I wax furniture?
- Conclusion:
- Rosalie Sanchez
A Common Cause of Chalk Paint Problems and Quick Fixes
| Chalk Paint Mistakes / Problem | Cause | Solution |
| Chalk paint is not sticking Or Poor Adhesion Leading to Scratches and Chips | Inadequate surface preparation or cleaning | Thoroughly clean and sand, use a quality primer |
| Brush Marks and Strokes in Chalk Paint | Incorrect brush or application technique | Choose a good quality brush, apply paint consistently |
| Streaky Topcoat Finish/Chalk Paint Looks Streaky | Uneven application or drying conditions | Apply thin, even coats, work in smaller sections |
| Lumpy Chalk Paint | Dried paint or impurities | Strain paint, store properly |
| Chalk Paint Bleed Through | Water-based paint allowing stains to bleed | Use a stain-blocking primer before chalk paint |
| Chalk Paint Cracking / peeling | Thick application or insufficient prep or poor quality chalk paint | Sand between coats, apply thinner layers of quality paint |
| Over Distressing | Excessive sanding or distressing techniques | Moderate distressing, sand strategically |
| Chalk Paint Scratching off with Fingernail | Insufficient curing or inadequate sealing | Allow ample cure time, use a protective topcoat |
| Chalk Paint Coming off When Waxing | Applying wax too soon or overapplying | Ensure paint is fully cured, use a thin layer of wax |
| Not Waxing After Applying Chalk Paint | Skipping the waxing step | Seal chalk paint with wax or protective finish |
| Applying Too Much Wax to the Painted Piece | Overusing wax | Apply a thin layer of wax, buff between coats |
| Not Monitoring Temperature and Humidity Levels | Environmental conditions affecting drying | Paint in controlled environment, adjust conditions |
| Chalk Paint Not Covering | Insufficient primer or thin paint application | Use quality primer, apply multiple thin coats |
| Skip Cure Time | Rushing through the curing process | Follow recommended cure times between coats |
| Too Much Paint | Thick layers of paint | Apply thin, even coats, let each layer dry |
| Chalk Paint Bubbles | Rapid drying or trapped air | Avoid overbrushing, work in suitable conditions |
| Fix Stained Chalk Paint | Stains bleeding through chalk paint | Use stain-blocking primer before repainting |
| Not Stirring the Paint | Settling of pigments or separation in paint | Stir paint thoroughly before each use |
What not to do with chalk paint?
- Clean and sand before chalk painting.
- Use a good brush.
- Apply paint thinly to prevent cracking.
- Always use primer, especially on tough surfaces.
- Sand between coats for a smoother finish and let it dry completely.
- Don’t distress too much for a balanced look.
- Use wax carefully for an even finish.
- Wax only when the paint is fully dry.
- Apply a protective topcoat for durability.
- Consider the environment when painting.
- Stir the paint well each time for consistency.
What is Chalking?
Chalking happens when paint gets older and is exposed to sunlight and weather. The acrylic resin in the paint breaks down, releasing pigments and fillers like calcium carbonate. This can make the wall surface look chalky. If this isn’t fixed, it can affect how new paint sticks. Before putting on a new coat, it’s a good idea to use an acrylic bonding sealer on surfaces that were painted before. This helps the new paint stick better and gives a smoother finish.
What is the problem with chalk paint?

Chalk paint is ease to use, but it can have some issues. These include problems like poor adhesion causing scratches, visible brush marks, streaky finishes, or a lumpy texture. Stains might bleed through, and the paint could crack or scratch easily if not applied correctly. To avoid these problems, make sure to prepare surfaces well, use the right tools, and follow the recommended techniques for applying and sealing chalk paint.
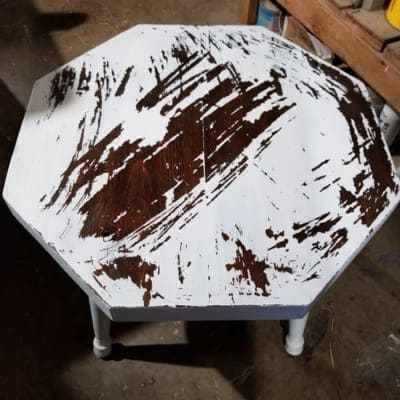
Why does my chalk paint look patchy?
Reasons for Chalk Paint Looking Patchy
Chalk paint may appear patchy due to uneven application, inadequate mixing, insufficient priming, dry brushing techniques, inconsistent sanding, or the use of poor-quality paint. These factors can lead to variations in color and texture on the painted surface, creating an uneven and patchy appearance.
Fixes for Patchy Chalk Paint
To address patchiness, ensure even application by using consistent strokes, thoroughly mix the paint before use, apply a suitable primer for better adhesion, avoid dry brushing, sand surfaces uniformly, and invest in high-quality, fresh chalk paint. Taking these steps will contribute to a smoother and more uniform finish, eliminating the patchy look in your chalk paint projects.
Is chalk paint bad for lungs?
Chalk paint is usually safer for breathing than many regular paints because it has low levels of harmful fumes. However, it’s important to use chalk paint in a place with good airflow to reduce the chances of breathing in anything harmful. Follow safety guidelines, wear a mask if necessary, and choose water-based, low-VOC chalk paints to lessen the impact on your breathing.
Does chalk paint need primer?
Chalk paint typically doesn’t require a primer, as it is known for its excellent adhesion to various surfaces. The porous nature of chalk paint allows it to grip onto most surfaces, including wood, metal, and even previously painted or varnished items. However, if you’re working with a particularly slick or shiny surface, using a primer can enhance adhesion and ensure a more durable finish. It’s advisable to assess the specific project and surface conditions to determine whether using a primer is necessary for optimal results.
Can you paint furniture with chalk paint without sanding?
Absolutely, you can usually paint furniture using chalk paint without the hassle of sanding. Chalk paint sticks well to surfaces without needing lots of sanding or priming. However, it works best if your furniture is in good shape – smooth and clean. If you want an even better result and a smoother finish, you can lightly sand the surface or use a deglosser. Just make sure to clean the furniture really well before you start painting to make sure the paint sticks nicely.
How many coats of chalk paint is best?
To paint with chalk paint, put on 2-3 layers, depending on your preferred color and how much you want it to show. If it’s a dark or strong color, you might need extra layers for full coverage. For lighter shades or vibrant colors like bold blue, you might need more than 4 coats. This usually takes about 1 hour so let it dry completely.
Does chalk paint require a top coat?
Chalk paint doesn’t always need a top coat, but adding one is recommended for better protection. A top coat adds a layer that shields the painted surface from damage, stains, and scratches, making it last longer. Some chalk paints may have a built-in sealer, but for strong results, especially in busy areas, it’s good to apply a clear wax (more durable) or water-based polyurethane. So, if you want a tough finish, it’s important to consider applying a water-based polyurethane topcoat.
Is it best to use a brush or roller with chalk paint?
Deciding between a brush or roller for chalk paint depends on your project. Use a brush for detailed areas and a textured look, and a roller for large, smooth surfaces to get a more even finish with fewer brush marks. You can even use both – a brush for details and a roller for bigger parts. Try both tools to see what works best for your project and the style you want.
How long after chalk painting can I wax furniture?
Wait about 24 hours after chalk painting furniture before applying wax. This gives the paint enough time to fully dry and set. Make sure the surface feels dry before waxing. The waiting time may vary based on factors like humidity and temperature, so check the paint instructions for the best guidance.
Conclusion:
In conclusion, addressing chalk paint problems and fixing mistakes is crucial for achieving a successful and polished finish. Understanding common issues and their remedies ensures a smoother application and enhances the overall quality of painted surfaces. Whether dealing with adhesion challenges, streaks, or other imperfections, knowing how to rectify chalk paint mistakes contributes to a more satisfying and professional outcome in furniture and decorative projects.

Rosalie Sanchez
DIY enthusiast with years of experience in home decor and home improvement. With a passion for educating consumers about DIY projects. Every time, I work with our painting professionals to provide you with the best painting product reviews and how-to advice. You can follow me on Facebook.