Benjamin Moore expert Mark Ferrauiolo explains that “enamel paint” is frequently used inaccurately, people commonly use it to refer to paints with a sheen (satin, semi-gloss, or gloss), but technically, all paints fall under the category of enamels.
Using enamel paint for furniture is a versatile and effective choice for refinishing and beautifying its look. Its durability, glossy finish, and ease of application make it a preferred option for many DIY enthusiasts and professional furniture refinishers alike.
In this blog, I’m going to take you on my journey of using enamel paint to revive my dresser. From repairing damaged drawers to selecting the best enamel paint for your project, I’ll cover everything you need to know. You’ll discover the art of sanding, the magic of color washes, and the importance of primers to make your furniture project turn out just the way you envision it.
So, let’s begin and discover the art of using enamel paint to achieve a stunning, long-lasting result that will sparkle your furniture in any room.
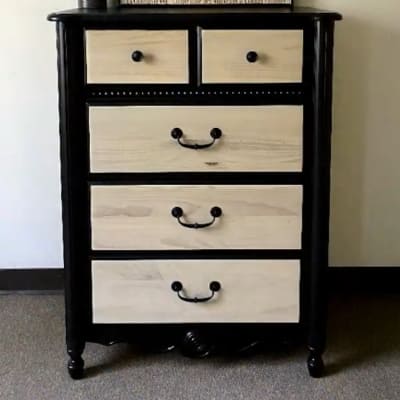
Table of Contents
- How To Paint Enamel On Furniture?
- Step1: Repairing The Drawer
- Step 2: Bleaching The Wood Furniture
- Step 3 : The Art of Sanding Before Painting
- Step 4: Playing with Colors
- Step 6: Applying Primer
- Step 6: Apply Enamel Spray Paint For Wood
- Step 7: quick dry enamel paint for wood & Finishing
- Step 8: The Grand Reassembly
- Best Enamel Paint For Furniture
- How To Apply Paint Over Enamel Paint Without Sanding?
- How To Clean Enamel Paint From Paint Brushes?
- Final Thoughts On furniture enamel paint
- FAQ On Painting Furniture With Enamel Paint
- Q. What type of paint is best for painting furniture?
- Q. Can you sand enamel paint?
- Q. Does enamel paint need a primer on metal?
- Q. What is enamel paint good for?
- Q. Do we need a clear coat for enamel paint?
- Jennifer Marie
How To Paint Enamel On Furniture?
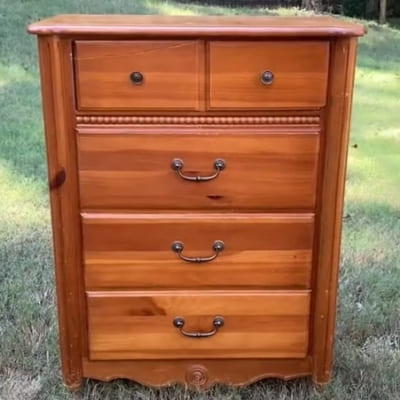
I restored a beautiful dresser that I bought for only $40. I love the intricate details on this dresser and I even like the hardware that I end up reusing it.
Step1: Repairing The Drawer
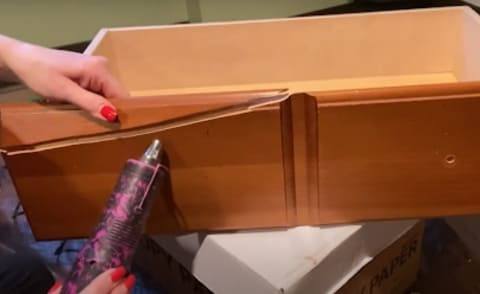
In the first step of the restoration process, I had to address a previously-done messy glue repair job on the drawer.
My objective was to rectify this by removing the old glue and reattaching the dislodged part securely. To accomplish this, I used a heat gun to gently soften the adhesive, allowing for its effortless removal.
Once the glue was successfully removed, I opted for Titebond Original Wood Glue as you can see in the picture below, applying it evenly to the damaged area using a brush. This meticulous application refines a robust and aesthetically pleasing bond, effectively restoring the integrity of the broken section.

With the repair now looking remarkably improved, I proceeded to enhance the surface color. To achieve this, I applied Durham’s Water Putty to the affected area.
This final touch not only strengthened the repaired section but also provided a seamless, polished appearance to the drawer, leaving it in pristine condition.
Step 2: Bleaching The Wood Furniture
To achieve the desired lighter wood appearance, I planned for a bleach treatment on the drawer fronts. Three rounds of bleach were carefully applied, so that the wood didn’t become excessively wet.
Step 3 : The Art of Sanding Before Painting

After each bleach application, with the vision of a beautifully restored dresser in mind, I began the sanding process. I took my time, starting with coarse 80 grit sandpaper, using a Surfprep foam pad and gradually progressed through higher grits like 150, 180, and completed with 220 grit to achieve a perfectly smooth surface.
I carefully sanded the drawer fronts, paying extra attention to areas where I applied wood putty for dings and the spots I wanted to give that charming weathered look.
Additionally, I addressed any wood fibers that had raised due to my bleach application.
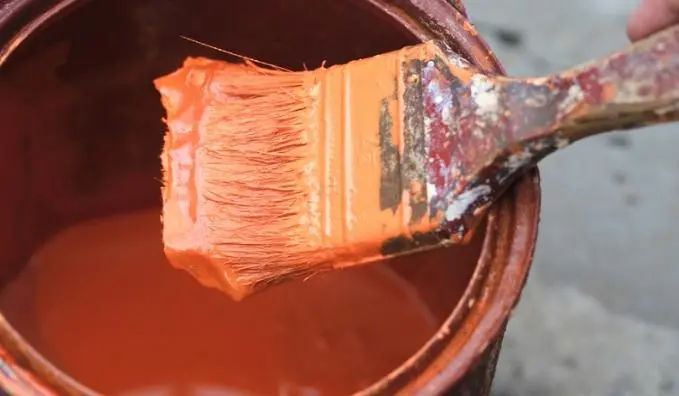
Step 4: Playing with Colors
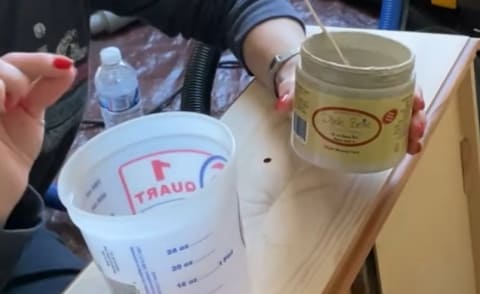
Now came the creative part; I crafted a color wash using Dixie Belle Sand Bar paint mixed with an equal part of water.
With a paintbrush, I applied this wash to the drawer fronts, letting it soak into the wood.
After just the right amount of time, I wiped off the excess in harmony with the wood grain, using lint-free rags.
Helpful Resource: In our recent articles, we’ve discussed the benefits of various paint types, including Wise Owl One Hour Enamel. Check out our One Hour Enamel Review for more details!
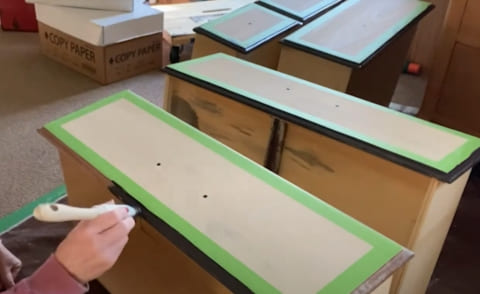
Step 6: Applying Primer

For those areas where I’d exposed raw wood; places that had seen wood putty or other repairs, I made sure to use a Rust-Oleum Zinsser Bulls Eye Shellac, best primer for enamel paint.
Following the primer application, a gentle scuff brought uniform paint adhesion, preventing any unwanted shiny spots that could disrupt the paint’s consistency.
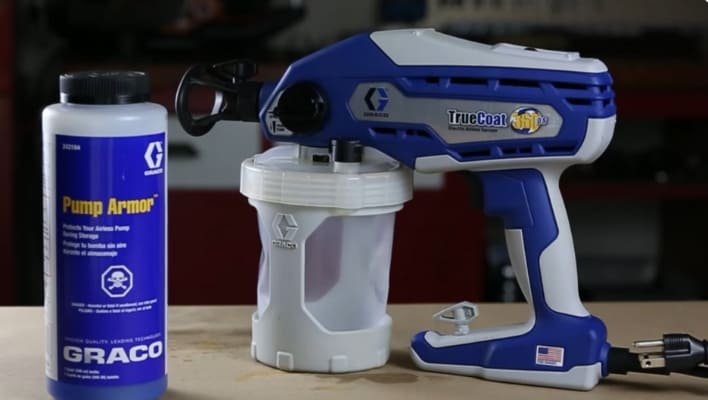
Step 6: Apply Enamel Spray Paint For Wood
For the main painting act, I tested Majic Satin Enamel Acrylic Paint. This water-based enamel, enriched with acrylic properties, was my go-to choice. Its built-in primer made it ideal for darker colors, and it provided smooth and uniform edges.
I began with delicate hand-painting along the outer parts of the drawers to ensure precision.
Using a combination of a brush and roller, I tackled the rest of the dresser in sections, deftly blending with a dry foam roller.
After the initial coat, I allowed it to rest for a solid eight hours before applying the second layer.
Depending on the final look and durability I sought, I even went ahead with a third coat for touch-ups and extra protection. Furthermore, I have tried RustOleum protective enamel paint for repairing chipped wood furniture, and it worked well.
Useful Resource: If you need to thin enamel paint, check out this guide!
Step 7: quick dry enamel paint for wood & Finishing
With the paint in place, patience became my virtue as I allowed the dresser to cure fully. Though, this paint can give a dry feel to your touch but it needs around 3 weeks to become scratch resistant.
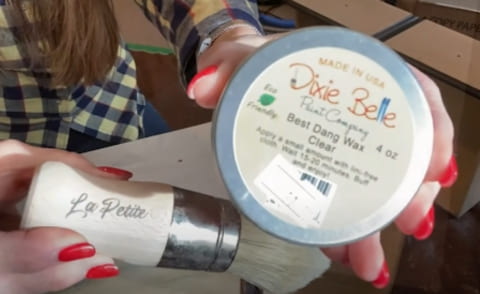
This period could span up to 30 days for a complete cure. Deciding not to apply a top coat, I relied on the enamel paint’s inherent protection and its beautifully smooth look.
However, for those who desire added safeguarding, I’d recommend applying Dixie Belle Clear Wax with a brush to the drawer fronts.
After waxing, a simple buffing maneuver left a polished, protective layer that marked the glorious conclusion of my restoration journey.
Step 8: The Grand Reassembly
Once every layer of paint and flawless touch was perfectly dried and cured, it was time for the grand finale; reattaching the carefully preserved hardware to my beautifully restored dresser.
The transformation was awe-inspiring, and I couldn’t be happier with the revived beauty of my once-forgotten furniture piece.
Best Enamel Paint For Furniture
I am fond of using different paints for my DIYs, and I have used different enamel paints for furniture so far. I’d like to share my recommendations for these paints with you other than Majic Satin Enamel Acrylic Paint, as they’ve proven to be a valuable addition to my painting toolkit.
- Majic Acrylic High Gloss Enamel Paint: This paint features an easy-to-clean and durable glossy finish. It works as the best enamel paint for furniture, metal, wood, brick, and more. You can use it for repurposing interior or exterior projects.
- DecoArt Satin Enamels Paint: It’s a water-based acrylic paint that doesn’t need priming. It adheres well to all furniture surfaces, and dries quickly, providing a durable coating.
- Rust-Oleum Multi-Purpose Enamel Paint: Known for its versatility and long-lasting performance, I found it to be the best paint for cement, tiles, doors, furniture, and other interior and exterior surfaces. It produces smooth outlines when you apply paint with a brush instead of a foam roller. It gives consistent painting results when thinned before applying.
How To Apply Paint Over Enamel Paint Without Sanding?
When you want to paint over an existing enamel paint job without sanding, you can alternatively use Zinsser, B-I-N Shellac Primer. Simply, apply primer to the surface before adding your new paint and it will act as a base coat and help the new paint bond properly.
Remember, simply applying enamel paint on top of an existing surface without preparing it isn’t a recommended approach. So, take the time to sand the surface for the best results in your painting project.
How To Clean Enamel Paint From Paint Brushes?
Cleaning enamel paint from paint brushes can be a straightforward process with the right approach:
- Use a putty knife or cloth to scrape off excess paint.
- Leave the brush for soaking in mineral spirits or paint thinner for about 30 minutes.
- Stir the brush during soaking to loosen the paint.
- Scrub off remaining paint using a wire brush or toothbrush.
- Rinse the brush with mild soap and clean water.
- If necessary, repeat until the brush is clean.
- Shape bristles and air dry them.
Final Thoughts On furniture enamel paint
Enamel paint for furniture opens up a world of creative possibilities to transform your old piece into cherished pieces that shine with long-lasting beauty in any room. From repairing and prepping the surface to selecting the right enamel paint and applying it with precision, consider this article as your helping guide to achieving enduring neat paint layers on your furniture projects.
FAQ On Painting Furniture With Enamel Paint
Q. What type of paint is best for painting furniture?
When painting furniture, semi gloss or satin finishes with either oil-based or latex paints are ideal to use. You should also use the primer before painting. If you opt for latex paint, consider using a latex primer, which is easy to apply, covers stains effectively, and lacks the strong oil-based primers odors.
Q. Can you sand enamel paint?
Yes, you can sand enamel paint, but it’s important to approach this task with care. Sanding enamel paint is done to prepare the surface for repainting and smooth out imperfections. To do this, you’ll need sandpaper with the 80 grit, safety gear, and a clean workspace. Begin with a finer grit and gradually move forward to coarser grits for desired results.
Q. Does enamel paint need a primer on metal?
A primer is typically needed when using enamel paint on metal to ensure a smooth and adherent topcoat application. It prepares the metal surface for painting.
Q. What is enamel paint good for?
Enamel paints are versatile and suitable for painting a wide range of surfaces and objects, including ceramic tiles, wood, glass, furniture, and glass.
Q. Do we need a clear coat for enamel paint?
A clear coat may not always be necessary after using enamel paint. It is applied differently depending on the type of enamel and purpose. Enamel paint contains additives that provide its durable and hard layer, and whether or not a clear coat is needed varies based on these factors.

Jennifer Marie
Jennifer Marie is a general contractor with over the years of experience in home remodeling, DIY projects, and commercial painting projects. Her experience includes working with paint sprayers, painting tools, and other painting supplies. You can follow her on Facebook.