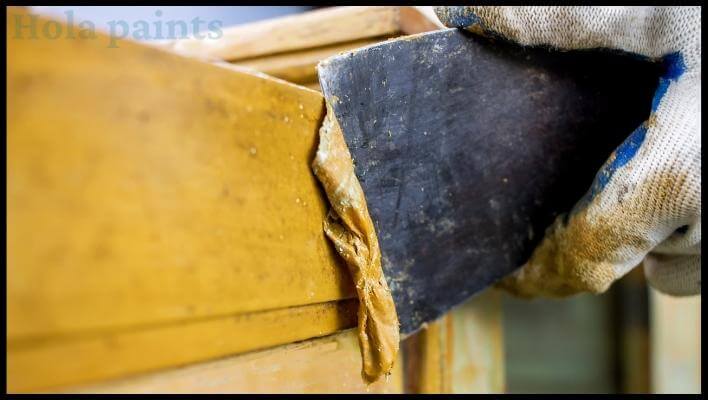
Preserving the look and ensuring the durability of your wooden fence requires an important step: cleaning before applying a stain. Wood fences, chosen for their affordability and aesthetic appeal, can lose their visual charm over time due to the accumulation of dirt and grime. Many homeowners ask for advice on cleaning wood fences long before visible damage occurs, emphasizing the importance of taking proactive measures.
To safeguard your wood fence from the elements, it’s crucial to adhere to proper cleaning procedures. Whether utilizing a pressure washer or opting for alternative methods, our guide on how to clean a fence before staining offers a comprehensive overview of techniques and tools necessary for effective fence cleaning before staining.
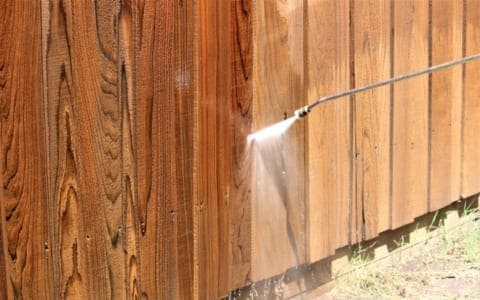
Table of Contents
- How to clean a fence before staining wood-Step By Step
- 1. Gather Your Tools:
- 2. Clear the Area:
- 3. Get Rid of Dirt and Debris:
- 4. Treat Stubborn Stains:
- 5. Optional Pressure Wash:
- 6. Rinse with Hose:
- 7. Allow to Dry:
- 8. Check for Damage:
- 9. Choose the Right Stain:
- 10. Apply the Stain:
- 11. Let It Dry:
- How To Pressure wash fence before staining?
- Optimal Pressure for Wood Protection
- Methodical Cleaning Approach
- Dealing with Residue
- Addressing Mold, Mildew, and Algae
- Drying and Staining
- Why do you need to power wash before staining?
- How to clean a wood fence without pressure washing?
- Materials and Supplies:
- Best Homemade Fence Cleaner:
- Cleaning Process:
- Commercial Cleaner Option:
- Conclusion:
- FAQS
- Do I need to wash my fence before staining?
- What happens if you stain a dirty fence?
- How long after washing a fence can you stain it?
- Do you need to clean a new fence before staining?
- Martina Hitchcock
How to clean a fence before staining wood-Step By Step
Preparing your fence before staining is essential for a smooth and durable finish. Here’s a guide to clean wooden fence manually!
1. Gather Your Tools:
Before you begin, collect the tools you’ll need – a stiff brush, garden hose, mild detergent, oxygen bleach, and safety gear like gloves and goggles.
2. Clear the Area:
Remove plants, furniture, or anything near the fence to create a clean workspace and avoid damage to your belongings.
3. Get Rid of Dirt and Debris:
Use the stiff brush to scrub away loose dirt, cobwebs, and debris, paying extra attention to corners and crevices.
4. Treat Stubborn Stains:
For tough stains like mold or mildew, make a solution of water, mild detergent, and a bit of oxygen bleach. You can treat stains by letting the solution sit, then scrub.
Oxygen bleach effectively removes green algae, while bleach is a potent cleaner for severe stains, tackling mold, mildew, hard water, and rust stains on your fence. It restores the wood’s original appearance.
5. Optional Pressure Wash:
If your fence is very dirty, use a pressure washer with moderate pressure to avoid wood damage. Hold the nozzle at a 45-degree angle and work from top to bottom.
6. Rinse with Hose:
After scrubbing or pressure washing, thoroughly rinse the fence with a garden hose to remove any cleaning solution.
7. Allow to Dry:
Let the fence dry completely for a day or two before moving on to staining.
8. Check for Damage:
While drying, inspect the fence for any damage like loose boards or nails. Fix any issues before applying the stain.
9. Choose the Right Stain:
Pick a high-quality wood stain based on your preference, considering clear or tinted finishes.
10. Apply the Stain:
Follow the stain manufacturer’s instructions using a brush, roller, or sprayer for even coverage. Watch for drips or excess stain.
11. Let It Dry:
Let the stain dry for a day or two before touching or re-attaching hardware.
By following these steps, you’ll have a spotless fence ready for staining, enhancing its appearance and protecting it from the elements.
How To Pressure wash fence before staining?
Before you start pressure washing your wooden fence, prioritize safety by donning appropriate gear and ensuring your equipment is properly connected. Attach the garden hose to your power washer and then connect the high-pressure hose from the washer to the spray wand. Remember to fill the power washer with water before turning it on.
Optimal Pressure for Wood Protection
To avoid damaging your wooden fence, it’s crucial to set the right pressure. A PSI of less than 2000 is recommended, especially for soft woods like pine or cedar. For softer woods, start with 500 to 600 psi, while harder woods can tolerate 1200 to 2000 psi. The goal is to use the minimum pressure required to effectively remove dirt and grime without harming the wood.
Methodical Cleaning Approach
Starting at the top of your fence, adopt a careful approach. Hold the spray wand at a 25-degree angle, positioning it 12 to 24 inches away from the wood. Employ a downward motion as you work your way from top to bottom in small sections. Ensure a continuous movement to prevent concentrated pressure in one spot, which could damage the wood.
After cleaning a section, check for cleanliness. If necessary, repeat the process until satisfied before moving on to the next section. This methodical approach ensures that your entire fence is cleaned thoroughly and uniformly.
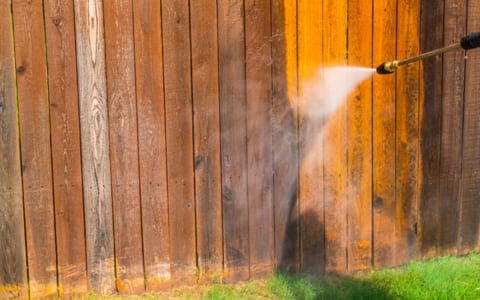
Dealing with Residue
During the cleaning process, you may encounter accumulated gunk at the bottom of the fence. Collect this debris in a bucket for proper disposal, either through composting or regular trash.
Addressing Mold, Mildew, and Algae
If you encounter mold, mildew, or algae during the cleaning process, pause and address these contaminants. Apply a bleach solution and, if needed, use a brush to remove stubborn mildew before continuing with the pressure washing.
Drying and Staining
Once the cleaning is complete, turn off the washer and inspect each section to ensure cleanliness. Allow the fence to air dry thoroughly before considering any staining. The summer season is ideal for cleaning and staining a wooden fence, providing optimal conditions for the wood to dry and absorb the stain effectively.
Why do you need to power wash before staining?
- Power washing is effective in removing accumulated dirt, grime, mold, and mildew from the fence.
- It also eliminates any loose or peeling paint or stain, ensuring a clean and smooth surface for the new finish.
- Pressure washing is crucial to strip away old finishes on the fence, facilitating proper adhesion of the new stain.
- This step is essential for preventing the risk of peeling or uneven application of the new stain.
- Proper cleaning through pressure washing allows the new stain to bond securely with the wood surface.
- The significance of pressure washing is evident in enhancing the longevity of the deck paint or stain.
- Thoroughly cleaning the fence ensures that the applied finish adheres more securely to the bare wood.
How to clean a wood fence without pressure washing?
To clean a wooden fence without a pressure washer, you can opt for an effective alternative using readily available household items. Here’s a DIY method that doesn’t require a power washer:
Materials and Supplies:
- Bucket
- Stiff Bristle Brush (with handle recommended)
- Rags
- Long Garden Hose
- Safety Goggles
- Gloves
- Work Clothes (water-resistant if available)
Best Homemade Fence Cleaner:
To make a strong fence cleaner, mix 1 cup of white vinegar with 1 gallon of water and improve its effectiveness by adding a small amount of dish soap. Ensure thorough mixing to create a consistent solution.
NOTE: Vinegar is a mild acid that can effectively remove mildew and mold, while baking soda, being abrasive, helps in scrubbing off dirt. Although vinegar is generally viewed as a safe and environmentally friendly cleaner, it’s important to handle it with care. Properly diluting vinegar with water and thoroughly rinsing the wood fence after cleaning are crucial steps to prevent any potential damage. If you’re uncertain or if your fence has a specific finish, it’s advisable to seek guidance from the manufacturer or consult with a professional.
Cleaning Process:
Preparation:
Put on your safety gear – goggles and gloves – and wear suitable work clothes.
Wet the Fence:
Use the garden hose to wet the fence thoroughly. This step helps prepare the wood for cleaning.
Apply the Cleaner:
Dip the stiff brush into the homemade cleaner and scrub each board individually. Apply sufficient pressure to remove dirt, grime, and other contaminants.
Extra Cleaning Power:
If your fence has mold, algae, or mildew, consider adding a diluted bleach solution. Prepare a separate solution using two parts bleach and one part water; apply this to the fence before using the homemade cleaner.
Scrubbing:
Scrub each board with the bleach solution using the brush or a sponge. Allow it to sit on the wood for about three to five minutes to ensure effective cleaning.
Rinse:
Ensure a comprehensive clean by rinsing the fence thoroughly with a garden hose. Move systematically, cleaning one section at a time.
Repeat if Necessary:
Stubborn stains may require a second round of cleaning. Repeat the process until your fence looks revitalized.
Commercial Cleaner Option:
For a store-bought solution, Mold Armor Fence, Deck & Patio Wash is a recommended choice. It’s a bleach-based cleaner designed to eliminate mold and mildew while restoring the appearance of weathered or discolored wood.
Conclusion:
In summary, cleaning your fence before staining wood is a vital part of the process. It enhances the appearance, promotes longevity, and ensures a successful finish. A properly primed and cleaned surface forms the basis for a wooden fence that is both beautifully stained and adequately protected.
FAQS
Do I need to wash my fence before staining?
Yes, it is advisable to clean your fence before applying a stain. Washing the surface helps eliminate dirt, mildew, and other impurities, ensuring better adhesion of the stain and a more uniform finish. You have the option of using a mixture of mild soap and water or a specific wood cleaner to clean it. After cleaning, ensure the fence is entirely dry.
What happens if you stain a dirty fence?
Staining a dirty fence can lead to poor adhesion, causing the top coat to peel away faster. Cleaning the fence before staining is crucial as dirt and grime can prevent the wood from absorbing the stain. Without proper cleaning, not only will the paint peel sooner, but visible dirt and imperfections may show through the stain, wasting both time and money.
How long after washing a fence can you stain it?
It’s recommended to wait 24 to 48 hours after washing your fence before staining. Drying time is influenced by weather conditions, wood type, and the washing method used. Warmer and drier weather accelerates drying, while hardwoods generally dry faster than softer woods. If a power washer is used, it may extend drying time. You should follow the stain manufacturer’s instructions, and perform a water droplet test. If droplets are absorbed, the wood is likely ready for staining; if they bead up, more drying time is needed.
Do you need to clean a new fence before staining?
Yes, it’s recommended to clean a new fence before staining. Cleaning helps remove mill glaze, contaminants, and allows for better stain penetration. Follow the manufacturer’s guidelines for the specific wood and stain you’re using, and consider methods like light sanding or using a wood cleaner.

Martina Hitchcock
Martina Hitchcock is a versatile author with expertise in different fields. As a paint sprayer expert, she has in-depth knowledge of paint spraying techniques, tools, and equipment. Martina is also an experienced home remodeler who has worked on various projects, including kitchen and bathroom renovations, flooring installations, and room additions. Her knowledge of home improvement and remodeling is extensive, and she enjoys sharing her insights and tips with readers. You can follow her on Facebook.