A paint sprayer has revolutionized the painting professional due to its high efficiency, convenience, and affordability. It shortens the preparation and project time with an improved paint finish. Do you understand, it habitually happens when you do not use the sprayer in the exact way? It’s an everyday question about how to use a paint sprayer.
No doubt, using a paint sprayer is a piece of cake but getting efficient results is challenging. I gained some valuable insights while testing paint sprayers. It’s only possible when you keep the right settings, pressure adjustments, and most importantly, have some practice.
I was jammed in a similar spot when I went ahead of using a paint sprayer. It is true that my first project with a paint sprayer was just trash due to a lack of information and practice. If you don’t want to plunge into such a situation, stay with me.
I’ll address all the details about how to use an electric paint sprayer, how to use a magnum paint sprayer, how to set up a paint sprayer, and other necessary details. So, let’s learn how to paint with a sprayer so that you can take advantage of this handy tool.
Materials Required To Get Flawless Finish
| Paint spay gun ( Graco or Wagner ) | Goggles & Gloves |
| Paint container | Respirator |
| Paint strainer | Drop Cloth |
| Painters’ tape | Paint thinner (Like mineral spirit for oil-based paint) |
Table of Contents
- Learn all about your paint sprayer
- Airless vs. HVLP Sprayers vs. Pneumatic
- How To Use A Paint Spray Gun
- Step 1: Prepare The Spray Gun
- Step 2: Practice, Practice, & Practice
- Step 3: Fine-Tune The Sprayer
- Step 4: Try Vertical Spray Pattern
- Step 5: Try Horizontal Spray Pattern
- Step 6: Paint on Surfaces
- Why Should You Use A Paint Sprayer?
- How To Use A Paint Sprayer With An Air Compressor?
- How To Use A Paint Sprayer On Furniture?
- Pro Tips For Using Paint Sprayers
- Tips for Spraying Corners
- Check Your Work
- Paint Sprayers As Applicators
- FAQs On How To Use A Paint Sprayer
- Is it easy to use a paint sprayer?
- Do you have to dilute paint when using a sprayer?
- How do you use a small paint sprayer?
- What kind of paint do you use in a paint sprayer?
- Is it worth getting a paint sprayer?
- Does a paint sprayer use more paint?
- Bottom Line On How To Use A Paint Sprayer
Learn all about your paint sprayer
Airless vs. HVLP Sprayers vs. Pneumatic
| HVLP Paint Sprayer | Airless Paint Sprayer | Pneumatic Paint Sprayer |
| Using a large amount of air to apply paint | Applies paint by atomizing droplets through spray nozzle | Paint is applied with compressed air |
| Reduces paint waste compared to other types | A compressor is not required for airless sprayers | The use of paint is more than that of other types |
| The paint transfer rate of airless spray guns is 40% to 60% | The paint transfer rate of airless spray guns is almost 50% | The paint transfer rate of airless spray guns is 45% to 60% |
| Preparation for painting takes less time | Preparation for painting takes more time | In comparison to airless sprays, it is more messy |
| Ideal for thin paints | Great choice for thicker materials | It is used for car coatings as well as indoor, outdoor, and industrial applications |
| Affordably priced sprayers | The tool is expensive and is usually rented | Cost-effective compared to airless sprayers |
| Best for interior painting projects | Excellent for exterior projects | It is good for painting cabinets, furniture and cars. |
How To Use A Paint Spray Gun
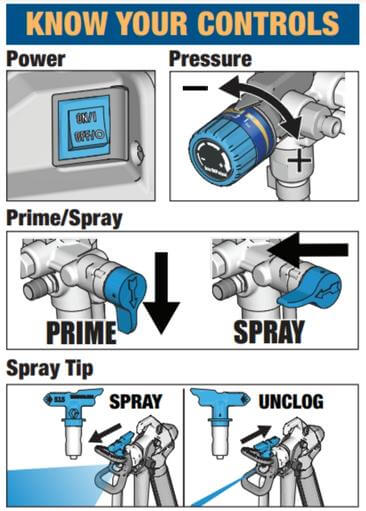
Step 1: Prepare The Spray Gun
Preparing the spray gun is important. It will help run your project finish quickly and smoothly. It includes all the tasks, including cleaning, preparation of the paint, setting up the ladder, figuring out problems, and more. Usually, I recommend you go for the following preparations:
Check The Temperature:
The painting works best when the room temperature is ideal for painting. You might face issues if it’s too cold or hot. The paint may dry not earlier and clog when it’s too cold. Likewise, the paint may dry quickly without proper bonding in hot weather.
Drop Clothes & Sheets:
Remember that you should not create a mess while painting in the room. Keep a drop cloth and cover the windows, ventilation, or other areas with sheets.
Wear Protection Kit:
Painters also have protective gear, and don’t skip this step. Always wear high-quality goggles, clothes, a face mask, and shoes before starting.
Move or Cover Furniture & Rugs:
Always cover the furniture and rugs with sheets while painting in a lounge or bedroom. I usually set them out to the other room or place to lessen the overall cost.
Step 2: Practice, Practice, & Practice
Practice makes everything perfect. Always try to act like you are painting before climbing the ladder and painting the house wall.
For this, I suggest you choose to pick up the paint sprayer in your hands and start acting. You can try it on paper or something else. It will allow you to adjust your hand to get a comfortable painting job at the end. Practice painting in different angles, such as vertical or horizontal, to learn the painting paths.
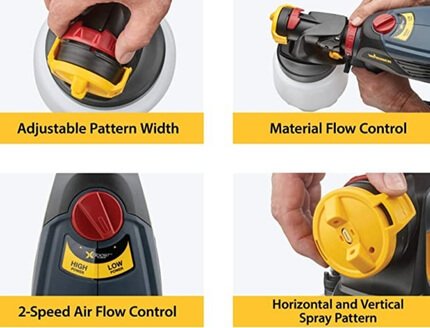
Step 3: Fine-Tune The Sprayer
Besides the painting practice, learn how to adjust the different parameters of a sprayer along with how to use a paint sprayer on ceiling.
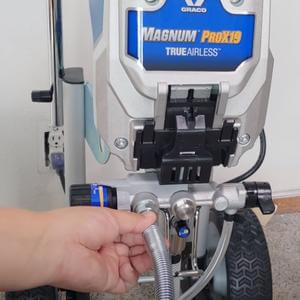
Adjusting the sprayer’s nozzle pressure and the pattern is easy but requires some practice. The most appropriate way is to look through the manual and look into the different adjustment levels.
Click here to learn more about how paint sprayers use more paint than other traditional methods.
Step 4: Try Vertical Spray Pattern
If you want to paint left-to-right or vice versa, a vertical pattern should be your primary choice. It helps create a long and thin oval for lateral paint spraying. Don’t forget to move the spray gun side-to-side with uniform speed. Main a distance of 6-12 inches between the nozzle and the wall.
There should not be arching at the end of each paint stroke. Adjust the speed, pressure, and other parameters to get good paint coverage.
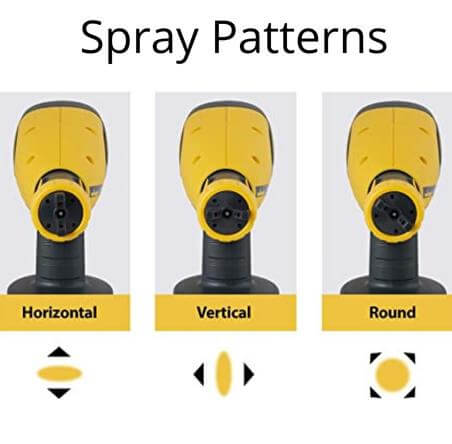
Step 5: Try Horizontal Spray Pattern
To get a wide oval spray pattern, paint in horizontal manners. Try up-to-down and down-to-up strokes with the same technique used for vertical patterns. Inspect how the pattern changes or behaves and try it with different adjustments.
Step 6: Paint on Surfaces
Now, it’s the final point to use a paint sprayer. Select a paint color according to your demand and prepare it in the bucket. Mix the water or oil based on your selected paint type. Fill the sprayer’s paint tank and start painting. Keep the practices in mind and try to get efficient painting results.
Why Should You Use A Paint Sprayer?
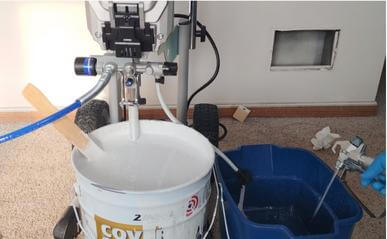
For several reasons, a paint sprayer is preferred for indoor and outdoor painting jobs. It’s helpful to cover large spaces such as a fence, a large bedroom, or exterior siding in minimal time.
Likewise, painting furniture is challenging, and it’s hard to reach tight corners. A sprayer makes your job a breeze by covering all the corners that are almost impossible with a roller or brush. The only drawback is that cleaning a sprayer after completing a job is necessary.
How To Use A Paint Sprayer With An Air Compressor?
Suppose you can’t use a roller or brush at a place; what will you do further? In my opinion, a simple paint sprayer attached with an all-in-all air compressor can sort out this problem. I’ve mentioned the process of using a spray gun with an air compressor in the following:
- Like other painting jobs, preparations are necessary. Make a mixture of paint, cover the windows, and wear safety gear.
- It’s time to choose the right paint tool compatible with an air compressor.
- Adjust the settings of your gun until it produces the right amount of pressure and flow for the job. To prevent paint from dripping or running, hold the gun about 6 to 10 inches away from the surface while spraying.
How To Use A Paint Sprayer On Furniture?
Painting home or office furniture using a sprayer is a convenient task. Follow the instructions below to get a beautiful and new look for your furniture.
- Prepare the furniture for painting. Sanding is the first step in removing the old paint and dirt. Start with light sanding and sand with more strength if needed.
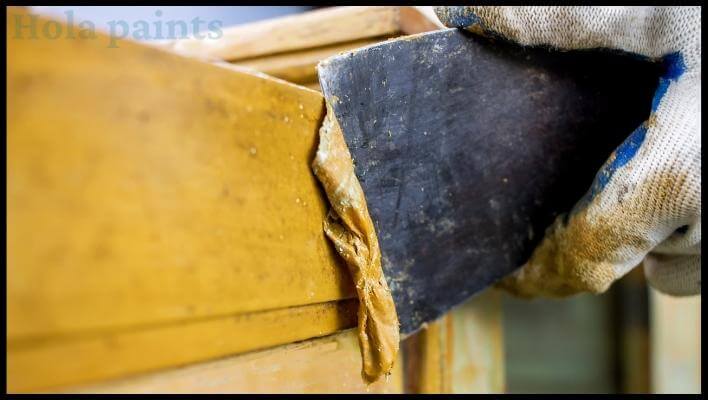
- In case sanding is not enough, strip off the old paint with the specialized tools. The market is full of different stripping tools having different sizes, shapes, and budgets. Choose according to your requirements.
- Pick up a paint sprayer having different patterns and pressure adjustments.
- In the end, start painting and apply the second paint when the first is dried completely.
Pro Tips For Using Paint Sprayers
Tips for Spraying Corners
Start with the corners of walls. Keep your distance and speed consistent, just as on flat surfaces. However, instead of walking side to side, aim directly at the corner and move vertically. In corners, you should apply the coat more quickly to avoid applying too much.
Check Your Work
You should take a few steps back after finishing a section to make sure you haven’t missed anything. If you notice any light spots, you can make a second pass. It is important to move the spray gun quickly before pulling the trigger, so that you get an accurate spray.
Paint Sprayers As Applicators
Some surfaces like wood siding may need to be back rolled or back brushed.
You can apply to paint thicker and more textured this way. The paint sprayer is used to quickly deliver paint to the surface and then you’re going to roll or brush it out with a brush or roller. A sprayer makes it easy to apply paint while back rolling for uneven surfaces and filling gaps. In this way, your paint sprayer serves as your applicator.
There’s no better way to apply paint with sprayers than to continually dip a roller or brush in a bucket!
Moreover, you can save yourself hours of work using this technique.
FAQs On How To Use A Paint Sprayer
Is it easy to use a paint sprayer?
Of course, it’s very easy to manage, maintain, and use a paint sprayer for all kinds of painting projects. It’s the best option for the surface where a brush or roller fails. However, it uses more paint than roller but gives you a perfect finish.
Do you have to dilute paint when using a sprayer?
It usually depends on the sprayer type, but usually, it is recommended to use thin paint. However, it should not be too thinned, causing drips or any leakage. Furthermore, the thickness of oil-based and water-based paints is different.
How do you use a small paint sprayer?
Using a small or big paint sprayer is quite similar as the difference is only in size. However, handling a small spray gun with a full paint tank requires practice. On the other hand, a small sprayer is the best option for tight spaces and painting ceilings.
What kind of paint do you use in a paint sprayer?
A large array of paint sprayer is accessible from the market apt for different applications. However, airless paint sprayers are preferred due to their overall functions, ease of use, and benefits. Likewise, the pneumatic sprayer is also useful for different paints such as latex, oil-based, and acrylic.
Is it worth getting a paint sprayer?
Definitely, a paint sprayer is very advantageous, easy to use, and a convenient tool. You can spread all types of paints conveniently and get a beautiful finish in minimal time. It’s useful for painting walls, ceilings, furniture, satin, cabinets, and so on.
Does a paint sprayer use more paint?
A drawback of spray guns is that they utilize approximately 33% more paint than rolling or brushing. Also, the finish might be thinner than rollers.
Bottom Line On How To Use A Paint Sprayer
So you have learned all the aspects of how to use a paint sprayer. All types of paint sprayers are useful, such as HVLP, LVLP, air, and airless, but you need to know how to use them properly. Therefore, I always emphasize practice before painting your home.

Jennifer Marie
Jennifer Marie is a general contractor with over the years of experience in home remodeling, DIY projects, and commercial painting projects. Her experience includes working with paint sprayers, painting tools, and other painting supplies. You can follow her on Facebook.

