Refinishing furniture can be a daunting task, especially when faced with old, stubborn finishes. Conventional methods involve using paint strippers, a messy and time-consuming process that also involves harsh chemicals. However, a more innovative and convenient technique has emerged for DIYer and individuals looking to rejuvenate their items. Unlike traditional liquid stains, this method involves using gel stain over paint, saving you the trouble of stripping process.
Gel staining isn’t limited to furniture alone; it’s a versatile method that extends to various surfaces, including cabinets. Gel stains come in a range of colors, allowing you to refresh your space and make a bold design statement.
Table of Contents
- What is Gel Stain?
- Water-based Gel stain vs oil stain
- how to apply gel stain over paint for antique look?
- Materials Required for Gel Stain Over Painted Wood
- Step 1: The Priming Process
- Step 2: Splash on the Semi-Gloss
- Step 3: Gel Stain Time
- Step 4: Sun-Curing for the Perfect Finish
- Step 5: The Big Reveal
- Helpful Tips:
- Warning!
- How To Apply Gel stain over finished wood
- Materials Required for gel stain over stained wood
- What is the best way to apply gel stain?
- 1. prepare finished wood for gel stain
- 2. Lightly Sand the Painted Surface
- 3. Select Your Gel Stain
- 4. Apply the Gel Stain
- 5. Remove Excess Gel Stain
- 6. Watch for Running
- 7. Allow Drying Time
- 8. Apply a Protective topcoat over gel stain
- Advantages of Gel Stains:
- Disadvantages of Gel Stains:
- Is gel stain better than paint?
- Why use gel stain instead of regular stain?
- Does gel stain get darker?
- What kind of varnish to use on a gel stain?
- Final Words On gel stain over paint
- Martina Hitchcock
What is Gel Stain?
Gel stain is a unique type of wood finish that stands out because of its thicker texture when compared to traditional liquid stains. Its thickness is what makes it particularly well-suited for use over paint. Unlike conventional stains, gel stain doesn’t penetrate the surface as deeply, giving you more control over the color and allowing you to achieve a rich, beautiful finish.
The method of applying gel stain over stain or paint offers a versatile way to refinish almost any previously painted surface, all without the necessity of stripping or extensive sanding to remove the original finish.
I’m thrilled to guide you through two gel stain projects: one involving my all-time favorite furniture finish and a transformation of a 9-drawer dresser. It’s the kind of finish that adds a touch of elegance to any room and stands up to the test of time. Whether you’re revamping your nightstand or your beloved kitchen table, this finish has got you covered. So, let’s dive right into it!
Water-based Gel stain vs oil stain
Water-Based Gel Stains:
- Water-based stains are less durable against the elements and require more long-term maintenance.
- They dry relatively faster.
- These stains may not provide as even a finish as oil-based stains.
Oil-Based Gel Stains:
- Oil-based stains are highly durable and require less long-term maintenance.
- They have a slower drying time.
- Oil-based stains tend to maintain a more even and attractive finish over time.
Important Information:
- Gel stains, both water-based and oil-based, do not absorb into the wood but create a thick, uniform layer of color or stain on the surface.
- This characteristic can be advantageous for achieving consistent coloring on wood surfaces.
how to apply gel stain over paint for antique look?
Gel stain proves to be an excellent choice when you want to breathe new life into painted furniture without the daunting task of completely stripping the existing finish. Here’s a step-by-step guide on how to use gel stain over white paint:
Materials Required for Gel Stain Over Painted Wood
- A Tinted Gray Primer
- Semi-Gloss Paint (Behr brand’s Open Canyon is a great choice)
- Gel Stain (Opt for oil-based)
- Disposable Paint brushes
- A Disposable Broom
- Paper Towels
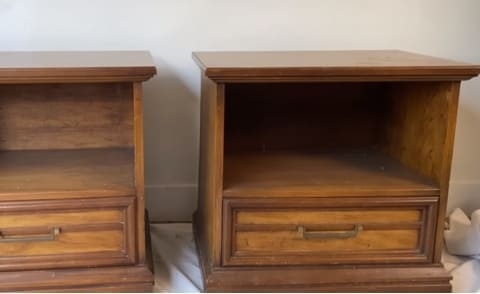
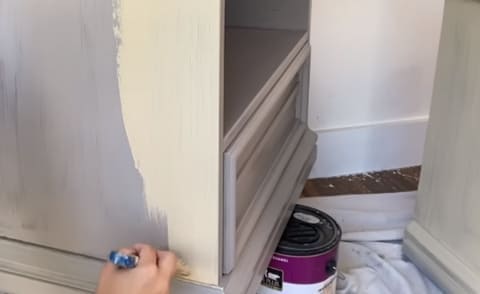
Step 1: The Priming Process
The first step in this transformation is proper priming. I use a gray-tinted primer (specifically, Kilz) to create the ideal base. Make sure to clean your furniture before applying the primer.
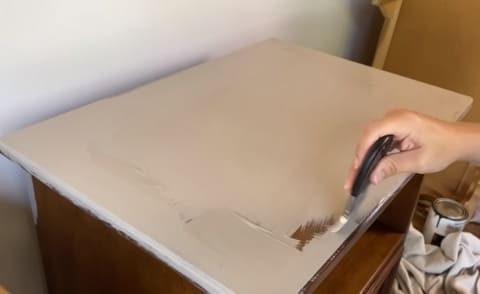
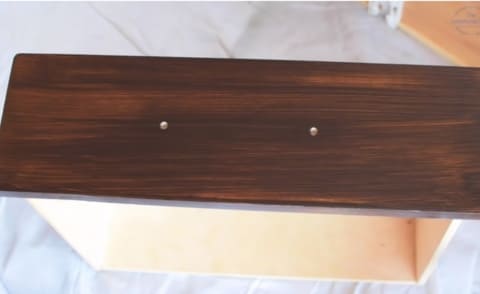
Here, I was using small paintbrush which is handy for reaching all the nooks and crannies as you can see in the picture above.
Step 2: Splash on the Semi-Gloss
Now, here comes the fun part. I opt for semi-gloss paint, and the color of choice is “Open Canyon” by Behr. It’s a beautiful shade that complements the warm gray finish we’re aiming for. If you can’t find this paint at Home Depot, you can get the color matched at other paint stores.
Step 3: Gel Stain Time
The real secret to this finish lies in the gel stain color. Gel stain is thicker and oil-based, providing exceptional durability. To make the application process easier, I’ve switched to using disposable paint brushes, which saves you from dealing with the hassle of cleaning up with mineral spirits.
While I prefer using a fluffy paintbrush to ensure even coverage, occasionally, I still use paper towels to remove excess product.
Step 4: Sun-Curing for the Perfect Finish
One thing to keep in mind is that gel stains have a longer drying time, sometimes taking up to a week to fully cure. However, the durability of the finish makes it well worth the wait.
It all depends on your surroundings, like humidity and temperature.
After your furniture has dried sufficiently (usually around six hours), it’s time to move it into the sun. This step helps set and cure the finish, ensuring that it’s not only beautiful but also exceptionally durable.
Step 5: The Big Reveal

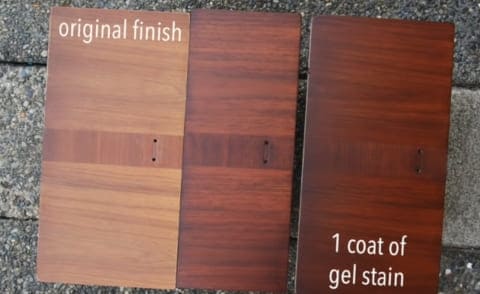
Once it’s thoroughly dry, prepare to be amazed. Here is a noticeable contrast when comparing gel stain over paint before and after pictures.
This transformation is unreal. Not only does it look stunning, but it’s also incredibly tough, making it perfect for furniture that gets a lot of love.
Helpful Tips:
- Semi-gloss paint gives the best results, so don’t skimp on it.
- Disposable brushes are your go-to when working with gel stains.
- Don’t be shy with the gel stain; it’s better to have a bit extra.
- Keep an eye on drying time, as it varies with conditions.
- The durability of oil-based products is a game-changer for furniture.
Warning!
- Be patient with the drying process, don’t rush it.
- Dispose of your disposable materials responsibly.
How To Apply Gel stain over finished wood
The gel stain over stain or gel stain over paint method offers the possibility to refinish nearly any previously painted surface, without the need for stripping or sanding off the original finish.
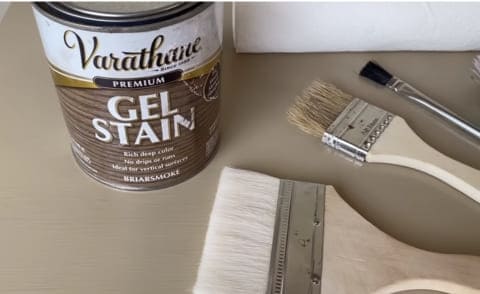
Materials Required for gel stain over stained wood
- General Finishes Gel Stain in your chosen color (e.g., Java)
- 220-grit sandpaper
- Foam poly brush
- Staining pads
- Gloves
- Clean staining pads
- General Finishes High-Performance Topcoat in satin
- 2-inch synthetic bristle brush
What is the best way to apply gel stain?
1. prepare finished wood for gel stain
When preparing the surface, it’s essential to do cleaning to eliminate any dust and debris. Properly preparing finished wood for gel stain involves sanding to eliminate any existing finish or imperfections. Applying a pre-stain wood conditioner helps ensure even stain absorption, resulting in a more consistent finish.
What I learnt!
Stripping old finish off furniture before staining isn’t always a must-do. If the current finish on the wood is in good shape, you have the option of refreshing the wood with a gel stain.
2. Lightly Sand the Painted Surface
The next step is to lightly sanding the areas you intend to stain, using 220-grit sandpaper. Keep in my mind not to accidentally remove the initial finish or the old stain entirely but rather to lightly sand the surface to create a suitable texture for paint adherence.
Let the sanded areas dry for a few hours before starting the staining process.
People often ask, Do I need to sand before gel stain?
Note: Typically, sanding isn’t a required step, but given the numerous stains on this piece, I found it necessary in this specific situation to enhance the gel stain’s adhesion.
3. Select Your Gel Stain
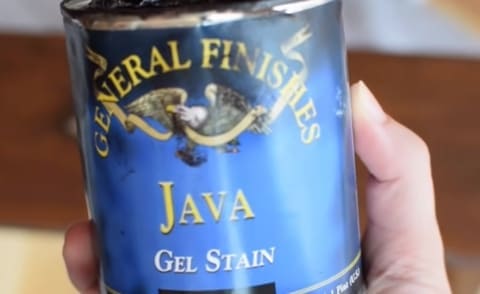
For this project, I’m using General Finishes Gel Stain in Java. I applied it with a foam poly brush and used staining pads to remove any excess.
Read more about the differences between satin and gloss spray paint.
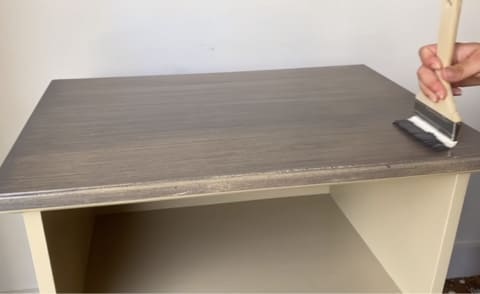
4. Apply the Gel Stain
When you apply the gel stain, make sure to wear gloves and work with the grain of the wood. You don’t need to apply it too thickly; a moderate amount should do the job.
5. Remove Excess Gel Stain
After applying the gel stain, wipe off any excess using a clean staining pad. I usually wipe down the entire surface about four times, checking for any streaks or marks left behind.
6. Watch for Running
It’s worth noting that gel stain has a tendency to run, so it’s important to be vigilant while it dries to prevent any uneven spots from forming.
7. Allow Drying Time
Wait for 24 hours for the stain to fully dry.
8. Apply a Protective topcoat over gel stain
Finally, protect the finish with a best topcoat for gel stain of your choice. You can use Oil based or Water based General Finishes Gel Topcoat. But here, I prefer using General Finishes High-Performance Topcoat in satin(water based). I apply it with a 2-inch synthetic bristle brush.
Advantages of Gel Stains:
- Easy DIY application.
- No dripping.
- Works on various surfaces.
- Provides uniform coverage.
- You can also use gel stain on wooden floors.
Disadvantages of Gel Stains:
- Not suitable for intricate details.
- Less effective on porous woods.
- No spray application option.
- Limited grain enhancement for some woods.
Is gel stain better than paint?
Gel stain offers distinct advantages over traditional paint. Unlike paint, gel stain maintains the wood’s natural texture and grain, allowing the wood’s inherent beauty to come to the forefront. Its thickness facilitates precise application, making it easier to achieve a uniform and appealing finish.
Why use gel stain instead of regular stain?
Opting for gel stain instead of regular stain yields several benefits, such as enhanced ease of application, reduced dripping, and improved coverage on vertical surfaces. Gel stain’s extended open time provides a more relaxed working experience, especially for substantial projects.
Does gel stain get darker?
Indeed, gel stain tends to intensify in color with each additional coat. This feature allows you to fine-tune the depth of color by applying multiple layers until you achieve your desired hue and richness.
What kind of varnish to use on a gel stain?
After applying a gel stain, it’s advisable to seal the surface with a clear varnish. Many prefer using a polyurethane varnish for its durability and protective qualities, which also enhance the appearance of the stain. Always make sure the gel stain is completely dry before varnishing and follow the manufacturer’s instructions for the best outcome.
Final Words On gel stain over paint
Gel stain allows the natural beauty of wood to shine through while providing color and enhancing its texture. It offers advantages such as easier application, reduced dripping, and improved coverage on vertical surfaces, thanks to its thickness and extended open time.
Ultimately, the choice between gel stain and paint should be guided by the aesthetic and functional goals of your project. Consider the character of the wood, the desired finish, and the ease of application when making your decision.

Martina Hitchcock
Martina Hitchcock is a versatile author with expertise in different fields. As a paint sprayer expert, she has in-depth knowledge of paint spraying techniques, tools, and equipment. Martina is also an experienced home remodeler who has worked on various projects, including kitchen and bathroom renovations, flooring installations, and room additions. Her knowledge of home improvement and remodeling is extensive, and she enjoys sharing her insights and tips with readers. You can follow her on Facebook.