Your room can look completely different when you paint it. But sometimes, when you use tape to get straight lines, paint can sneak underneath the tape and mess up your neat edges. This problem is known as paint bleed. Here’s how to fix paint bleed under tape.
To prevent paint from bleeding under the tape, apply a thin layer of water-based polyurethane or mod podge along the edge of the tape before you start painting.
If paint does bleed under the tape, there are ways to clean up the edges and make them straight again after painting. To get to know my personally experienced paint bleeding fixes, stay tuned to the rest of the blog.
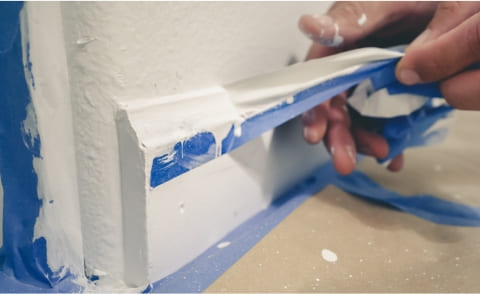
Table of Contents
- Why Does My Paint Bleed Under Tape?
- How To Fix Paint Bleed Under Tape?
- 1. Using Painter’s Tape Instead Of Regular One
- 2. Cleaning The Area Before Taping
- 3. Using Painter’s Tool
- 4. Sealing The Edges With A Clear Coat
- 5. Removing Tape When Paint Is Not Fully Dry
- Final Thoughts
- FAQS
- What to do if paint bleeds through tape?
- Does paint leak through masking tape?
- Can you use Vaseline instead of painters tape?
- Why do professional painters not use tape?
- How do you keep paint from peeling when removing tape?
- How to fix paint bleed on wall?
- How to fix paint bleed under tape car?
- how to keep paint from bleeding under stencil?
- Rosalie Sanchez
Why Does My Paint Bleed Under Tape?
I have observed different reasons for paint bleeding under tape. Here they are:
- Not using painter’s tape, which is specifically designed to prevent paint bleed.
- The presence of dust, grease, or oil may also interfere with proper adhesion.
- If the edges of the tape are not properly sealed, it can allow paint to seep underneath, resulting in bleeding.
- Tape that is old, damaged, or of low quality may not stick well or provide a good seal.
- On uneven or textured surfaces, the tape may not be able to adhere smoothly, leading to gaps where paint can bleed under.
- Removing the tape too quickly or waiting until the paint is completely dry can also result in paint bleed. (At least wait for 2 hours)
- Not pressing down the tape firmly to ensure a tight seal against the surface.
Useful Resource: Discover effective methods for fixing spray paint drips and achieving a smooth finish in our comprehensive guide on DIY paint projects.
How To Fix Paint Bleed Under Tape?
After trying various methods to stop paint from bleeding under the tape, I’ve found some effective solutions which I’m excited to share with you.
1. Using Painter’s Tape Instead Of Regular One
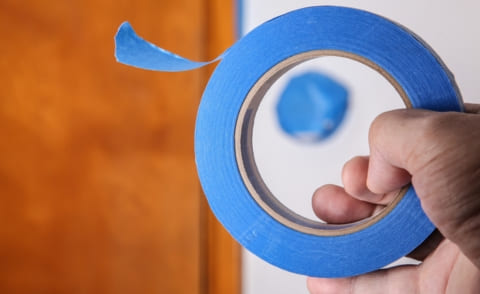
I used to use the common blue painter’s tape to shield interior trim during wall painting. However, when I switched to green Frogtape, the results were much better in preventing paint bleed.
This tape sticks well to many surfaces like metal, glass, or walls that have already been painted. Its Paint Block Technology helps seal the edges of the tape, giving me really clean and sharp lines when painting.
I loved how it worked well for both indoor and outdoor painting, and it was easy to peel off without leaving a mess, even after being on for up to 2 weeks.
Using Frog tape made my painting task way easier, reduced the need for touch-ups, and made the edges look neat and professional.
Discover creative wall paint ideas using tape in our design inspiration article.
2. Cleaning The Area Before Taping
Cleaning the area before taping is something I learned the hard way. In my early days of painting, I would often skip this step, only to find myself struggling with paint bleed later on.
Now, I always make sure to clean the area well before putting any tape down, and it has made a huge difference.
Before I start with the tape, I take a clean, dry cloth and give the area a good wipe to get rid of any dust or dirt. It’s surprising how much stuff can build up on a surface, and just this simple step can really help the tape stick better.
But if the surface is greasy or oily, a dry cloth isn’t going to do much. In those cases, I use a little bit of mild soap or a cleaning solution to get the area clean. I make sure to wash the area well, getting it as clean as I can.
Helpful resource: Explore the risks associated with using old paint in our article on the dangers of outdated paint.
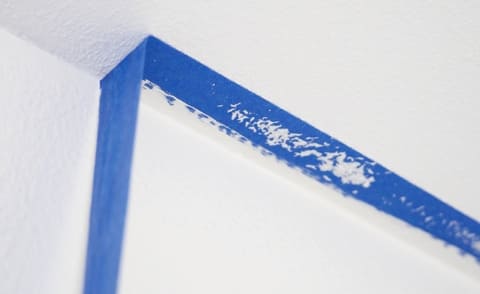
3. Using Painter’s Tool
After taping, I began using a painter’s tool to enhance the seal between the tape and the surface.
I simply run the painter’s tool along the edge of the tape, pressing down firmly to ensure a tight seal. Incredibly, this simple step reduces paint bleeding under the tape by a significant amount.
This tool helps in pressing down the tape securely, closing any tiny gaps where paint could potentially seep through.
I noticed that this method worked well especially around tricky corners and edges where paint bleed used to be a frequent annoyance.
4. Sealing The Edges With A Clear Coat
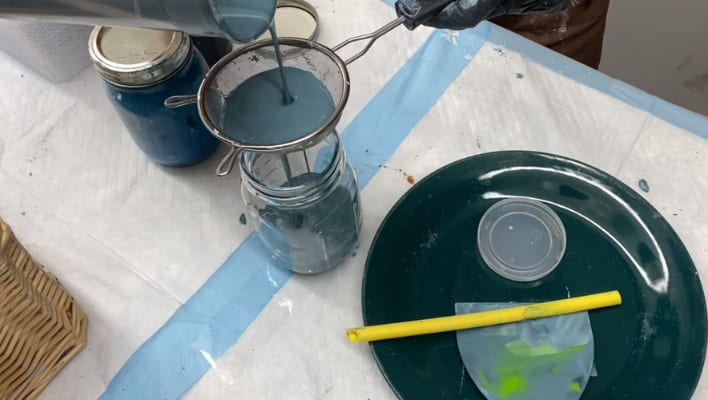
After putting down the painter’s tape, it’s good to seal the edges with a clear coat. I usually use mod podge, but if I don’t have any, I use Minwax water-based clear topcoat instead. It’s important to use a clear substance for this purpose, ensuring transparency in your application.
Using this clear coat method really made my painting tasks easier and better. The Minwax water-based clear topcoat was a big help in stopping the paint from leaking under the tape. It dried up quickly and formed a strong shield, keeping the paint in its place and giving me those clean, sharp edges.
It acts like a barrier, so when I start painting, the colors stay where they are supposed to. I just brush a thin layer along the edges of the tape and let it dry before I get started with the actual painting. This simple step cut down a lot of extra work, making the painting more professional-looking.
5. Removing Tape When Paint Is Not Fully Dry
I used to wait for the paint to dry completely, but I noticed that doing so often led to the paint peeling off with the tape, ruining those sharp lines I worked so hard for.
Now, as soon as I’m done painting, I carefully start peeling off the tape, making sure to pull it back on itself in a slow, steady motion. This way, the paint doesn’t have the chance to dry and stick to the tape, which makes for a much cleaner edge.
It was a bit nerve-wracking at first, worrying that I might smudge the wet paint, but with a gentle hand and a bit of patience, I was able to get much neater lines. Plus, any minor smudges were way easier to fix than the peeling and tearing I dealt with before.
Final Thoughts
Addressing how to fix paint bleed under tape requires a mix of precautionary steps like using the right tape, cleaning the surface, and sealing tape edges with a clear coat. If bleed occurs, corrective measures such as removing the tape before paint fully dries can be effective.
These simple yet impactful methods ensure a professional finish, effectively solving the issue of paint bleeds under tape.
FAQS
What to do if paint bleeds through tape?
If paint bleeds through tape, it’s often due to poor tape adhesion or low-quality tape. To remedy this, press the tape down firmly, ensuring it’s properly sealed. High-quality painter’s tape helps prevent bleeding. You can also apply a thin base coat of the same color along the tape edge to seal it.
Does paint leak through masking tape?
Paint can leak through masking tape if it’s not applied correctly or if the tape is of inferior quality. To avoid this, ensure the tape is firmly pressed down and use painter’s tape designed for the job, which is less likely to allow paint to seep through.
Can you use Vaseline instead of painters tape?
Using Vaseline instead of painter’s tape is not recommended. Vaseline can be messy, and it may not provide crisp, clean lines. Painter’s tape is specifically engineered for this purpose and proves to be a more effective and dependable choice.
Why do professional painters not use tape?
Professional painters often avoid using tape because they have the skills and experience to create clean lines freehand. This approach is quicker and doesn’t leave behind adhesive residue. It’s a matter of efficiency and precision.
How do you keep paint from peeling when removing tape?
To prevent paint from peeling when removing tape, wait until the paint is almost dry but still slightly tacky. Then, pull the tape off at a 45-degree angle, ensuring a clean edge. This method minimizes the risk of paint peeling away with the tape.
How to fix paint bleed on wall?
Fixing paint bleed on a wall involves waiting for the paint to dry completely. After that, carefully remove any extra paint using a putty knife or scraper. Once the surface is smooth, touch up the affected area with the original wall color, using a small brush. This should blend the bled area seamlessly with the rest of the wall.
How to fix paint bleed under tape car?
If you have paint bleed under tape on a car, first, make sure the paint is fully dry. Then, use a fine-grit sandpaper to carefully sand the affected area. Afterward, apply touch-up paint matching your car’s color to cover the bleed, feathering the edges for a smooth transition. Finish with clear coat for a polished look.
how to keep paint from bleeding under stencil?
To prevent paint from bleeding under a stencil, make sure the surface is clean and dry. Press the stencil firmly against the surface, and use stencil adhesive or painter’s tape to secure it in place. You can apply paint by using a stencil brush for dabbing motion, rather than brushing. This technique reduces the risk of bleed, creating crisp, clean stencil designs.

Rosalie Sanchez
DIY enthusiast with years of experience in home decor and home improvement. With a passion for educating consumers about DIY projects. Every time, I work with our painting professionals to provide you with the best painting product reviews and how-to advice. You can follow me on Facebook.