It is probably our language that most clearly demonstrates the relationship between black and negativity. Please take a look at these common expressions: Black Monday. Black hole, Black sheep. Blackmail. Black market. Blackout. There was a time when it represented a bad color, but that no longer holds true.
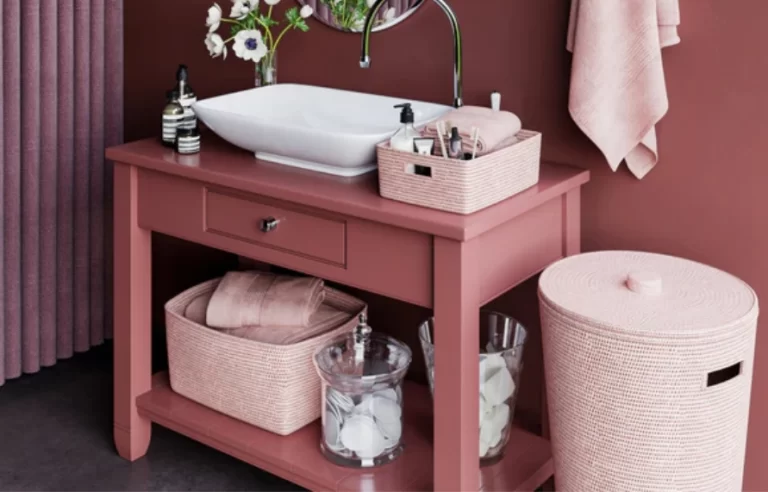
Recent research shows that black evokes positive associations, such as attractiveness and elegance. There is nothing more classic and timeless than a black color. The color oozes sophistication. Black furniture, black bed frames appeals to so many people because of this reason. Thus, black painted wooden or metal furniture looks stylish when applied.
As far as scratch resistance is concerned, black paint is better than other colors. Finding the right paint and applying it correctly are the key to success. If you don’t apply it the way black deserves to be painted, your furniture will look bland.
The color of your walls also affects how black pieces of furniture will look, and how they will accent your decor. The use of black paint on furniture makes it more of an accent color than if it were painted black throughout the entire room. Let’s take a look at the how to paint furniture black.
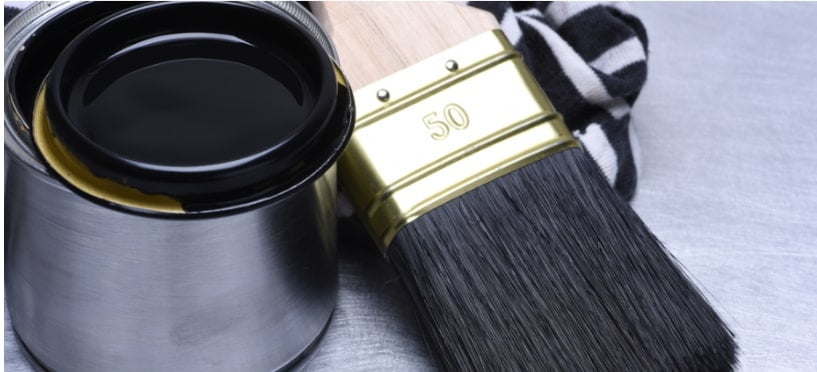
Table of Contents
- Painting furniture black- Easy Steps to Apply!
- 1: Clean the furniture
- 2: Sanding
- 3. Priming
- 4. Apply black paint for furniture
- How to paint furniture black like Pottery Barn?
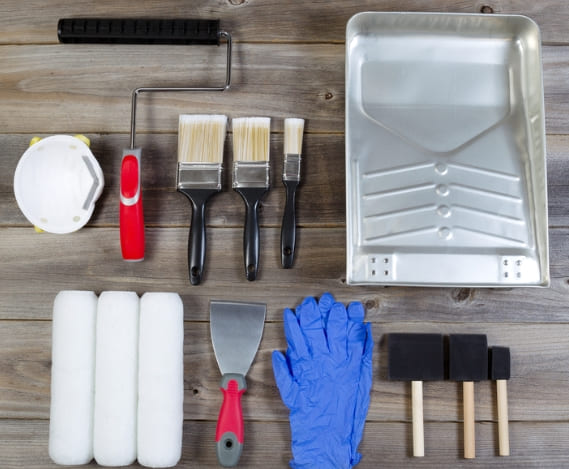
- Gather Your Materials
- Prepare the Furniture
- Prime the Surface
- Choose the Right Paint:
- Paint in Thin Layers:
- Sand Between Coats:
- Add Distressing (Optional):
- Protect and Seal:
- Reassemble and Enjoy:
- Conclusion On How To Paint Furniture Black
- FAQS On Paint Furniture Black
- How can I paint furniture black without sanding?
- What is the best black paint for wood furniture?
- Is black stain or paint different?
- What paint is best for furniture?
Painting furniture black- Easy Steps to Apply!
You can follow this step-by-step guide to learn how to paint furniture black. A room can be completely transformed with black paint or other dark tones. Also, you can minimize the number of coats needed for a smooth finish when painting dark wood furniture by following a few simple tips.
1: Clean the furniture
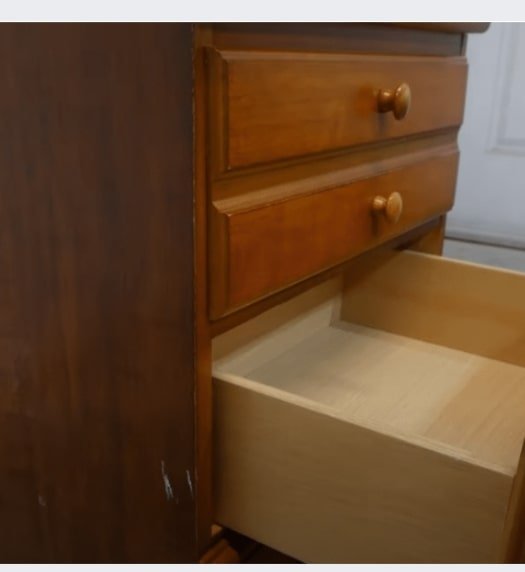
First things first, you should remove all the drawers, doors, knobs, and hinges present in the furniture before applying the black wood paint.
In this way, you will be able to clean and paint all surfaces of the furniture, rather than just the front side of your furniture. So I would suggest starting by cleaning the entire piece of furniture with an anti-grease product.
It is preferred to use Krud Kutter, but if you don’t have this option, you can also use dish soap. The anti-grease we have applied has served the intended purpose. So, we get some warm water and remove the anti-greasing product that has been applied to the furniture. Because we want our furniture to be clean from any dirt, grease, or soap.
Then wipe the full area with a dry rag of the furniture. Wiping the entire surface of the wood avoids stains from any type of water sitting on it.
Tip: Before applying black paint to wood furniture, please make sure to remove the random things placed inside it. Within the drawers of furniture, you never know what you’ll find.
2: Sanding
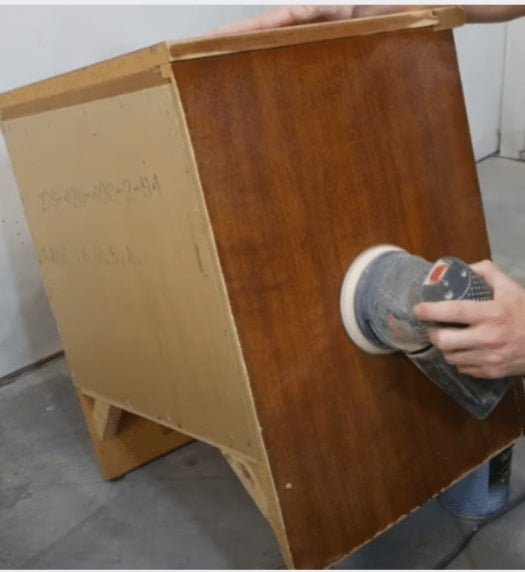
Once the water has completely dried, 120-grit sanding paper is needed. Now we’re ready to sand the wood piece of furniture. Keep in mind the purpose of sanding is not to remove the old paint. Surfaces are smoothed out, so paint adheres evenly. This is the most effective technique to get the best black paint for furniture like Rust-Oleum Flat Black-2X Ultra Cover, Water Based Milk Paint Lamp Black, Fusion Mineral Coal Black Paint.
There is a noticeable difference between a scuffed surface and a glossy finish surface, you have to make sure you scuff your furniture surface up otherwise on the glossy surface. It is highly likely that your paint just peeled off and it is not something you want. So, it’s necessary to make sure the entire surface is sanded before the paint.
Now that everything has been sanded with 120 grit to make everything as smooth as possible, I need to use 240 grit. As we need to make the process as smooth as possible before we can begin started on priming.
In my case, I have to reuse 240 grit because I am actually out of sandpaper, so I need to order it from the store. At the end of this blog, I will share all the things that you need/require for this project. If you’re painting the side table, don’t forget the drawers, too.
Use 240 grit sandpaper on the edges of the drawers and nightstand by hand. This is because if you use an electric sander, you can damage the corners, so please be careful. Tack cloths are used to clean up the dust after sanding.
3. Priming
For perfect black paint for wood furniture, I applied Rust-Oleum flat black primer. You can also apply gray primers. The benefit of using a primer is that it will smoothen the surface of the wood and fill in the wood grain. Considering I have had wax on the side table, I wanted to cover that up with an oil-based primer so it’s best to cover the whole piece because you never know what this piece has been through.
The primed surface should now be sanded down since spray cans sometimes leave a rough surface, but when I tried that time it went actually pretty smooth.

However, sanding is always a smart idea between each coat until the final coat. As soon as you finish sanding, wipe up any dust that’s sitting on the surface with a tack cloth as done previously.
4. Apply black paint for furniture
Now that we’re ready for black paint for wooden dresser, I like to make sure my brush is wet before I start brushing since the wet brush makes everything glide better, so I’m using fusion mineral paint cold black instead of bare paint. As I did last time, I have actually started using Fusion mineral paints, so I’m going to use them. All you have to do is dip the brush into it a little bit at the beginning and then you can start painting.
If you paint on a brush, you might get brush strokes. You should however paint in thin, light coats and make sure to use the same brush direction all the time in order to avoid brush strokes.
Useful Resource: Would you like to learn how to paint rattan furniture black or any other color of your choice?
Crisscrosses and uneven surfaces will look bad if you keep your brush going in the same direction the brush strokes will look natural and that’s what you want to achieve with the brush.
You can also use a sprayer to apply paint if you like, I’ve done that before, but for smaller projects like this, I usually use a brush and just apply it like that. Before the paint is too dry, I just lightly go over it with my brush one more time to give it a nice even look. After applying the first coat, I simply cover my brush in a plastic bag to prevent it from drying out.
Once the first coat has been dried, let’s start the light sanding. Now I am using a 220 grit sanding sponge to lightly sand the painted surface before applying the second coat. The paint doesn’t need to be scratched up.
After the light sanding on the surface, I use a tack cloth to clean up any dust. The second coat is finally painted. In this project I only needed two coats of black paint and the coverage was perfect since we primed as well.
Pro tip and reminder is that I dampened my brush again under the sink to ensure there was no dry spots. You can see after I applied the paint that everything glided a lot better that way I just went back and forth randomly, but for my final pass I just took a small brush and lightly moved it from back to front to smooth everything out in one direction, ensuring everything was matched up after it had dried.
The next step is to apply a clear coat of varathane crystal clear polyurethane (which provides excellent protection from scratches and stains. Interior wood surfaces such as furniture, doors, windows, cabinets, trim, and doors are ideal for it, whether they are stained, bare or painted). You can also purchase clear polyurethane at HomeDepot.
My plan is to use a very thin layer for a diamond wood finish. This is a clear satin finish, but I’ll spray this on with a spray gun. Because the water-based poly is mixed with water, I put in 10% water, after that, you add fusion mineral paint and stir it up and it’s ready to go.
Make sure the inside of your piece is clean so dust doesn’t fly out and land on your finish. For dust control, you can also set up a plastic or just have some drop cloth so dust doesn’t fly around.
It’s also advisable to raise your furniture a few inches off the ground. I can use my paint cans, but they’re usually pretty dusty from sitting around, so I’m using my painter’s pyramids instead to lift the furniture from the ground.
Whenever I use my Wagner Flexio 590, I always test the spray just to make sure the settings are correct. I usually have the setting set to seven or eight. The spray gun is also set at the lowest level possible so as to minimize the amount of product being emitted.
You should be careful using a sprayer gun for black furniture paint as it spits out the poly in clumps. So I just started spraying on the testing wall before I started the project.
I like to use a tack cloth to sweep over the piece I’m spraying to make sure it’s dust free before I start spraying. If it isn’t, a quick sweep with a tack cloth is all that’s needed before spraying.
I like to spray at least three coats of polyurethane sometimes I do four sometimes I do more depending on the project but after you’re finished spraying your poly, you take your leftovers and pour them back into the can and once the poly has fully dried, you clean your spray gun.
In order to make sure that everything slides easily like drawers and stuff, I use some finishing wax.
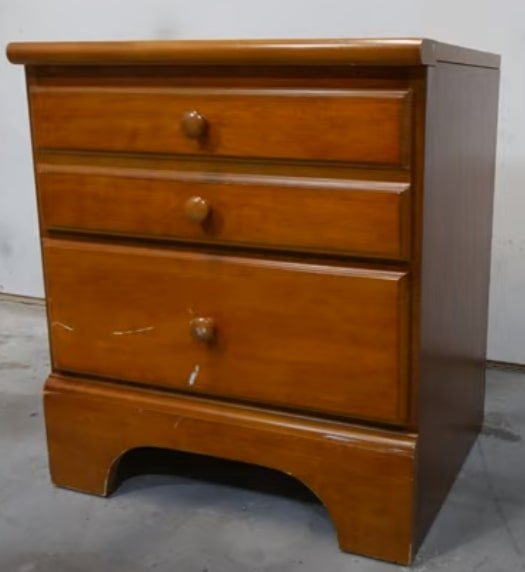
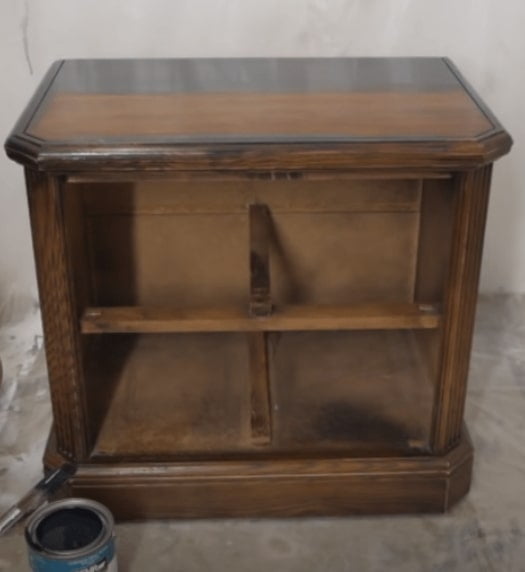
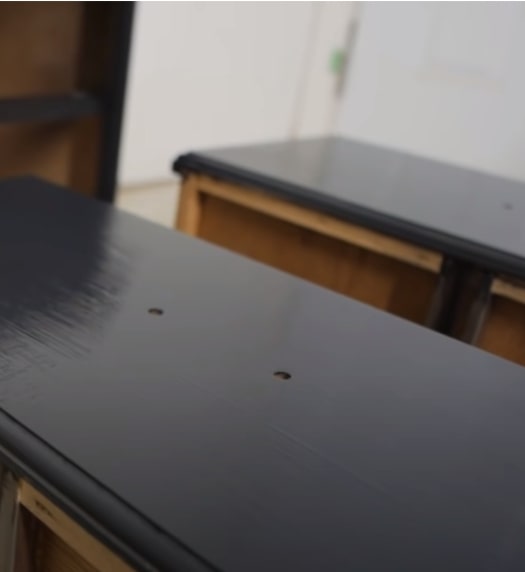
So here is how it looks after painting it black. Let’s take a look at it before we start painting it black.
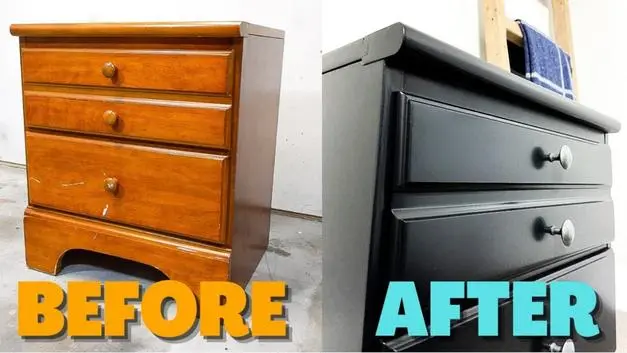
As you can see, the finish is super smooth and if you look close enough, you’ll see small brushstrokes that are all in the same direction. This will ensure everything looks natural. and you can’t even tell unless you literally go up right next to the piece.
Update: Last week, I completed another project by painting furniture with Sherwin Williams Black Magic SW6991. You can check the after result!
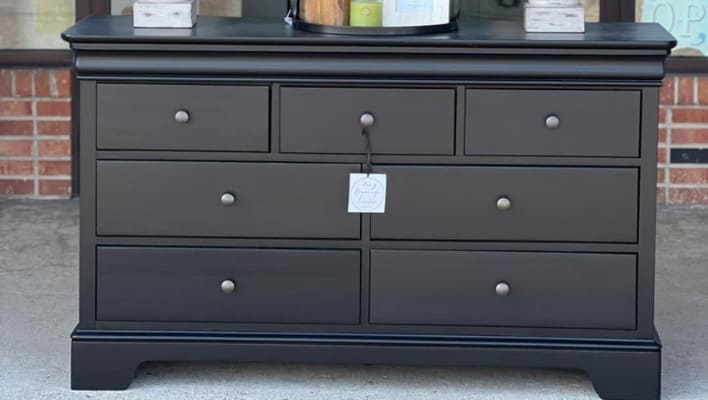
How to paint furniture black like Pottery Barn?
To paint furniture black like the stylish pieces you find at Pottery Barn, follow these steps. Remember, this is a unique description created without copying content from any source:
Gather Your Materials
Before you begin, collect all the necessary supplies. You’ll need black paint, a paintbrush or foam roller, sandpaper, a drop cloth, painter’s tape, and a clean, dry cloth.
Prepare the Furniture
First, you should prepare your furniture piece by giving it a thorough cleaning to get rid of any dust or dirt. If the furniture has an existing finish or paint, lightly sand it to create a smooth surface for the new paint to adhere to.
Prime the Surface
Applying a primer is crucial to ensure your black paint adheres well and provides a uniform finish. Use a primer specifically designed for the type of furniture you’re painting, whether it’s wood, metal, or another material. Allow the primer to dry completely.
Choose the Right Paint:
Select a high-quality black paint that’s designed for furniture. Acrylic or latex paints work well for this purpose. Pottery Barn often uses paints with a satin or semi-gloss finish for a sleek look.
Paint in Thin Layers:
Next, start applying black paint in thin and even layers. Let the thin layer dry completely. Avoid overloading the brush or roller to prevent drips and uneven coverage. It’s worth noting that applying several thin coats is more effective than using a single thick coat.
Sand Between Coats:
After each coat has dried, lightly sand the furniture with fine-grit sandpaper. This technique will help to even out any imperfections on the surface and ensure better adhesion of the paint.
Add Distressing (Optional):
If you want to achieve a distressed or antique look, you can lightly sand the edges and corners of the furniture after the final coat has dried. This will expose some of the underlying layers for a weathered appearance.
Protect and Seal:
Once you’re satisfied with the finish, apply a clear sealant or topcoat to protect the black paint and give it a durable finish. This step is important for maintaining the long-term quality and durability of your painted furniture.
Reassemble and Enjoy:
After the topcoat has dried, reassemble any hardware or components you removed, and your Pottery Barn-inspired black furniture is ready to enhance your decor.
Conclusion On How To Paint Furniture Black
Black paint on wood furniture typically requires several coats to achieve good coverage. However, if you want black furniture that looks brand new, you need to follow above practiced method. In this way, you’ll be able to finish your project quickly and get the best results.
FAQS On Paint Furniture Black
How can I paint furniture black without sanding?
Chalk paint is the easiest way to paint any surface without sanding. It leaves a beautiful matte finish and requires no preparation. You can also paint wooden surfaces without sanding with milk paints. Using milk paint on wood furniture is a nontoxic painting option, and if you mix it with a bonding agent, you don’t have to sand it first.
What is the best black paint for wood furniture?
I always prefer Chalk paint or Fusion Mineral paint when painting furniture black. Fusion mineral paint dries quickly, has self-leveling and a topcoat that provides a smooth, dark finish, whereas Shabby Chic Chalk Paint has a distressed and soft finish.
Is black stain or paint different?
Yes, black stain differs from black paint. It soaks into the wood instead of sitting on top like paint. Also, paint can also be applied to stained furniture.
What paint is best for furniture?
There are several types of paint that can be used on furniture, including oil-based paint, latex paint, and chalk paint. Choosing the right paint for your furniture depends on its surface, finish, and durability. When it comes to refinishing furniture in distressed colors, chalk paint makes a smart choice. Or if you need to paint furniture that can be difficult to paint, you might want to consider oil-based paint. On the other hand, the use of latex paint is a suitable choice for surfaces that can be painted easily for furniture.

Jennifer Marie
Jennifer Marie is a general contractor with over the years of experience in home remodeling, DIY projects, and commercial painting projects. Her experience includes working with paint sprayers, painting tools, and other painting supplies. You can follow her on Facebook.