Painting home furniture is one of the best ideas to revamp it. Do you think hiring a painter is a good choice or painting furniture yourself? Engaging a professional will provide the best painting results but not 100% exactly to your choice. I always like to paint furniture on my own, giving me satisfaction and desired results. Undoubtedly, it’s not everyone’s cup of tea because you must know how to prepare furniture for painting before getting started.
Preparation is crucial for a professional furniture painting and long-lasting finish. It’s also necessary to reduce the chances of chipping off or peeling because no one wants to invest in furniture painting again and again. Don’t worry! It’s super easy to prepare the best paint for upcycling furniture.
In this guide, I will thoroughly explain furniture painting ideas, the easiest way to paint furniture, how to clean furniture before painting, and everything about how to prepare pine furniture for painting. Let’s begin!
Table of Contents
- How to Paint Furniture-Quick Steps
- How To Prep Furniture For Painting Step-by-step Guide
- Step 1: Repair The Furniture
- Step 2: Sand The Furniture
- Step 3: Clean The Surface and Remove Residue
- Step 4: Protect The Furniture
- Step 5: Prime The Furniture
- Step 6: Paint The Furniture
- How to paint furniture without brush marks?
- Tip1: A brush stroke can be removed with sanding.
- Tip2: Using a fine mist spray bottle can prevent brush strokes.
- How To Clean Furniture Before Painting
- How To Clean Wood Furniture Before Chalk Painting
- FAQs On How To Prepare Furniture For Painting
- How do you prep furniture for painting without sanding?
- What should I prime my furniture with before painting?
- Do I need to prime furniture before painting?
- Can I paint over varnished wood without sanding?
- What happens if you don’t sand wood before painting?
- Final Words On How To Prepare Furniture For Painting
How to Paint Furniture-Quick Steps
- Repair furniture
- Sand furniture
- Clean the furniture surface
- Protect furniture piece
- Prime furniture
- Paint furniture (outdoor or Indoor)
How To Prep Furniture For Painting Step-by-step Guide

Preparing furniture for painting is straightforward if you strictly follow my instructions. No need to buy specialized tools or supplies to complete this task. Moreover, I will share the easiest steps to draw it up without any trouble. Check out the instructions for painting furniture below:
Step 1: Repair The Furniture
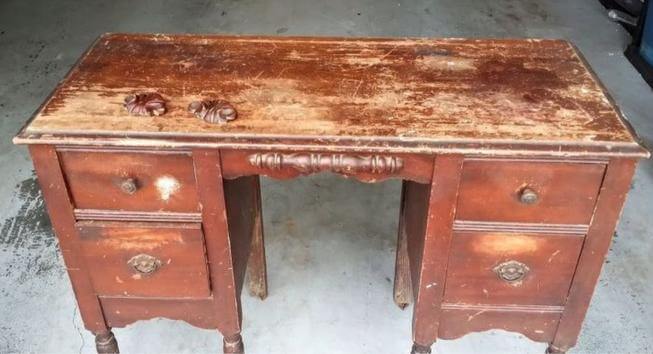
Surely, I would not like to paint furniture if it’s broken or damaged. Therefore, start by repairing it. Check out the missing feet, alignment, and other broken components. Replace all the broken components or repair them, whatever you think is good on the spot. Likewise, fill the unnecessary gaps with a high-quality wood filler. Make sure everything is working well and at its place before moving forward.
Step 2: Sand The Furniture

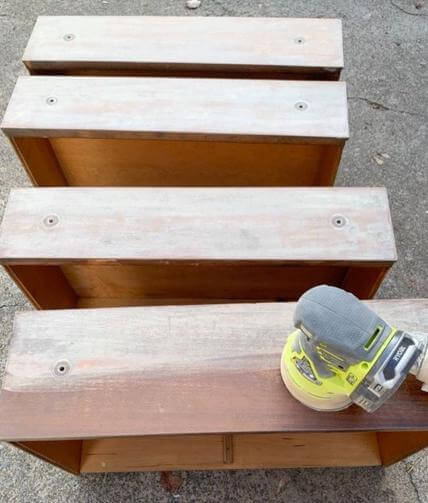
Sanding is an important step for surface preparation. Many tutorials say that you don’t need sanding, but I always recommend you go for it. It not only cleans the furniture’s surface but also gives strength to primers & paints. I recommend you sand carefully and don’t apply too much force. Make sure all the surfaces are sanded perfectly and have an equal level.
Step 3: Clean The Surface and Remove Residue
I always prefer using a degreaser or deglosser to remove residue. It’s highly effective to remove dust, wax, or grime before painting furniture. Clearing it is necessary because it will make the surface dumpy and non-uniform. TSP cleaner is also helpful for this purpose. Don’t forget to wipe it properly after application.
Make some sort of soapy water solution which will play to role of a solvent and dissolve all the grease. Apply a little force while wiping if the dirt is not separated. Moreover, it’s better to detach the drawers or windows for sanding everywhere.
Step 4: Protect The Furniture
Protect the surface where you don’t want to apply the furniture paint. I usually use high-quality painter’s tape as it’s a good investment. Don’t use cheap-quality tapes; otherwise, they can create a mess. You can also go with an ordinary tape if you want to save money.
Step 5: Prime The Furniture
Finally, it’s time to prime the furniture surface. It’s necessary to get good paint strength and a smooth finish. Another benefit is that the paint does not leave drips and dark spots after priming. It’s very valuable, especially for complete paint replacement. The dark paint does not allow you to apply light paint on it, but it’s possible with the primer. Don’t paint until it dries completely to prevent staining issues.


Step 6: Paint The Furniture
After completing all the preparations mentioned above, start painting the furniture thoroughly. If you have unscrewed the windows of drawers, attach them after completing the project.
How to paint furniture without brush marks?
Tip1: A brush stroke can be removed with sanding.
Apply a little mist to the furniture and to your paintbrush before you brush on the paint. It is usually water mist spray bottles that I use. Using this method will help your paint go on smoothly and thinly, resulting in a brush-free finish.
Tip2: Using a fine mist spray bottle can prevent brush strokes.
It is recommended that you use softer grit sandpaper for this process. 320 grit sandpaper is the good choice because you are looking to smooth out the paint, not remove it completely.
You can also work with 280 grit sandpaper if necessary. Using a handheld sander would also be helpful. In this way, you’ll be able to monitor the brushstrokes you’re trying to remove closely and have complete control over the process.
Useful Resource: checking our Furniture Painting Price List to ensure you get the best value for your furniture transformation project.
How To Clean Furniture Before Painting
Dusting, cleaning, and eliminating grease all these are involved in the cleaning of furniture before painting. First, wipe it with the water solution using a soft cloth. After that, leave it for a while to dry. You can also go for vacuum if the furniture requires further cleaning. Use it everywhere in the drawers, cabinets, and corners.
In the end, tack cloth is a helpful product to remove the remaining little particles of dust. It picks up all the dust easily. Try to apply a little force at the start and increase it according to the circumstances.
How To Clean Wood Furniture Before Chalk Painting
Cleaning requires the same steps I have described above. I use a soft cloth, water solution, vacuum, and other specialized products for cleaning. Special products are optional if you have enough budget. Likewise, a damp cloth is also helpful to clean the furniture before chalk painting. It’s efficient and can wipe off all the dust (even small amount of dust) and residue.
FAQs On How To Prepare Furniture For Painting
How do you prep furniture for painting without sanding?
You can go furniture painting without sanding but I don’t recommend it to anyone. Suppose you skip it; you can go for mineral paints, chalk paints, milk paints, bonding agents, bonding primers, and liquid deglossers instead.
What should I prime my furniture with before painting?
While painting furniture, a semi-gloss or satin finish is better for priming. Both are applicable for oil-based or latex-based paints. Suppose you have selected latex paint, don’t forget to pick up a specialized latex primer for it.
Do I need to prime furniture before painting?
Priming furniture before painting brings many benefits, such as high strength, smooth finish, and acting as a base coat. It makes the paint durable and increases the life of applied paint on the furniture. It’s helpful to set the direction of strokes and brushing. Also, it’s helpful to bring the real color of the paint to the furniture surface.
Can I paint over varnished wood without sanding?
Yes, varnished wood allows you to paint without sanding. Here the varnish acts as a primer providing a smooth and cleaned surface. However, I always recommend you pick up a varnish after getting a recommendation from an expert.
What happens if you don’t sand wood before painting?
Suppose you don’t sand the wood and apply the paint directly; you might have to face several problems. The paint might look rough or blotchy, creating strange stains. The look of the paint will be dull and provide low adhesive strength to the surface.
Final Words On How To Prepare Furniture For Painting
To sum up, it’s all about the preparation of wood furniture before painting. Following the mentioned steps will make the preparation a breeze. These steps are equally helpful for both experienced professionals and beginners. Pin this post to get help whenever you want to revamp furniture with desired paint.

Martina Hitchcock
Martina Hitchcock is a versatile author with expertise in different fields. As a paint sprayer expert, she has in-depth knowledge of paint spraying techniques, tools, and equipment. Martina is also an experienced home remodeler who has worked on various projects, including kitchen and bathroom renovations, flooring installations, and room additions. Her knowledge of home improvement and remodeling is extensive, and she enjoys sharing her insights and tips with readers. You can follow her on Facebook.


