Every time I work on a home improvement task, I’m reminded of how a fresh coat of paint can do wonders. It’s like magic for your home! But to paint like a professional, you need the right tools. Among the essential equipment that stands out in the world of painting, paint shields hold a special place for their ability to transform ordinary spaces into extraordinary ones. But, how to use a paint shield?
As someone who loves to roll up their sleeves and dive into do-it-yourself projects, I’ve uncovered the secrets to making these paint shields do wonders. With each brushstroke, I’ve polished my skills and gained valuable experience in home improvement.
So, keep reading to learn the art of using a paint shield like a seasoned pro as I’ll share the tips and tricks I’ve gathered along the way. Let’s begin!

Table of Contents
- How to Use a Paint Shield With A Sprayer?
- Things You Need
- Step 1: Choosing The Best Paint Shield
- Step 2: Prepare Your Workspace And Safety Gear
- Step 3: Start Painting Using Paint Shield for Spraying
- Step 4: Maintain a Steady Pace and Overlap Strokes
- Step 5: Remove the Paint Shield and Final Check
- Step 6: Clean Up
- Q. What type of edger do professional painters use for edging?
- Alternatives To Paint Shield
- Drawbacks To Using Paint Shields And Other Alternatives
- Final Words On shield painting
- FAQs On How to Use a Paint Shield
- Q. When can I tape fresh paint?
- Q. Do I need to cut in twice when painting?
- Q. What is a paint shield used for?
- Martina Hitchcock
How to Use a Paint Shield With A Sprayer?
If you’re just getting started using painting tools, you’d be definitely stuck at wondering how to use a trim guard when painting. Don’t worry, these step-by-step instructions will help you learn using a paint shield to achieve clean, precise results. From preparation to finishing touches, I’ll take you on the path to professional-quality paintwork.
Things You Need
- Paint shield
- Paint sprayer
- Extension pole
- Coating
- Drop cloths
- Protective gear (a face mask and goggles)
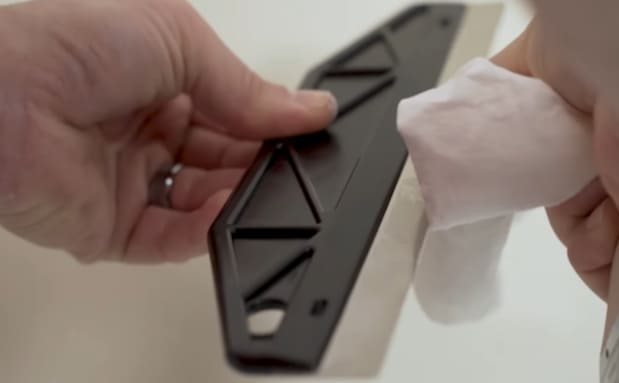
Step 1: Choosing The Best Paint Shield
Creating your own paint sprayer edging tool might sound like a fun activity, but in my opinion, the time spent researching patterns through your workshop for materials can often be better invested elsewhere.
That’s why I highly recommend investing in ready-made shields, which are not only more convenient but also beneficial from ongoing innovation by manufacturers.
For those who prefer a more traditional approach, a regular rectangular painting shield can still be the way to go. I would recommend Warner spray shield because it combines durability with ease of use. This can work as a paint sprayer edge guard when using a spray gun.
Just be sure it holds the right balance: lightweight enough not to make you strained and sturdy enough not to shift around.
And if you’re new to extension rods, the FUNTECK Universal Spray Guide Kit is good to consider. It includes a generous-length pole that’s particularly useful when working with powerful airless sprayers. Trust me; it’s a real hand-saver!
Other standout option is the Titan Guide Accessory Tool, a personal favorite of mine. What I loved about the tool is its rotating wheeling disk that attaches to an extension pole or spray gun extension, providing a seamless painting experience. This handy feature not only saves time but also frees up one of your hands, allowing you to multitask with ease.
Remember that your project determines your painting trim guard size, so choose accordingly. Based on my testing, I can confidently say that the Titan Guide Accessory Tool and FUNTECK Universal Spray Guide Kit have earned their spots as top choices when it comes to paint shields.
Step 2: Prepare Your Workspace And Safety Gear
Start by clearing the area of furniture and drop cloths. A clean and organized workspace sets the location for a successful painting masterpiece.
Based on my own lounge-painting adventure, you are also supposed to prioritize safety. Equip yourself with a face mask and goggles to shield against paint fumes and accidental splatters.
When using a paint sprayer for ceiling or any other project, follow the manufacturer’s guidelines to load it with your chosen paint and primer. Ensure that the paint’s consistency is suitable for spraying. This helps achieve a smooth and even application.
My Personal Tip: Experiment with the spray pattern settings on the paint sprayer to match your painting job needs. Whether it’s a horizontal, vertical, or circular pattern, selecting the right one is important to get the desired finish.
Don’t skip; Before painting your wall straightly, test the paint sprayer on a scrap piece of cardboard or a small hidden area. It’s an ideal way to get a feel for the sprayer’s settings and ensure it’s delivering the paint evenly.
Step 3: Start Painting Using Paint Shield for Spraying
When you’re ready to paint, place the best paint spray shield by Warner, against the surface you want to protect.
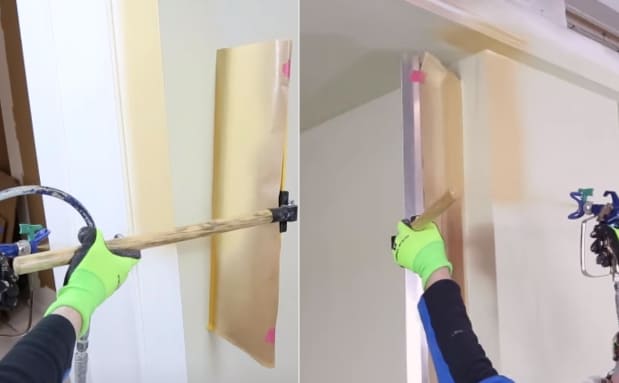
For example, if you’re painting areas like baseboards or corners, that’s when you use a helpful tool like paint shield or you can also use paint edger.
Make sure that you hold the shield firmly to keep it in place and cover the area you don’t want to paint. This is the key to achieving those professional-looking lines and edges.
Use your second hand to hold the paint sprayer about 5 to 10 inches away from the surface you’re working on. Ensure that the spray gun is pointed inward toward the surface. This distance and angle allows you to achieve optimal spraying results.
Now, start spraying the paint using even, overlapping strokes. The paint shield should act as a barrier, preventing overspray from reaching areas you want to keep clean. This is essential to get those professional-looking lines and edges.
Step 4: Maintain a Steady Pace and Overlap Strokes
To get a smooth and even coat, make sure to move the spray gun at a consistent pace and overlap your strokes slightly with each pass. This ensures even coverage and a professional finish. Whether you choose to move the spray gun up and down or side to side, consistency is key for a polished result.
Step 5: Remove the Paint Shield and Final Check
After finishing the painting, take a close look at the edges for any touch-ups. If there are spots that the paint shield couldn’t reach, use a paintbrush for those final touches. Afterward, remove the paint shield carefully.
Step 6: Clean Up
To keep a paint shield clean, use a sponge or damp cloth immediately to wipe it down after use to remove any paint build-up. In case the paint got dried, use a paint scraper to gently scrape off the dried paint. Avoid scratching the surface of the paint shield.
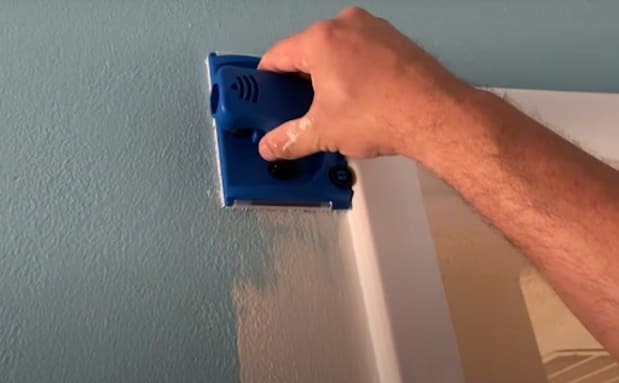
Q. What type of edger do professional painters use for edging?
Professional painters rely on two primary options for achieving clean edges. The first is the roller-style paint edger, which functions like a miniature paint roller and excels at creating precise lines along edges and corners.
One of the top choices in this category is the Accubrush Mountable Paint Edger, which includes a handheld paint edger and a kit with four refill rollers and brushes.
The second option is the pad-style edger, a convenient tool equipped with a foam or felt pad and a handle. This tool is ideal for seamlessly applying paint along straight edges. The Shur-Line Paint Edger Pro, along with its pad refills, is considered one of the best options for this purpose.
Alternatives To Paint Shield
If you don’t have a paint shield on hand or prefer alternatives, several handy and quick-fix options can help you achieve clean paint lines.
- A drywall knife is a versatile tool that can serve as a makeshift paint shield. Simply hold it firmly against the surface you want to protect while you paint.
- Cardboard scraps can be cut and used as a cardboard paint shield holder to create a DIY shield. You can use these solutions when you need a quick solution on the spot.
- However, for precision and especially when you’re concerned about clean edges, consider painter’s tape and masking paper.
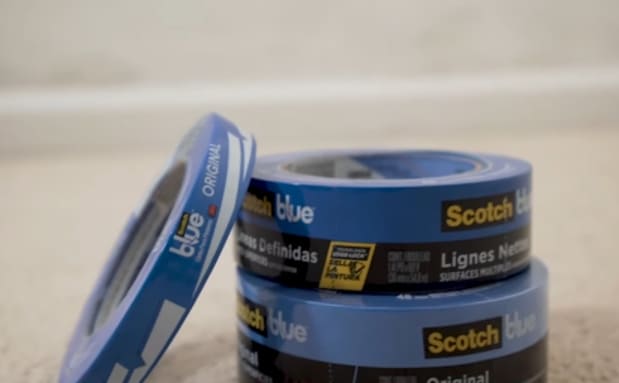
Painter’s tape, in the paint shield vs. tape debate, offers precision masking. Apply it along edges, corners, and surfaces that need to be protected before you begin painting. It’s definitely easier but time-consuming as well. Thus, the paint sprayer edge guard wins the battle.
Drawbacks To Using Paint Shields And Other Alternatives
- Using tape sometimes results in paint bleed-through, leaving uneven edges.
- When working with paint shields, you need to constantly move up and down until you finish painting the edges, baseboards, ceilings, and corners.
- Paint tape can leave sticky adhesive residue on the surface.
- Cardboard scraps are not durable and prone to wear and tear.
Final Words On shield painting
Learning how to use a paint shield isn’t difficult if you keep practicing before working directly on your main painting task. Having the right diy paint spray shield and following this detailed step-by-step guide can be fruitful for your next home improvement work.
FAQs On How to Use a Paint Shield
Q. When can I tape fresh paint?
To be on a safe side, wait at least one day after painting before putting tape on it. Use a special painter’s tape like Scotch Delicate Surface Painter’s Tape for delicate areas to avoid harming the fresh paint.
Q. Do I need to cut in twice when painting?
Cutting in is a good idea every time you apply a new layer of paint. To begin, cut in your walls, then roll them. Once the paint has dried, cut in again, then apply another coat. Keep repeating this process for as many paint layers as you want on your walls.
Q. What is a paint shield used for?
A paint shield is like a protective barrier that stops paint from going where you don’t want it to go on the surface, whether you’re spraying, brushing, or rolling paint. It’s like your paint companion!

Martina Hitchcock
Martina Hitchcock is a versatile author with expertise in different fields. As a paint sprayer expert, she has in-depth knowledge of paint spraying techniques, tools, and equipment. Martina is also an experienced home remodeler who has worked on various projects, including kitchen and bathroom renovations, flooring installations, and room additions. Her knowledge of home improvement and remodeling is extensive, and she enjoys sharing her insights and tips with readers. You can follow her on Facebook.