Can a paint job ever be considered perfect? If you are still using the traditional tools like paint brushes or rollers for a paint job then it’s time to ditch those and invest in a spray gun instead. With spray guns, you gain more control, are less time-consuming, and give smooth and precise results.
When using a spray gun for a paint job, setting the right pressure is extremely important to get optimum results. In this article, we will learn about paint spray gun pressure settings and various adjustments of spray gun that will not only give your projects a controlled and even finish but will also make the whole process a lot easier.
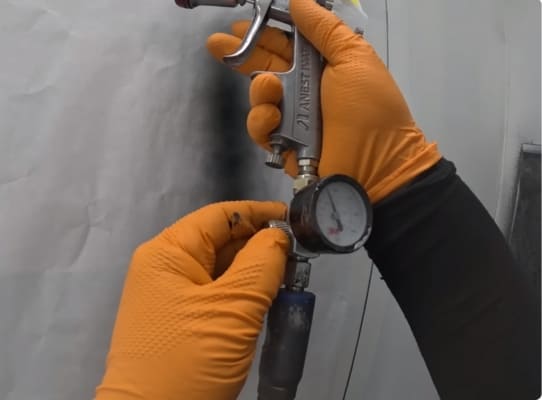
Table of Contents
- Spray gun settings (Automotive)
- Paint Sprayer Pressure Setting (Quick Summary)
- How to Setup a Spray Gun
- Cleaning and setup
- Connecting the air hose
- Using the controls: HVLP Spray Gun Adjustments
- 1. Fluid Adjustments
- 2. Air Pressure Adjustments
- 3. Trigger Adjustments
- 4. Fan Adjustments
- 5. Thinning
- 6. Fill the spray gun and start Spraying!
- What is the working principle of paint spray gun?
- Paint Supply
- Air Compressor
- Mixing Chamber
- Nozzle and Needle
- Atomization
- Adjustable Controls
- Application
- What pressure to spray 2k paint?
- FAQS on Paint Spray Gun Pressure Settings
- What is the best pressure for spray painting?
- What PSI should I run my sprayer?
- What PSI should a spray gun be for primer?
- Will 1700 PSI Damage Car Paint?
- Martina Hitchcock
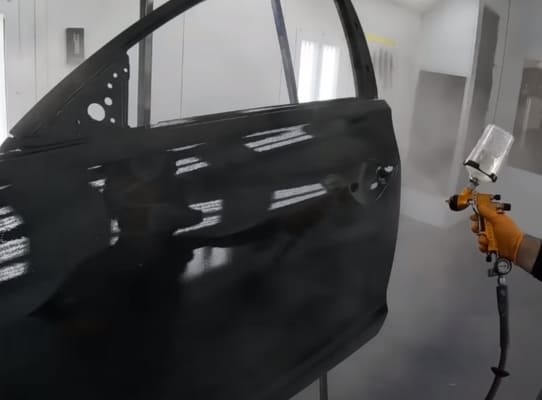
Spray gun settings (Automotive)
In the past, I have worked with several spray guns including Master Pro, Paint Zoom and Devilbiss. However, here I have tested an Anest Iwata and 3M performance spray gun for spray painting a car.
This below table provides recommended air pressure settings and air volume (SCFM) for both HVLP and LVLP spray guns when applying base coat and clear coat.
| Spray Gun Type | Base Coat PSI Range | Clear Coat PSI Range | SCFM at 40 PSI |
|---|---|---|---|
| HVLP | 26-29 PSI | 28-29 PSI | 10-14 SCFM |
| LVLP | 10-15 PSI | 20-25 PSI | 5-7 SCFM |
Related Resource: Is it necessary to consider certain factors when choosing an air compressor for painting cars?
Paint Sprayer Pressure Setting (Quick Summary)
| Paint Sprayer Type | Pressure Source | Pressure Range | Applications |
| Pneumatic (HVLP) | External Air Compressor | Around 10 PSI | Versatile for a range of coatings, offering a balance between coverage and precision. |
| Pneumatic (LVLP) | External Air Compressor | As low as 3.5 PSI | Ideal for fine finishing work, providing low-pressure control for intricate paint tasks. |
| Pneumatic (Conventional) | External Air Compressor | Up to 50 PSI | Typically used for larger, less detailed projects due to the higher pressure output. |
| Airless sprayer pressure settings | Hydraulic Pump | 800 – 3000+ PSI | Excellent for high-density coatings, with pressure ranges varying based on the paint type. |
| Turbine (HVLP) | Integrated/Stand-Alone Fan | 5 – 10 PSI | Popular among DIYers for home improvement projects, offering moderate pressure for versatility. |
Note: Check out the high quality air compressor reviews that are suitable for your requirements.
How to Setup a Spray Gun
Setting up your spray gun is the crucial first step toward achieving that flawless paint finish. As someone who has worked with these tools for many hours, I cannot emphasize how important it is to make sure the settings are correct before you use them.
Cleaning and setup
Before you start using your spray gun, it’s essential to give it some proper maintenance. Fresh out of the box, it’s coated with anti-corrosion oil, which, needless to say, doesn’t mix well with paint. Start your cleaning routine by taking out the air nozzle and cleaning it by immersing it in a container of thinner. Don’t forget that the vessel containing the thinner can be used as your dependable cleaning assistant for future use.
TIPS
- If it’s inconsistent or spitting, increase the pressure.
- If it’s uniform and atomized well, you’re good to go.
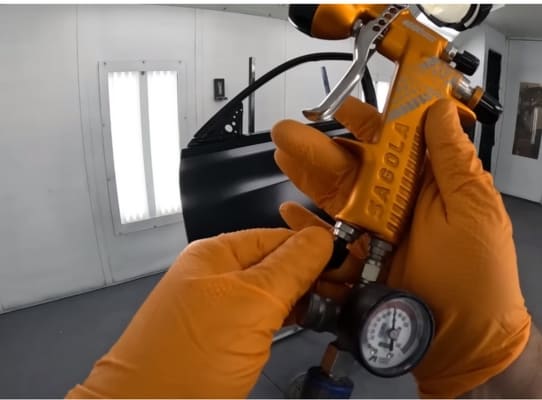
Connecting the air hose
Now, let’s get your spray gun connected to the air hose from your compressor. This part’s pretty straightforward, but there are a few details to keep in mind. You’ll require the appropriate connector, which should be a male air hose coupling with a 1/4″ NPT thread. Remember to use Teflon tape to wrap the threads properly to ensure a tight fit.
The size of your air hose matters, too. For hoses up to 25 feet long, go with a 5/16″ inner diameter. If you’re working with a 50-foot hose, opt for a 3/8″ inner diameter. Adjust your air pressure regulator based on the hose length to ensure smooth operation for your paint gun.
| Hose Length (feet) | Recommended Air Pressure (PSI) |
| 15 | 30 |
| 25 | 35 |
| 50 | 40 |
Using the controls: HVLP Spray Gun Adjustments
Now let us explore the adjustments of an HVLP spray gun. HVLP guns have gained prominence, for their efficiency and precise capabilities, in achieving smooth finishes. To fully utilize their potential it’s essential to comprehend and excel at the following adjustments;
1. Fluid Adjustments
The first and foremost adjustment to consider in a spray gun is fluid control. This controls the amount of paint or coating material that is released from the gun. Start by adjusting the fluid control knob clockwise and closing it completely and then slowly turn it anti-clockwise to achieve the desired flow rate. Too much fluid can lead to drips and runs, while too little may result in an uneven coating.
2. Air Pressure Adjustments
The second step is to make necessary changes to the air pressure. HVLP spray guns operate on the principle of low pressure, which means they rely on a controlled airflow to atomize the paint. Adjusting the air pressure is a fundamental step in achieving the desired spray pattern and finish. Too high, and you risk overspray and a rough texture; too low, and the paint may not atomize effectively. Strike a balance by tweaking the air pressure regulator until you achieve a smooth, fine mist. Here’s a rough guide:
| PSI Range | Recommended Uses |
| 15 to 20 PSI | Airbrushing, touch-ups, shading, and thin finishes. |
| 20 to 25 PSI | Smooth finishes, especially with lacquers. |
| 35 to 45 PSI | Sealing and topcoating. |
| 50 PSI | Some water-based lacquers. |
What is the correct air pressure for HVLP spray gun?
It is generally recommended that an HVLP spray gun be operated at a low air pressure, typically below 10 PSI at the air cap. A significant amount of air is required for HVLP to break down paint into a fine, slow-moving mist. It produces a controlled and soft spray pattern. In most situations, maintaining less than 10 PSI at the air cap is sufficient to effectively atomize the paint when using an HVLP spray gun.
3. Trigger Adjustments
The trigger on your HVLP spray gun is your key to control when and how much paint is released. Start by testing the trigger’s sensitivity, a light touch should release a small amount of paint, while a full squeeze should result in a continuous flow. When working on intricate details or tight spaces, you can fine-tune your technique by adjusting the trigger.
4. Fan Adjustments
Another setting is to control the fan adjustments. Controlling the spray pattern width is vital for uniform coverage. Most HVLP guns come with an adjustable fan control knob. When it’s turned clockwise, it narrows the pattern, while when it’s turned anti-clockwise, it widens it. Choosing the right brush width for your painting project is important when using a fan brush. For large, open areas, a wider pattern is ideal, whereas narrow spaces require a more focused spray.
5. Thinning
Thinning – it’s an art in itself. Your spray gun nozzle can handle various finishes without thinning, but sometimes, it’s necessary. Start by spraying unthinned material. If it sputters or spits, gradually thin it until you achieve a fine, consistent spray pattern. Don’t forget to adjust the air pressure accordingly.
6. Fill the spray gun and start Spraying!
Now, let’s talk about filling the spray gun cup. After gently stirring your finish, pour it into your gun’s spray cup.
Tips & Tricks: Stand the can on its end for a minute, then flip it over to prevent drips from contaminating the rim. Cover the can to keep it from drying out and gumming up.
With your spray gun set up and ready, you’re on your way to mastering the art of painting like a pro.
What is the working principle of paint spray gun?
The working principle of a paint spray gun is relatively simple. It’s a device used to apply a coat of paint or other liquid substances to various surfaces. Here’s a straightforward explanation of how it works:
Paint Supply
Paint is stored in a reservoir, often a paint cup or canister, which is attached to the spray gun. Some spray guns are designed to be connected to a paint supply source like a compressor and a paint container.
Air Compressor
An air compressor plays a vital role in generating high-pressure air, which is an essential element in the paint spraying process. This compressed air is usually adjusted to attain the required pressure for spraying.
Mixing Chamber
Inside the spray gun, there is a mixing chamber where the paint and air come together. The compressed air enters the chamber and creates a low-pressure area. This low-pressure zone draws paint from the reservoir into the chamber, where it mixes with the air.
Nozzle and Needle
The mixing chamber leads to a nozzle and needle arrangement. The needle acts as a valve that controls the flow of paint. When you press the trigger on the spray gun, the needle retracts, allowing paint to flow through the nozzle.
Atomization
As the paint and air exit the nozzle, they are atomized, which means they are broken down into tiny, fine particles. This atomized spray creates a mist of paint, which is then propelled toward the surface being painted.
Adjustable Controls
Most paint spray guns have adjustable controls for regulating the flow of paint and the pattern of the spray. This allows for precision and flexibility in applying the paint to achieve the desired result.
Application
By moving the spray gun back and forth over the surface, you can evenly coat it with the atomized paint. The distance between the gun and the surface, as well as the speed of movement, will affect the thickness and evenness of the paint application.
Remember, practice makes perfect, so don’t be afraid to experiment and fine tune these settings to achieve the impeccable results you’re after.
What pressure to spray 2k paint?
The ideal pressure for spraying 2K paint, which is a type of two-component paint that consists of a base paint and a hardener, can vary depending on the specific product, manufacturer recommendations, and the type of spray gun being used. However, a general guideline for spraying 2K paint is to use a spray gun pressure of around 25-30 psi at the air cap.
FAQS on Paint Spray Gun Pressure Settings
What is the best pressure for spray painting?
It is important to check your specific model’s instructions to know the best pressure setting for your spray gun but most spray guns operate best between 25 and 30 PSI, and sometimes even up to 40 PSI when greater atomization is required.
What PSI should I run my sprayer?
This range varies depending on the nozzle but is typically between 20-80 PSI. Too little pressure will prevent the nozzle from maintaining a consistent spray pattern and too much pressure will result in fine mist, which can also cause coverage problems.
What PSI should a spray gun be for primer?
Begin with 25-30 psi for most HVLP spray guns when applying primer, but check the primer manufacturer’s recommendations and adapt as necessary.
Will 1700 PSI Damage Car Paint?
A pressure washer with 1700 PSI still falls within the acceptable range for cleaning cars. However, it’s essential to remember that pressures higher than 1500 PSI may increase the risk of scratching or damaging your car’s paintwork. While it won’t necessarily cause immediate damage, exercising care and using the right techniques remain important to avoid potential issues.

Martina Hitchcock
Martina Hitchcock is a versatile author with expertise in different fields. As a paint sprayer expert, she has in-depth knowledge of paint spraying techniques, tools, and equipment. Martina is also an experienced home remodeler who has worked on various projects, including kitchen and bathroom renovations, flooring installations, and room additions. Her knowledge of home improvement and remodeling is extensive, and she enjoys sharing her insights and tips with readers. You can follow her on Facebook.