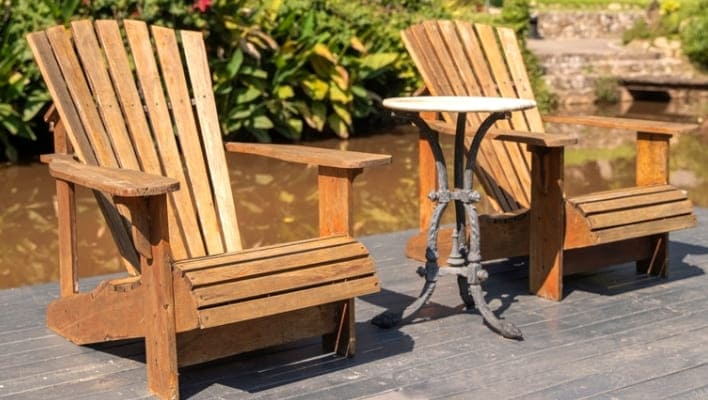
Imagine you’re about to transform a piece of original wood furniture into a stunning masterpiece. Before painting, make sure any rough spots on the surface are addressed. Sanding becomes your ally in this endeavor, as it eliminates imperfections and dimples, creating a smooth foundation for your paint. With a well-sanded surface, your paint is less likely to chip, crack or peel, ensuring that your furniture remains a cherished addition to any space for years to come.
Now that we understand the importance of sanding furniture before painting, let’s explore how this process is essential for various types of furniture. Whether you’re dealing with wood, metal, or any other material, sanding is a universal technique that brings out the finest in your painting endeavors. Taking the time to prepare furniture properly will result in a flawless and beautiful finish for your project. This not only enhances your furniture’s visual appeal but also ensures its durability in the face of daily wear and tear.
In the realm of furniture painting, sanding is an indispensable tool for furniture painting. So, let’s grab our sandpaper, prepare our surfaces, and embark on a transformative journey. This is where rough spots and imperfections become a thing of the past. With proper sanding, the stage is set for a painting project that will leave you with a masterpiece worth showcasing in any home or office.

Table of Contents
- The Tools You’ll Need For Sanding Before Painting Furniture
- How To Sand Furniture Before Painting?
- What is sandpaper grit?
- Sandpaper Grit Vs. Sandpaper Grade
- How do I know what sandpaper to buy?
- What Grit Sandpaper do I need to sand before painting wood furniture?
- Which sandpaper to buy for your sander for woodworking
- 1: Sanding furniture with orbital sander
- 2. Belt Sander
- 3. Drum Sander
- 4. Palm Sander
- 5. 1/4-Sheet Sander
- 6. Drywall Sander
- 10 tips For sanding furniture for beginners
- Conclusion:
- FAQS On Sanding Furniture Before Painting
- Do you really need to sand furniture before painting?
- Do I need to sand unfinished furniture before painting?
- How much sanding should be done before painting wood?
- What is the best way to sand a chair or dresser before painting it?
- How to sand furniture by hand?
The Tools You’ll Need For Sanding Before Painting Furniture
Prepare the tools and materials necessary before you begin sanding wooden furniture. These include:
- Sandpaper selection: It is important to choose the right grit of sandpaper for your specific project.
- Sanding Blocks: Sanding blocks provide stability and control during the process.
- Sanding Sponges: They are versatile and easy to hold, so they are ideal for intricate or curved surfaces.
- Electric sander: Electric sanders save time and effort. Make sure the sander has adjustable speed settings to accommodate different surfaces. As per my experience, you can buy either a Black Decker detail sander or a Dewalt orbital sander. Having used both DeWalt and Black Decker orbital sanders, I noticed that DeWalt has a 3.0-amp motor spinning at 12,000 OPM. In contrast, Black Decker has a powerful 1.2-amp motor delivering 16,000 OPM. Black Decker offers faster material removal, but DeWalt provides more control and durability. I will tell you which is my preferred sander for furniture painting. So, continue reading.
- Dust Mask and Safety Glasses: Wear a dust mask and safety glasses to prevent inhaling dust particles and getting them into your eyes.
Useful Resource 1: Find out more about the DIY painting tool.
Useful Resource 2: It might be interesting for you to look into whitewashed dark wood furniture with sanding. Here are the step by step guide!
How To Sand Furniture Before Painting?
Let’s say if you plan on refinishing wood furniture, you will start the sanding process in this way:
- Choose an area with adequate ventilation. Cover the floor with an old sheet or drop cloth to prevent dust from flying.
- Prior to sanding your furniture, remove any hardware such as knobs and handles. By doing this, you will be able to sand the hardware evenly and prevent damage.
- Clean the furniture thoroughly with a mild detergent and warm water before sanding to remove grease, wax, and dirt. After that rinse and dry the surface completely.
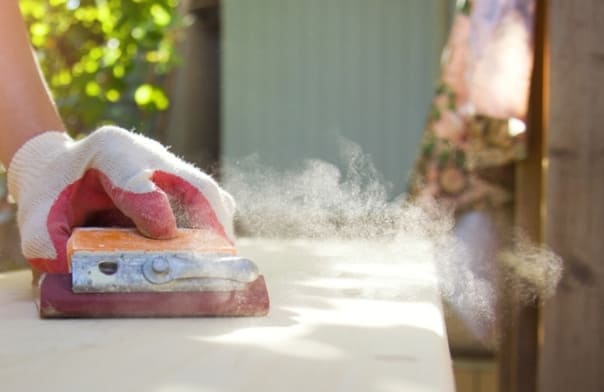
- Begin the sanding process by using coarse-grit sandpaper to eliminate rough spots or existing finishes on the surface. Apply even pressure while sanding along the wood grain. Avoid oversanding and damaging the wood.
- After smoothing out the rough spots, use medium-grit sandpaper to refine the surface further. Then, use fine-grit sandpaper to achieve a smooth finish.
Useful Resource: If your furniture has a smooth surface without imperfections or roughness, you can skip the sanding step for wooden furniture painting.
What is sandpaper grit?
Sandpaper grit is a number that determines the coarseness of the abrasive particles on the surface of sandpaper. It indicates how aggressively the sandpaper will sand a given material. While there is a common misconception that the grit number corresponds to the number of abrasive particles on the paper, it actually refers to the number of holes per inch on the screens used in the manufacturing process.
The number of holes per inch affects the size of the abrasive particles distributed on the sandpaper. More holes per inch result in smaller abrasive particles, while fewer holes per inch lead to larger particles. Thus, the grit number indirectly represents the particles’ size and coarseness.
Lower grit values, such as 40 or 60, signify a rough and coarse abrasive suitable for effectively removing substantial amounts of material. Higher grit numbers, like 220 or 400, represent finer grit used for smoothing and polishing surfaces. It is imperative to carefully select the most fitting grit size based on the task at hand in order to attain the desired outcome in terms of material removal or surface smoothness.
Sandpaper Grit Vs. Sandpaper Grade
Sandpaper grit refers to the specific size of abrasive particles, such as 40, 80, or 120. On the other hand, sandpaper grade is a broader term that encompasses a range of grits within a general coarseness category. This includes coarse, fine, very fine, or extra fine.
How do I know what sandpaper to buy?
You must select the right sandpaper grit for a successful project. Each grit number represents a different level of coarseness in sandpaper, with lower numbers indicating a coarser texture and higher numbers representing a finer texture. The coarseness of the sandpaper directly affects its sanding ability.
In general, coarse sandpaper removes more material, while fine sandpaper produces smoother finishes. Take a look at sandpaper grit chart below!
| Sandpaper Grade | What grit sandpaper for wood furniture before painting? | Use |
| Extra coarse | Less than 40 | Heavy or rough sanding and to remove scratches or imperfections |
| Coarse | 40 to 60 | Getting rid of small and rough material and shaping wood |
| Medium | 80 | Stripping paint and rounding sharp edges and corners |
| Fine | 100 to 120 | General sanding to prep surface for painting. |
| Very-Fine | 150 to 220 | Smooth surface |
| Extra-fine | 320 to 360 | Sanding between finishes |
| Super-Fine | 400 tO 600 | Sanding between finish coats, wet sanding and Polishing |
Useful Resource: If you’re wondering how to paint laminate furniture without sanding, we have a comprehensive guide that can help you achieve the desired results.
What Grit Sandpaper do I need to sand before painting wood furniture?
When it comes to wooden furniture that will be painted, I follow a two-step sanding process. I begin with 150-grit sandpaper to roughen up the surface and provide a solid foundation for the primer. Once that’s done, I switch to 3 M Pro 220-grit sandpaper to further refine the texture, leaving the surface perfectly prepped for the paint to adhere smoothly and evenly. By following this sanding routine, I have consistently achieved fantastic results in my furniture painting endeavors.
I personally prefer the 3M Pro sandpaper brand for its quality and performance.
The combination of 150-grit and 220-grit sandpaper allows me to create an ideal surface for paint adhesion without compromising the integrity of the piece. So, if you’re looking to tackle a furniture painting project, I highly recommend to follow the above mentioned sanding steps for a professional and long-lasting finish.
Which sandpaper to buy for your sander for woodworking
When selecting sandpaper, you should consider the compatibility of your sander and sandpaper. Sandpaper must be matched to the grit of your sander, and not just the grit itself. There are a variety of sanders and sandpapers for each type:
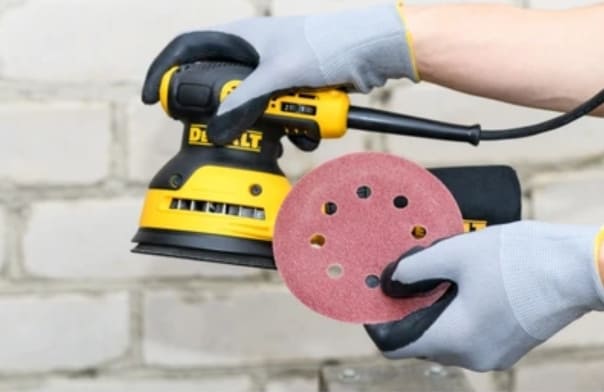
1: Sanding furniture with orbital sander
An orbital sander uses sanding discs that connect to the machine by hooks and loops. You will find sanding discs in different sizes, such as 5-inch and 6-inch, so make sure to get the right size for your sander. You can also buy sanding disc at Walmart.

I personally use Dewalt orbital sander with variable speeds to make the job easier and more efficient. However, it’s important to handle the sander with care and avoid exerting too much pressure that could gouge or damage the surface. The aim here is to create a slightly roughened texture, providing the primer with a solid base to adhere to. I don’t try to strip the surface completely; rather, I just want to rough it up gently.
2. Belt Sander
A belt sander utilizes sanding belts as its primary tool. The belts need to fit perfectly around two rollers and have specific dimensions. Among the most common belt sizes for sanders are 3 x 18 inches and 4 x 24 inches. Choose the belt size that is appropriate for your belt sander.
3. Drum Sander
Drum sanders use sleeves that slide onto a drum for sanding. The diameter of these sleeves can vary from 3 inches to 4 inches. If you want to get the best performance from your sander, you must select the sanding sleeves that match the drum size.
4. Palm Sander
Sanding sheets are usually attached to a palm sander’s base in the form of square or rectangular shapes. These sheets come in standard sizes like 1/4-sheet or 1/3-sheet. Ensure that you have the appropriate size and shape of sanding belts for your palm sander.
5. 1/4-Sheet Sander
Sanding sheets can also be square or rectangular with this type of sander. Sandpaper needs to be cut into quarters for a 1/4-sheet sander. This smaller size requires smaller sandpaper sheets.
6. Drywall Sander
A drywall sander is specifically designed for smoothing drywall surfaces. Typically, they use sanding screens or mesh sheets, attached to the sander by a fastening system. It is important to choose the right screens or mesh sheets based on the model of your drywall sander.
Check the compatibility of your sander and the sandpaper you intend to purchase before buying. There are sanders that can handle larger sandpaper sheets, and others require smaller sheets.
Your sanding project will be more successful if you carefully consider the type of sander, its size requirements, and the corresponding sandpaper.
10 tips For sanding furniture for beginners
- Begin with coarse grit sandpaper (around 80 or 150) to remove any existing finish or imperfections on the surface.
- Gradually switch to finer grits (such as 220) as you progress to achieve a smoother finish.
- When sanding, it’s important to follow the wood grain and sand in the same direction to prevent unwanted scratches or damage.
- Use a sanding block or sanding pad to ensure even pressure and prevent uneven surfaces.
- Let the sandpaper do the work and avoid pressing too hard, as it may damage the wood.
- Run your hand over the sanded surface to ensure it feels smooth and even.
- Clean the surface between sanding grits to remove dust particles that can interfere with the sanding process.
- Wear protective gear to protect yourself from dust particles. Whenever you are near dust particles or other potential hazards, you should wear protective gear such as a dust mask.
- Take your time and be thorough, paying attention to detail. Rushing can lead to mistakes and uneven finishes.
- Use very fine grit sandpaper (such as 320 or higher) for final sanding to achieve a polished and smooth surface.
Conclusion:
Sanding is the secret ingredient for flawless furniture painting. It removes imperfections, improves paint adhesion, and creates a smooth surface. By sanding furniture before painting, you ensure professional-quality results that make your furniture shine.
FAQS On Sanding Furniture Before Painting
Do you really need to sand furniture before painting?
Sanding furniture before painting is recommended as it helps create a smooth surface, removes imperfections, and allows paint to adhere better for a durable finish.
Do I need to sand unfinished furniture before painting?
Yes, it’s essential to sand unfinished furniture before painting. Sanding removes roughness, evens out the surface, and prepares it for better paint adhesion, resulting in a more polished appearance.
How much sanding should be done before painting wood?
The amount of sanding required before painting wood depends on its condition. If the surface is rough, damaged, or has an existing finish, start with a coarser grit and gradually move to finer grits until you achieve a smooth surface ready for painting.
What is the best way to sand a chair or dresser before painting it?
To prepare a chair or dresser for painting, remove hardware. Use coarse-grit sandpaper to remove old finishes or paint. Sand along the wood grain, applying consistent pressure. Switch to finer-grit sandpaper for smoother surfaces. Wipe off dust before painting.
How to sand furniture by hand?
When sanding furniture manually, first clean the surface and remove any hardware. Utilize coarse-grit sandpaper to remove the old finish or paint, following the wood grain. As you progress, transition to finer-grit sandpaper for a more polished result. Finally, remember to meticulously wipe off any dust before proceeding with the next steps.