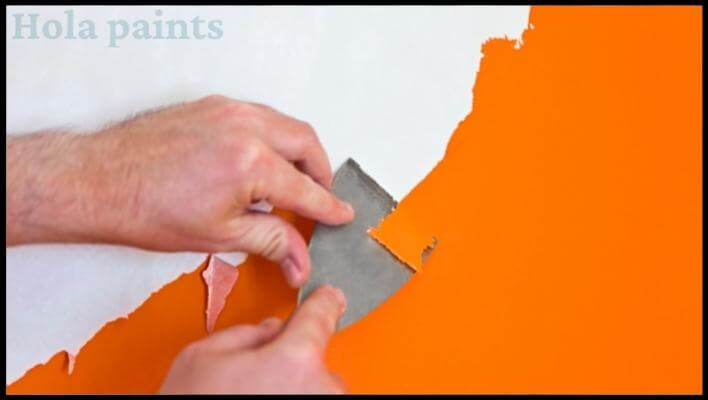
If you’re thinking about giving your home a new look, dealing with a painted popcorn ceiling can be a bit tricky compared to tackling an unpainted one. Popcorn ceilings rose to popularity for their affordability and knack for hiding flaws. However, getting rid of the paint from these surfaces needs careful handling to avoid damaging the underlying drywall.
The paint sticks strongly to the ceiling, making it harder to remove without potential damage. This not only creates a mess but may also lead to having to replace parts of the ceiling, which means spending more money. In this guide, I will take you through the necessary steps and things to consider when removing paint from a popcorn ceiling. This will help you give your living space a fresh and updated appearance without the risk of causing damage or incurring unnecessary expenses.
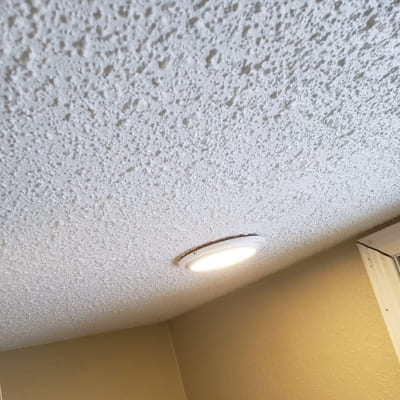
Table of Contents
- How to remove painted popcorn ceiling In 30 Minutes? (Prep Work)
- Checking for Asbestos and Lead Paint:
- Dealing With Popcorn Ceiling:
- Scraping Popcorn Ceilings
- Pros:
- Cons:
- Remove painted popcorn ceiling vinegar
- How to remove painted popcorn ceiling without making a mess?
- Texture Application After Removing Painted Popcorn Ceiling
- Surface Preparation After removal popcorn ceiling:
- Sanding for Smoothness:
- Waiting Period:
- Patching Holes:
- Choosing the New Texture:
- Applying the Texture:
- Drying Time:
- Final Touches:
- How to Cover a Popcorn Ceiling with Skim Coating?
- Final Words On Removing Popcorn Ceiling Paint
- FAQS On Popcorn Ceiling Removal Techniques
- What liquid removes the popcorn ceiling?
- Can you just paint after removing the popcorn ceiling?
- Can you sand painted popcorn ceiling?
- What is the best primer for removing popcorn ceilings?
- Rosalie Sanchez
How to remove painted popcorn ceiling In 30 Minutes? (Prep Work)
When it comes to renovating an older home with a popcorn ceiling, it’s important to be well-prepared. Here are easy steps to ensure a smooth ceiling:
Checking for Asbestos and Lead Paint:
Old homes might have asbestos and lead paint. Test a small piece first using kits you can buy online. Results usually come in about a week. If you’re unsure, get professionals to do the testing. You can read the risk associated with asbestos.
Dealing with Asbestos:
If the popcorn ceiling contains more than 1% asbestos, you have three choices:
- Hire a certified asbestos abatement company to safely remove the textured ceiling material.
- If the asbestos content is low and the ceiling is in good condition, leaving it undisturbed is an option.
- Another approach is to encapsulate the ceiling by covering it with a different material, ensuring safety.
Lead Paint Test:
Do a lead paint test, especially if there are kids around. I suggest you become familiar with the rules in your state regarding dealing with hazardous materials.
TIPS-Safety Measures
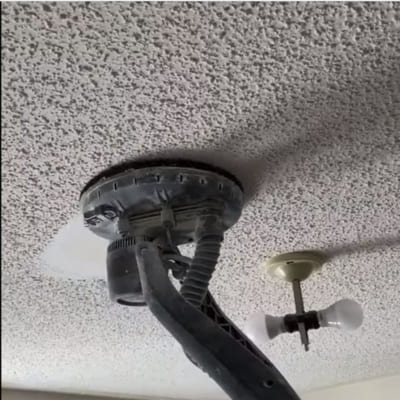
- If all is good, cover the room with plastic, use drop cloths on the floor, and move furniture out.
- Cover electrical stuff and cut the power for safety.
- Asbestos is cool if left alone, but disturbing it can be harmful.
Dealing With Popcorn Ceiling:
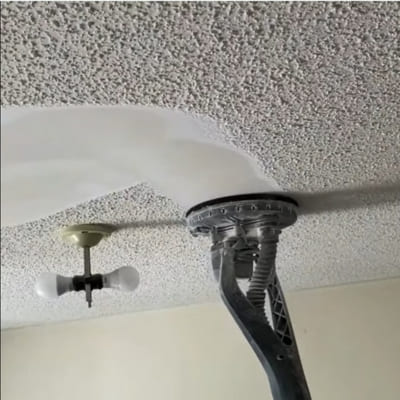
Once you’ve covered the room with plastic wrap, it’s time to dampen the ceiling. You can use a clean backpack sprayer, a garden hose with a spray nozzle, or even a spray bottle. The key is not to over-wet the popcorn ceiling, as it might seep through. Adding a bit of dish soap can enhance the results.
If the popcorn coating is thick, consider spraying it twice with some drying time in between.
Pro Tip: If you notice that the popcorn texture has paint mixed in and it’s not softening up, there are a few options. You can choose to dry-scrape the entire ceiling, but this may take more time and could result in some gouging. Alternatively, you can cover it up with additional drywall or another suitable material.
While letting it soak, make sure to prepare yourself for the job. Tie your hair back, wear a face respirator to shield yourself from particles, and put on a hood along with safety glasses to protect your eyes and hair. This will ensure a safer and more comfortable experience during the process.
Scraping Popcorn Ceilings
Removing a popcorn ceiling can indeed be a messy and somewhat challenging task, but with the right approach, it’s manageable. Let me share some insights based on my experience:
Using a putty knife is a common method. It allows you to physically scrape off the popcorn texture. This approach is generally effective, but it requires some caution. Be gentle to avoid damaging the ceiling.
Metal scrapers with rounded-off corners can help minimize gouges.
Pros:
- Direct and hands-on approach.
- Minimal cost as you only need basic tools.
Cons:
- Can be a time-consuming and messy process with popcorn droppings.
Alternatively, I also tried a tool called Festool Planex to easily take off the bumpy texture from a painted popcorn ceiling, like you see in the picture above.
And you know what, I once hired a professional for popcorn ceiling removal last month, and I observed how they tackled painted popcorn ceilings. The expert chose to use a drywall or popcorn ceiling sander, specifically the Makita cordless sander.
When coupled with a dust extractor, these tools proved to be efficient in swiftly handling most popcorn ceilings. Despite the initial investment, the use of such professional-grade equipment significantly speed up the process, which was particularly beneficial for larger projects.
Remove painted popcorn ceiling vinegar
To remove a painted popcorn ceiling, use vinegar. First, clear the room and mix water with vinegar (1:10 ratio). Spray this mix on a small ceiling section and wait 15 minutes. Then, gently scrape off the paint using a 4-inch knife. Do this for the whole ceiling. Wipe it with a damp cloth afterward. If there’s damage, fix it with joint compound and paint the ceiling. It might get messy, but it works well to make the ceiling look better.
How to remove painted popcorn ceiling without making a mess?
Getting rid of painted popcorn ceilings without creating a mess involves a step-by-step process. First, wear a dust mask to stay safe from potential asbestos in popcorn ceilings. Use a scraper or putty knife to gently remove the old glue without harming the underlying drywall. Smooth out any rough spots by sanding, and cover vents and fixtures to avoid dust buildup. Wet the ceiling with water to make it easier to remove, then apply a good-quality patching compound in thin layers, letting it dry completely before sanding. Finish by using a wet sponge to remove excess compound and applying a second coat for a smooth finish.
Removing a painted popcorn ceiling requires time and effort, and it can be a bit messy. If you’re doing it yourself, be patient. Use tools like a knife, saw, puller tool, and plastic sheeting to help. Consider the project’s value based on your time, budget, and its impact on your home’s resale value. For a cleaner method, try duct-taping a spackle knife to a vacuum hose to minimize dust and mess while scraping.
Texture Application After Removing Painted Popcorn Ceiling
After successfully scraping off the popcorn texture from the ceiling, the steps involve preparing the ceiling surface for a new texture. Here’s a breakdown of the essential tasks:
Surface Preparation After removal popcorn ceiling:
Once the popcorn texture is removed, it’s important to get the ceiling surface ready. This includes filling any dings or imperfections left behind by the scraping process. Utilize an appropriate patching compound to ensure an even and smooth surface.
Sanding for Smoothness:
After applying the patching compound, ensure it dries entirely. After it’s dry, go ahead and sand the whole ceiling until it’s a nice and smooth texture. This step is important for creating a flawless base for the new texture and ensuring that the surface is ready for painting.
Waiting Period:
It’s advisable to allow the patched and sanded ceiling to dry thoroughly before moving on to the next steps. Allowing it a day to dry out is a good practice to ensure that the surface is ready for the final touches.
Patching Holes:
Check for any remaining holes or bumps on the ceiling. Use more fixing material if needed to fill in these imperfections and make it completely dry.
Choosing the New Texture:
Decide on the type of texture you desire for your ceiling. There are various options, such as knockdown, orange peel, or popcorn-style textures. Consider the aesthetic you want and choose a texture that complements your overall design.
Applying the Texture:
Follow the manufacturer’s instructions for the texture product you’ve chosen. Use the appropriate tools, such as a sprayer or a trowel, to apply the texture evenly across the ceiling.
Drying Time:
Allow the newly added texture to dry entirely. The drying duration may differ based on the texture type and environmental conditions, so it’s advisable to consult the product guidelines for precise information.
Final Touches:
Once the texture is dry, inspect the ceiling for any irregularities. Sand down any rough spots or excess texture to achieve a polished look. Your ceiling is now ready for the final painting stage.
How to Cover a Popcorn Ceiling with Skim Coating?
Skim coating a ceiling involves adding a thin layer of joint compound or plaster to create a sleek and even surface. This method is commonly used to hide flaws like cracks, bumps, or undesirable textures on the ceiling. Let’s break down the steps:
First off, prep your ceiling by ensuring it’s clean and free of any dust or debris. Take care of significant cracks or holes if they’re present.
Next, apply a primer to the ceiling. This not only improves the sticking ability but also establishes a proper foundation for the skim coat.
Now, mix your joint compound or plaster following the instructions. You want a creamy consistency to make application a breeze.
Using a trowel or drywall knife, spread the compound evenly across the ceiling. The goal is to create a thin, smooth layer covering the entire surface.
Ensure the skim coat dries entirely, considering that drying times can differ depending on the type of compound used and the surrounding environmental conditions.
Once dry, lightly sand the surface to achieve a seamless and smooth finish, eliminating any imperfections.
Lastly, give your ceiling a thorough cleaning to get rid of any dust or debris left from the sanding process.
Skim coating is a go-to technique in home improvement, offering a polished and contemporary look to your ceiling. It acts as a blank canvas, ready for painting or other decorative finishes, elevating the overall aesthetics of your living space. Indeed, Skim coating is the cheapest way to cover a popcorn ceiling.
Final Words On Removing Popcorn Ceiling Paint
In conclusion, removing popcorn ceiling paint is a transformative process that can enhance the overall look of your space. Whether opting for wet scraping, encapsulation, or other methods, the key is to prioritize safety and follow your state’s regulations for handling materials. With careful consideration and the right approach, you can achieve a refreshed and updated ceiling that adds value to your home.
FAQS On Popcorn Ceiling Removal Techniques
What liquid removes the popcorn ceiling?
Water is commonly used to remove popcorn ceilings. If you prefer to moisten the area, wet a small section of the ceiling with a bottle of warm water mixed with a few drops of dishwashing soap. This approach helps to loosen the material without causing damage to the drywall underneath, making it easier to scrape off the popcorn texture. This process is effective in minimizing dust during the removal process.
Can you just paint after removing the popcorn ceiling?
Yes, you can paint after removing a popcorn ceiling. Once you’ve successfully removed the popcorn ceiling, painting is a viable option to enhance the overall appearance of the room. Start by priming the surface for better paint adhesion and addressing any imperfections with the appropriate patching compound. Choose a suitable ceiling paint with a flat or matte finish for a smooth look, and protect the surroundings before applying the paint. Using proper painting techniques, such as even strokes with a roller or brush, ensures a refreshed and appealing ceiling.
After the removal of the popcorn texture, painting becomes a straightforward way to revitalize your ceiling. Apply a primer to create a smooth base, fix any imperfections, and opt for a high-quality ceiling paint with a flat or matte finish. With careful application and attention to detail, your ceiling can undergo a significant transformation, adding a clean and polished look to the entire room.
Can you sand painted popcorn ceiling?
Yes, you can sand a painted popcorn ceiling, but it’s crucial to exercise caution, especially regarding the potential presence of asbestos. If the ceiling was installed before the 1980s, it may contain asbestos, posing health risks when disturbed. Assuming the ceiling is asbestos-free, wear a mask, use fine-grit sandpaper, and clean the area afterward to smooth out imperfections.
What is the best primer for removing popcorn ceilings?
Selecting the right primer is vital for popcorn ceiling removal. A stain-blocking primer designed for ceilings, such as Zinsser Bulls Eye 1-2-3 Water-Based Primer or KILZ Premium High-Hide Stain Blocking Primer, can be effective. These primers help cover stains and promote adhesion, but it’s crucial to check for asbestos before any sanding or removal activities.

Rosalie Sanchez
DIY enthusiast with years of experience in home decor and home improvement. With a passion for educating consumers about DIY projects. Every time, I work with our painting professionals to provide you with the best painting product reviews and how-to advice. You can follow me on Facebook.