The fastest way to complete most painting jobs is to spray paint with Wagner sprayers. Paint sprayers allow DIY experts and professionals to do projects much more efficiently. However, mastering the proper technique to use Wagner spray guns is the key to maximize the efficiency.
Even if you are a first-time painter or an experienced one, you can learn how to use Wagner paint sprayers quite easily, but like anything else, practicing and getting a bit of knowledge will help you achieve professional-grade results fast.
So, take a few minutes and read the Quick Operating Guide here to improve your painting style and Wagner spraying technique.
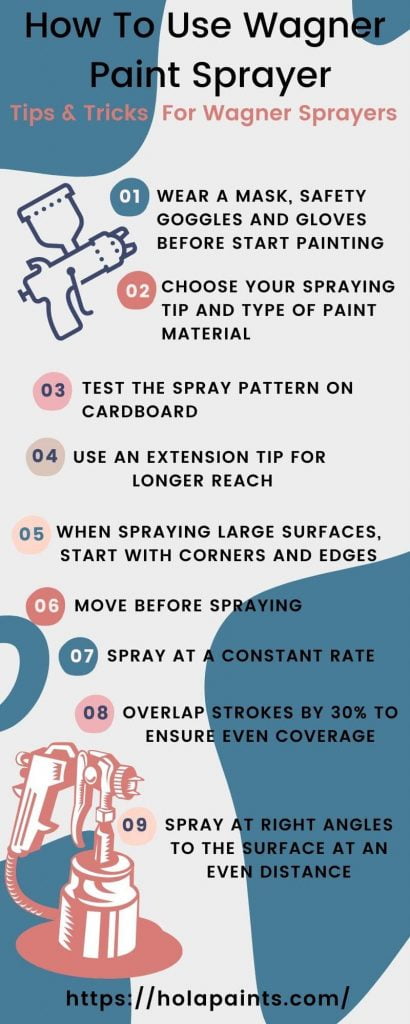
Table of Contents
- How To Use A Wagner Paint Sprayer?
- 1. Preparation of all materials required to use wagner paint sprayer
- 2. Putting Together Your Wagner Paint Sprayer
- 3. Thinning the Paint:
- 4. Testing the Spray:
- 5. Pressure flow
- 6. Spraying tip
- 7. Applying the Paint:
- 8. The Finishing Settings
- 9. Cleaning and Storage:
- Can You Use Paint In A Wagner Stain Sprayer?
- How to Prime a Wagner Paint Sprayer?
- Conclusion on Wagner paint sprayer how to use!
- FAQs On How To Use A Wagner Spray Gun
- Do you have to thin paint for Wagner sprayer?
- Are Wagner Paint Sprayers Any Good?
- Does the Wagner sprayer work with primer?
- Why does my Wagner paint sprayer spit?
- Should I leave paint in Wagner sprayers between coats?
How To Use A Wagner Paint Sprayer?
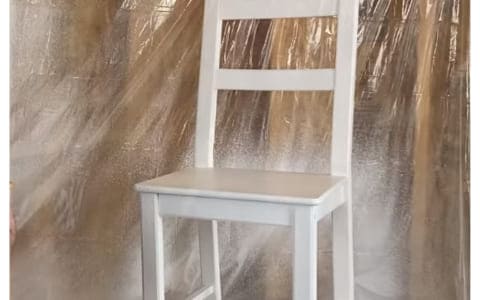
As we know, no two paint sprayers are alike. The Wagner paint sprayer is a popular choice for beginners since their spray guns are easier to clean, and more comfortable. Here I am using Wagner double duty paint sprayer to revamp a wooden chair from Ikea.
Let’s dive into the supplies and steps you’ll need:
1. Preparation of all materials required to use wagner paint sprayer
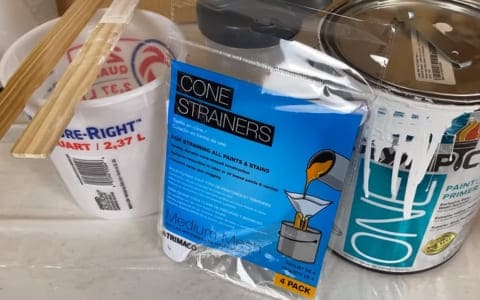
- Wagner paint sprayer
- Drop cloth for a clean work area
- Mixing bucket and stir sticks for thinning the paint
- Cone strainer/filter to prevent clogs
- Water for thinning
- Paint (Olympic Paint Plus Primer, water-based, white)
- N95 mask respirator and eye goggles for protection
- Wooden chair (For my project)
- Foam blocks to lift the chair (For my project)
- Cardboard for testing the spray
2. Putting Together Your Wagner Paint Sprayer
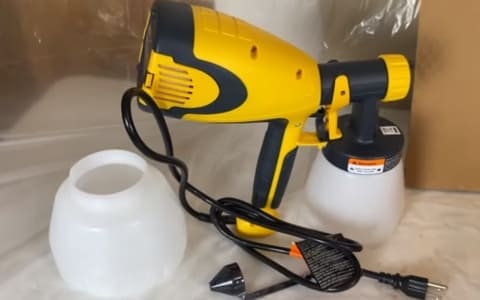
- Assemble the Wagner paint sprayer by following the instructions in the manual.
- Understand the nozzle, air cap, and nut components. Adjust the spray pattern to horizontal, vertical, or circular as required.
- Choose the appropriate container size (28 or 48 ounces) and set up the viscosity cup to achieve a run-out time of 25-40 seconds.
- Besides the materials for the painting, you also need the material to protect the surfaces from overspray.
- Furthermore, you should wear your protective gear and ensure that the area where you’re spraying is well ventilated to avoid a smell of paint fumes.
3. Thinning the Paint:
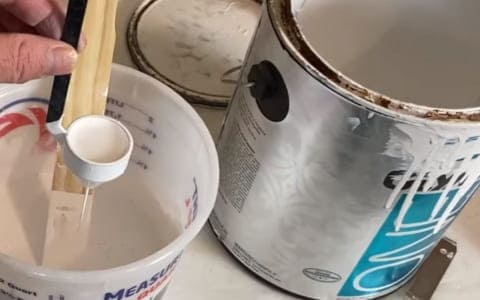
- Mix three parts paint with one part water in the bucket.
- Check viscosity using the viscosity cup and adjust as needed.
- Filter the paint into the container to remove any debris.
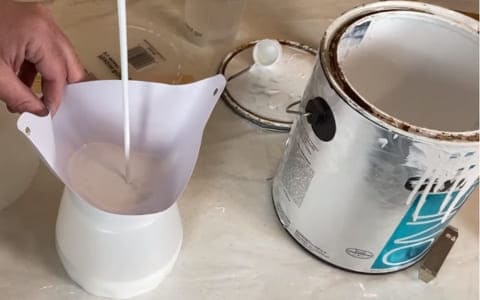
4. Testing the Spray:
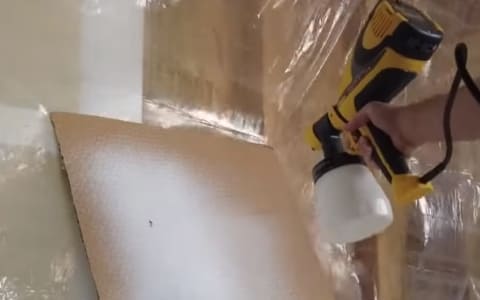
- If you are using a Wagner sprayer for the first time, it is advisable to test the tool before using it on any surface. This is where the scrap piece of cardboard comes into play – it serves as a practicing canvas.
- The main settings for adjusting the sprayer are pressure flow, spraying tip, and spray pattern. Each element contributes to the outcome.
- Connect the container securely to the sprayer.
- Use the knob to regulate the spray intensity.
5. Pressure flow
- You can control the flow rate of the paint by adjusting the pressure of a spray gun.
- Too much pressure causes overspray and uneven spraying, while too little pressure results in poor atomization.
6. Spraying tip
- You should select the paint tip according to the paint material and the model of the paint sprayer you are using.
- A larger tip is suitable for viscous paints, while a smaller tip is recommended for thinner materials.
7. Applying the Paint:
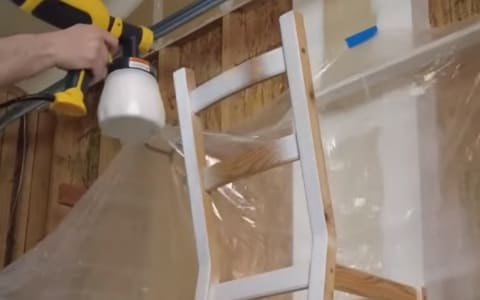
- Lift the project (chair) using foam blocks to avoid sticking and apply the paint as shown in the picture above.
- Allow it to dry before applying another coat if desired.
8. The Finishing Settings
- When it comes time to paint the corners and edges, you may need to adjust the spray gun settings. Using a lower pressure will allow you to control the spray better.
9. Cleaning and Storage:
- Release the nozzle and clean the components with warm water.
- Pour excess paint to the bucket.
- Clean the sprayer by rinsing it with warm water.
- Fill the container with soapy water and run it through the sprayer for a thorough cleaning.
Can You Use Paint In A Wagner Stain Sprayer?
Using a Wagner stain sprayer for wood staining or painting presents several benefits, streamlining the process compared to manual application. This device facilitates quicker completion of larger surfaces and allows for precise work.
Practice with the sprayer beforehand enhances both speed and accuracy, ensuring a neat finish. However, not all paint sprayers are suitable for staining.
In my opinion, the Wagner W 690 HVLP and the Wagner HEA Control PRO 250 M are recommended paint sprayers for wood staining. The Wagner W 690 HVLP is versatile for various projects, while the Wagner HEA Control PRO 250 M is ideal for achieving a clean finish on large surfaces like walls.
It’s important to note that stain sprayers aren’t designed for thick paints, so thinning the chosen paint is necessary for optimal use.
How to Prime a Wagner Paint Sprayer?
Wagner makes power spray painters that are suitable for both professionals and beginners. A newer unit has an adjustable tip, called the Optimus Dual Tip, which can be used both for priming and painting. It is important to have a primer coat to maintain color accuracy.
Step 1
Lights, switches, plugs, cabinets, doors, and trim that you won’t be painting or priming should be well protected. To prevent overspray from the Wagner Spray Painter, place drop cloths on the floor and on the furniture.
Step 2
Follow the manufacturer’s instructions to mix the primer. To apply primer, place the can near the area you wish to prime so the Wagner extension hose can reach it, but it should not be too close as it will interfere with your movements.
Step 3
You should assemble the Wagner painter according to the instructions. Attach one end of the extension hose to the sprayer’s bottom and the other end to the primer can. By connecting the extension hose to the primer container, we can fully submerge the hose in paint.
Step 4
You will need an extension cord that connects to a power outlet and the other end will connect to the power cable on the Wagner Sprayer. Approximately 18 inches away, point the gun at the desired area of the wall. The extension hose will draw primer through to the paint gun as you pull the trigger.
In a matter of seconds, the primer begins to spray from the paint gun. The spray pattern of the primer can be controlled by adjusting the nozzle of the gun. Once you have adjusted the gun properly, continue on to step five.
Step 5
Smoothly and evenly spray the primer across the entire target area. The coat should not be too thick so that it starts dripping.
Conclusion on Wagner paint sprayer how to use!
Hopefully, you now understand how to use a Wagner paint sprayer for your next project like a pro. Also, you’ve learned the tips and tricks for using a Wagner paint sprayer, which will save you both time and money.
Additionally, you can ensure the success of your painting project by investing in a Wagner sprayer.
FAQs On How To Use A Wagner Spray Gun
Do you have to thin paint for Wagner sprayer?
The thinness of paint depends entirely on the Wagner sprayer you buy. Most Wagner models can operate without thinning the paint on the job site, but some of them will need to be thinned to make sure that the paint gets through the sprayer effectively.
For instance, it is necessary to thin paint for viscous coatings before using Wagner power painters. However, HEA machines, such as the Control Pro 170, do not require any dilution.
Are Wagner Paint Sprayers Any Good?
Yes, Without a doubt, Wagner is a popular brand in the painting industry. Wagner paint sprayers are efficient, competitively priced, simple to use, and durable.
A long history of producing small, consumer-grade sprayers has led Wagner to offer a wide selection of Airless paint sprayer and HVLP sprayers.
Furthermore, The Control Spray Wagner HVLP Sprayer is the most versatile model in 2022 because it offers so many features.
Does the Wagner sprayer work with primer?
Yes, you can spray primer with a Wagner, but you may need to thin it first. You should check each Wagner’s specs before buying to ensure your machine can handle primers efficiently.
Why does my Wagner paint sprayer spit?
Wagner paint sprayer spitting is easy to fix. Generally, when a paint sprayer spits, the reason is that there is air in the fluid outside of the air cap.
In addition, if the tip of a paint gun is applied incorrectly, air can enter the fluid supply, causing spitting. So, the first thing you need to do when your paint sprayer is spitting is to make sure the tip is securely fastened to the sprayer.
Should I leave paint in Wagner sprayers between coats?
If you’re painting trim or walls, it’s normal to wait two to four hours between coats. To get the most out of a fast-drying latex paint, spray it in a well-ventilated area.

Jennifer Marie
Jennifer Marie is a general contractor with over the years of experience in home remodeling, DIY projects, and commercial painting projects. Her experience includes working with paint sprayers, painting tools, and other painting supplies. You can follow her on Facebook.


